
Dialer for Google Chrome Overview
What you need to know
This article describes the Chrome Dialer.
Help Topics
A. Feature Overview
The Chrome Dialer is an extension for the Google Chrome browser with the following communication features:
- Click-to-call
- Call notifications
- Directory search
- Feature management
B. Install the Chrome Dialer
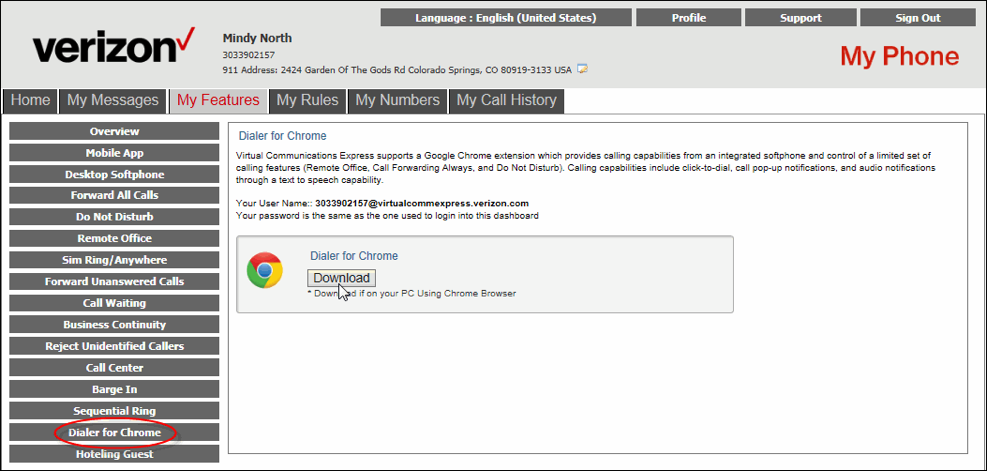
- Log in to the My Phone dashboard at https://businessdigital.verizon.com/myphone/.
- Click the My Features tab on the toolbar.
- Click Dialer for Chrome on the menu on the left. The Dialer for Chrome screen appears on the right.
- Click Download. The Google Chrome Web Store opens in another browser window.
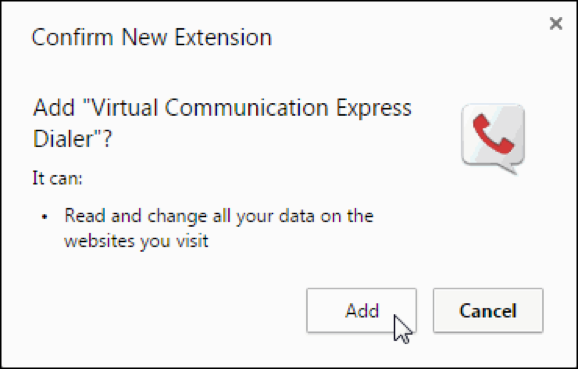
- Click ADD TO CHROME on the Virtual Communications Express Dialer. A confirmation pop-up appears.
- Click Add to confirm and install. A confirmation pop-up appears informing you that the Chrome Dialer was successfully installed.

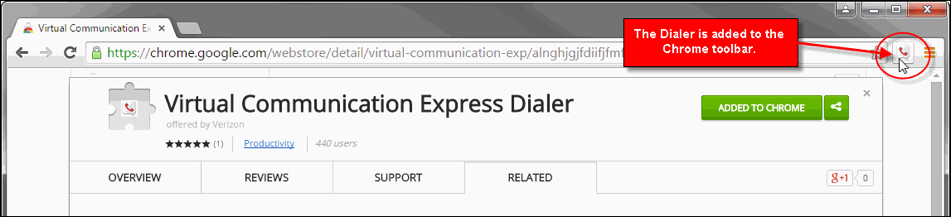
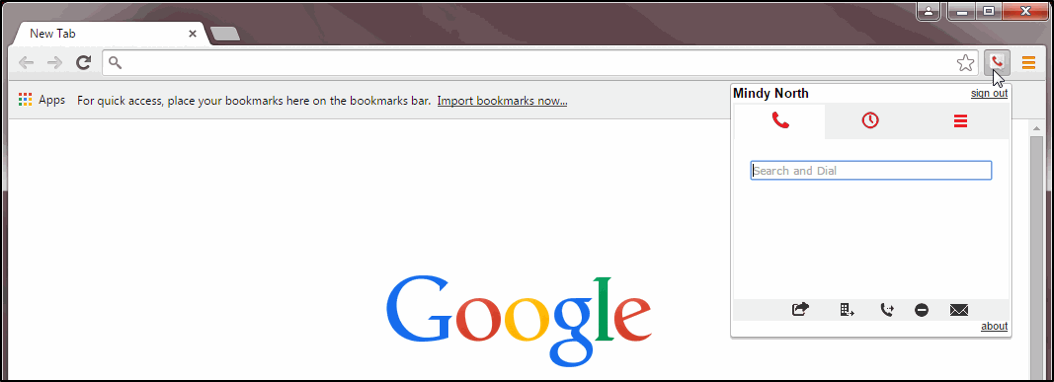
The Chrome Dialer icon is located next to the address bar in your Chrome browser window.
C. Sign In
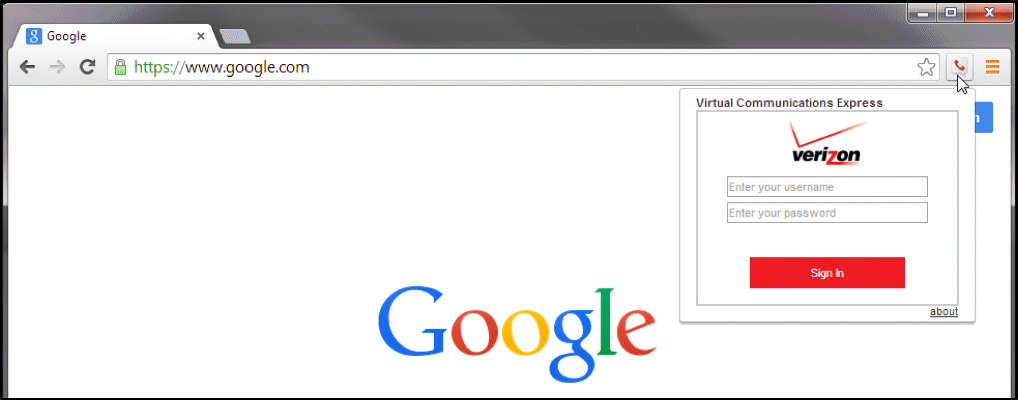
You’re prompted to sign in the first time you launch the Chrome Dialer.
- Click
 to sign in. The sign in pop-up appears.
 - Enter the user name that appears on the Dialer for Chrome page on the My Phone dashboard. The password is the same one you use to login to the My Phone dashboard.
- You’re prompted to restart your browser and continue after your credentials are validated.
- After restarting, click the Chrome Dialer icon. The Dialer remembers your login information and automatically logs in until you sign out. It is now ready to use.
Note: Restarting the Chrome browser may require logging out of your PC.
D. Manage Features
There are several icons you can use to perform quick tasks or access features. Icons are red when active and black when inactive.
 My Phone – opens a new tab in your browser to log in to the My Phone dashboard.
 Remote Office – plays a recording informing you to go to the My Phone dashboard to configure your Remote Office feature.
 Call Forward Always – plays a recording informing you to go to the My Phone dashboard to configure your Call Forwarding Always feature.
 Do Not Disturb – turn on/off the Do Not Disturb feature. Plays a recording informing you whether it is on or off.
 Voice Mail – not active.

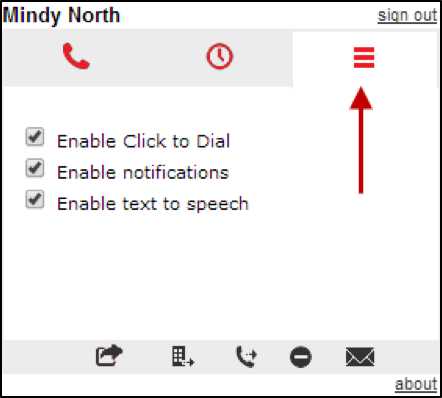
E. User Preferences
The Preferences tab displays options to manage your dialer settings.
- Click
 to access dialer settings.
 - Check Enable Click to Dial to allow calls to be placed when you enter a number and click
 from a web page.
 - Check Enable notifications to display visual and audio notifications of an incoming call, if enabled.
- Check Enable text to speech to enable an audio notification of an incoming call or feature activation/deactivation from the toolbar.
F. Use the Dialer
You can use the dialer to inititate calls in different ways: search the enterprise directory or your Google contacts, search in the address bar, click to dial from web pages, or click to dial from your call history.
Use Search to Make a Call
You can use Google search, the Chrome Dialer, or the address bar to make a call.
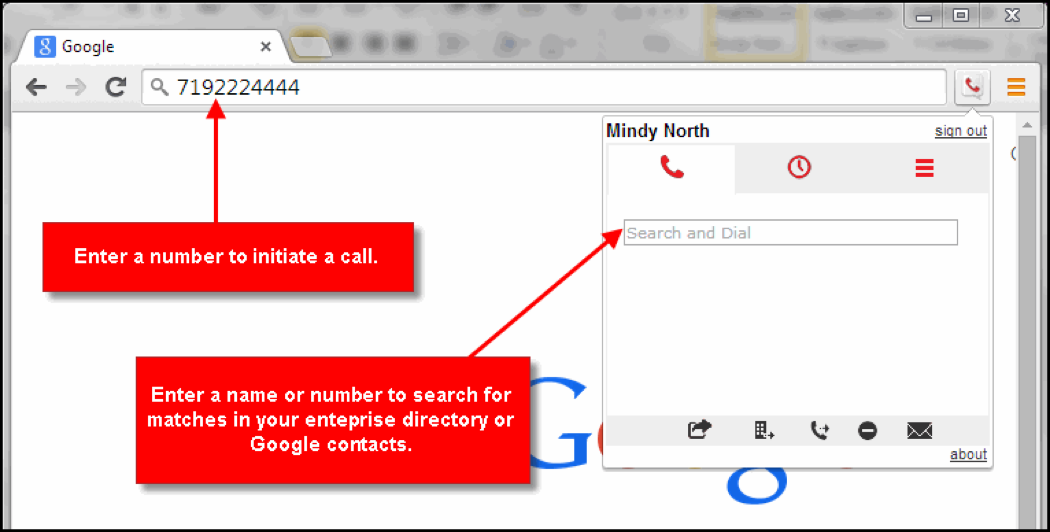
Enter a number in Google search to initiate a call.
-OR-
Enter a name or number in the Chrome Dialer search field to find matches in your enterprise directory or Google contacts to initiate a call.
-OR-
Use your address bar to search for a called party.
- Type –call, then press your space bar or tab. The address bar presents the Dialer search option.
- Start typing the name of the contact.

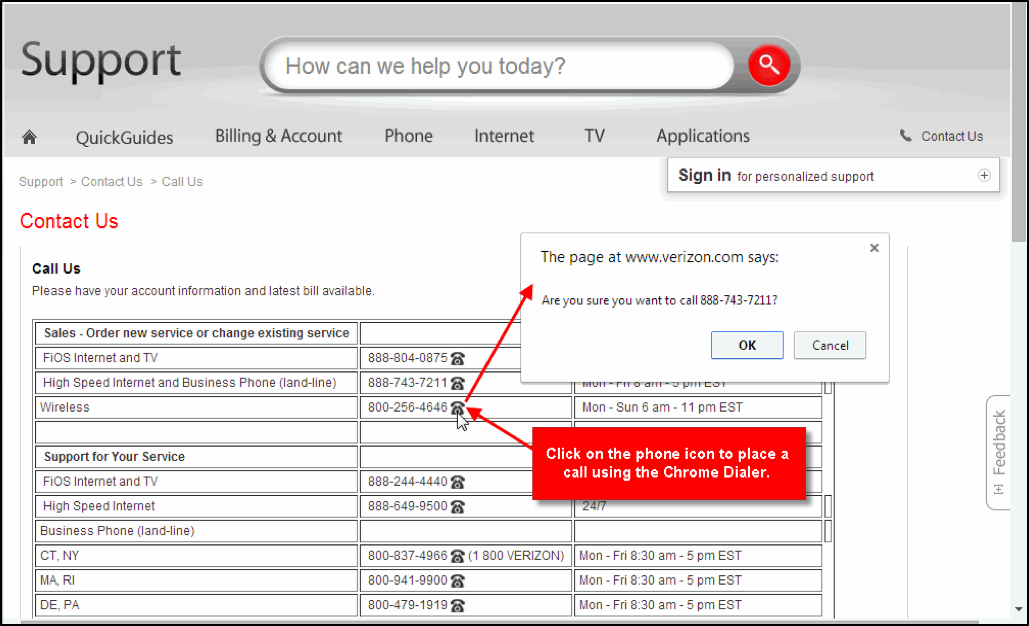
Click to Dial from a Web Page
Phone numbers on a web page viewed in Chrome display a phone icon  .
.
- Click
 next to the phone number you want to dial. A pop-up appears asking for confirmation that you want to dial the number.
 - Click OK to place the call using the Chrome Dialer.
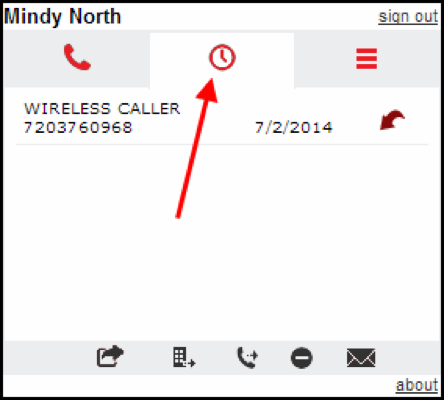
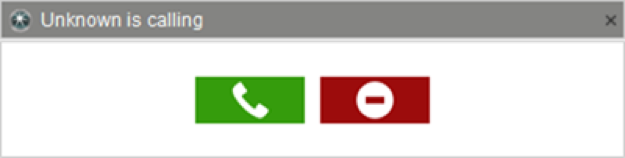
Click to Dial from Call History
- Click
 on the Chrome Dialer. You call history displays.
 - Double-click on a call in your call history. A pop-up appears enabling you to place the call or cancel.
- Click
 to place the call.
-OR-
Click  to cancel.
G. Call History
- Click
 on the Chrome Dialer. Your call history appears.

Additional call history can be viewed on the My Phone dashboard on the My Call History tab.
H. Call Notifications
The Chrome Dialer supports visual and audio notifications, which you enable/disable on the User Preferences tab (see page 5).
Visual Notifications
Incoming calls display a call notification pop-up with the calling line ID (name and number).
Audio Notifications
The Chrome Dialer plays an audio notification for incoming calls and displays confirmation of feature status change on the toolbar if text-to-speech in enabled.

I. Sign Out
You’re always logged in to the Chrome Dialer unless you manually sign out. Click Sign Out in the top right corner of the Chrome Dialer, if applicable.