Adding devices
Administrators can add devices in the admin portal. In this guide, you will find steps for adding one device at a time and for adding devices in bulk. Once a device is added, it is activatable when adding a user via:
- The Set Up a User wizard on the Dashboard.
- The Set Up a User wizard on the Users page.
- The Assign User action in the Numbers page.
If you are adding devices and users for the first time, take a look at this getting started article – Getting Started: Adding and Assigning Devices and Users.
Adding a device
- Log in to the admin portal.
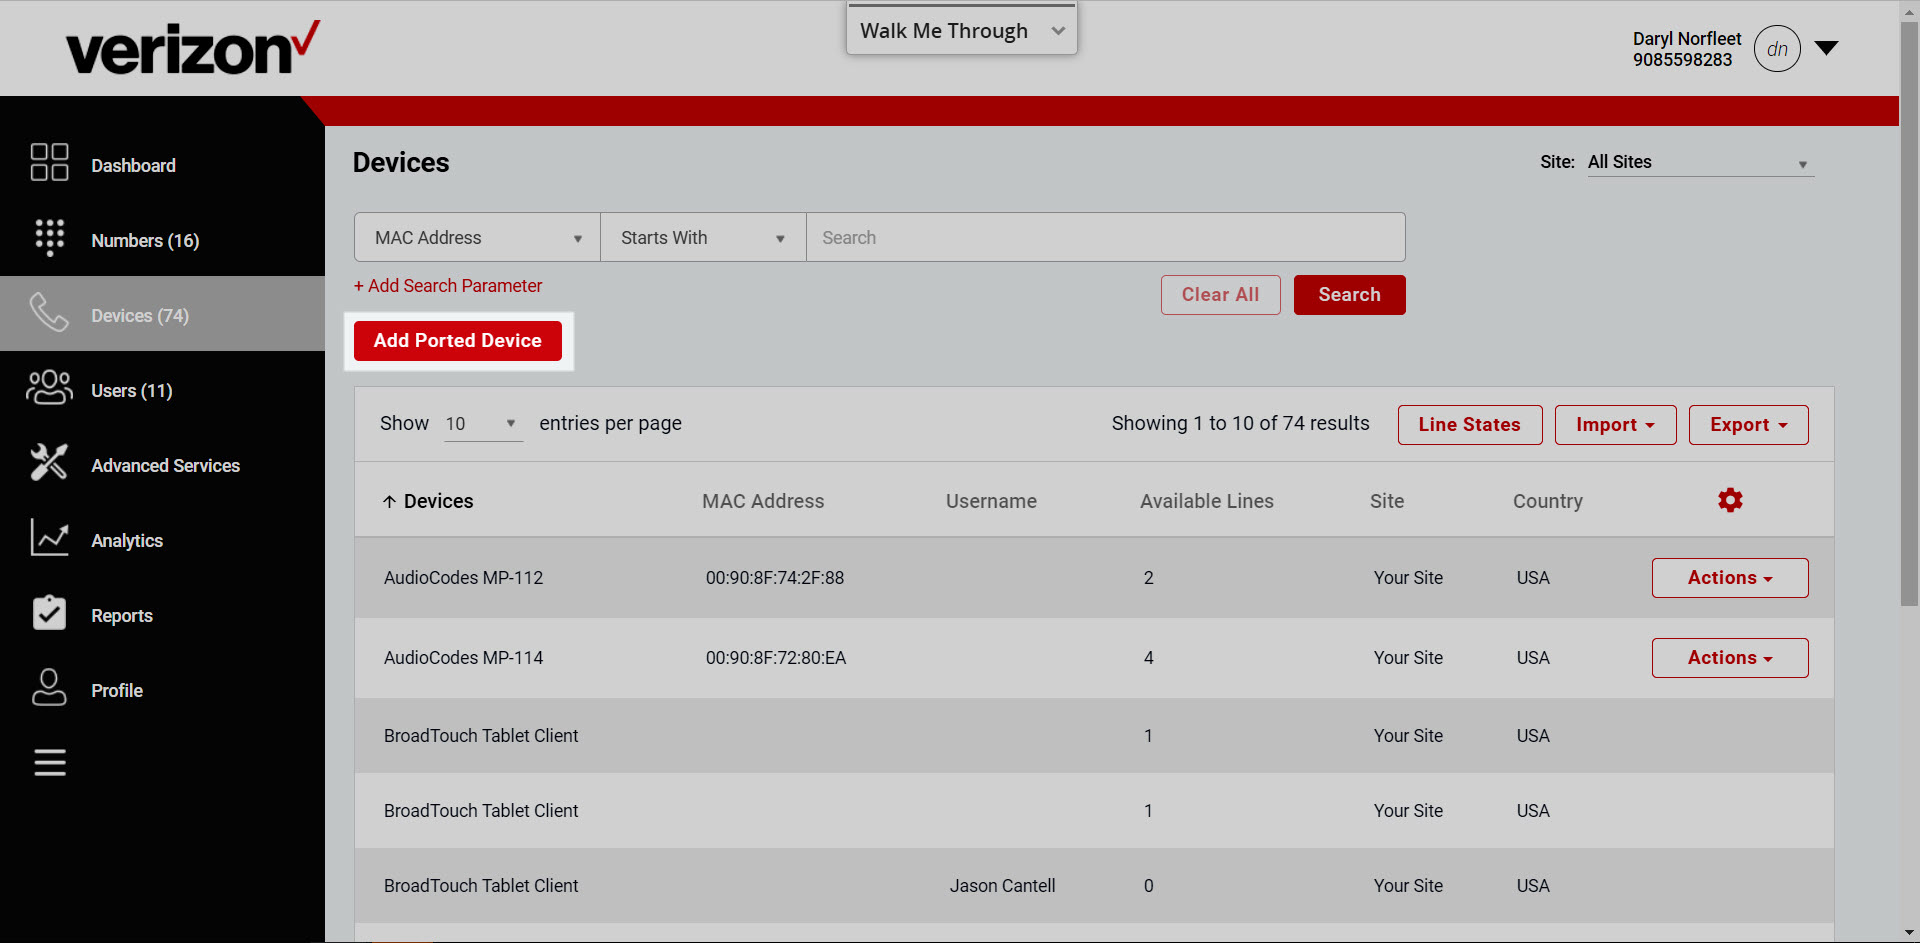
- Select the Devices tab from the left-hand navigation.
- Select Add Ported Device.
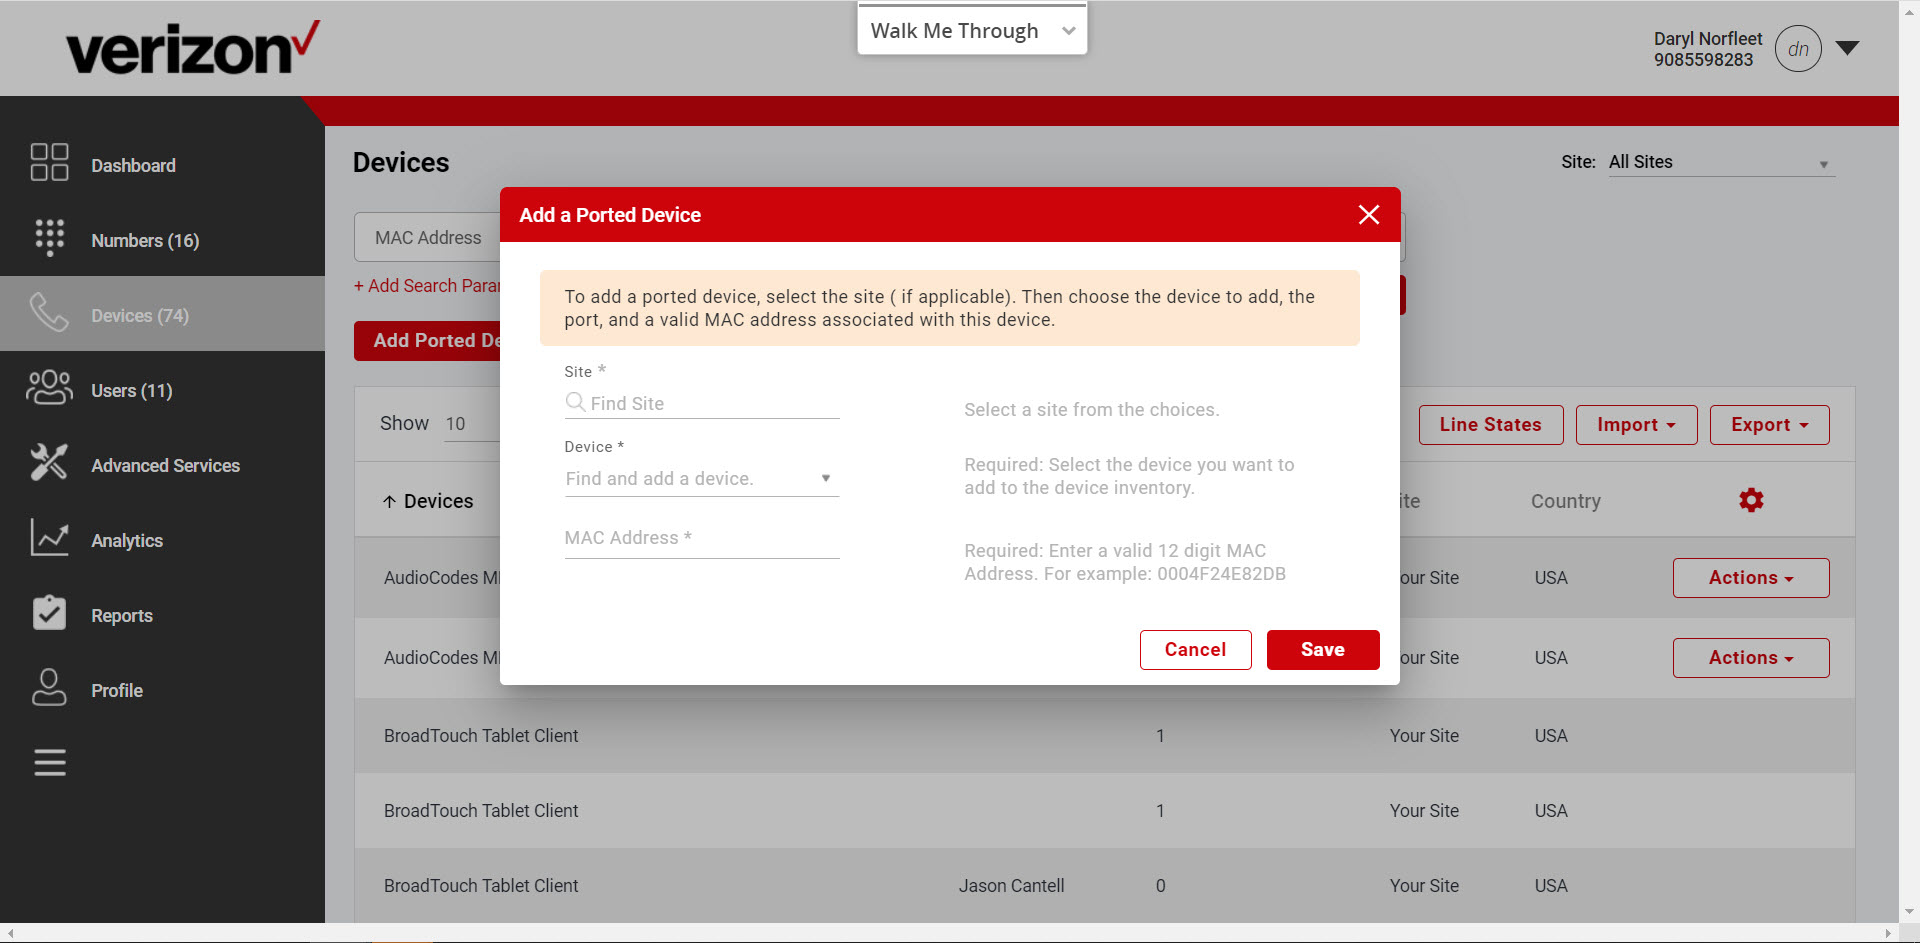
- The Add Device wizard will appear. From here, choose the Site where you would like to add the device.
- Next, choose the device you would like to add from the Device drop-down menu.
- Enter the MAC Address of the device to be added.
- Select Save. The new device will now show up in your device list.

Note: Only Verizon sold devices are allowed and supported with Business Digital Voice.

What’s next?
- Now that your device is added, it is managed on the Devices tab. For information on managing devices, visit the Device Management guide.
- Added devices are now available to assign to users. For steps on how to add a user, visit the Adding Users guide.
Adding multiple devices (bulk upload)
You can import a list of already existing devices as a bulk upload to the portal. To do so, follow these steps:
- Log in to the admin portal.
- Select the Devices tab from the left-hand navigation.
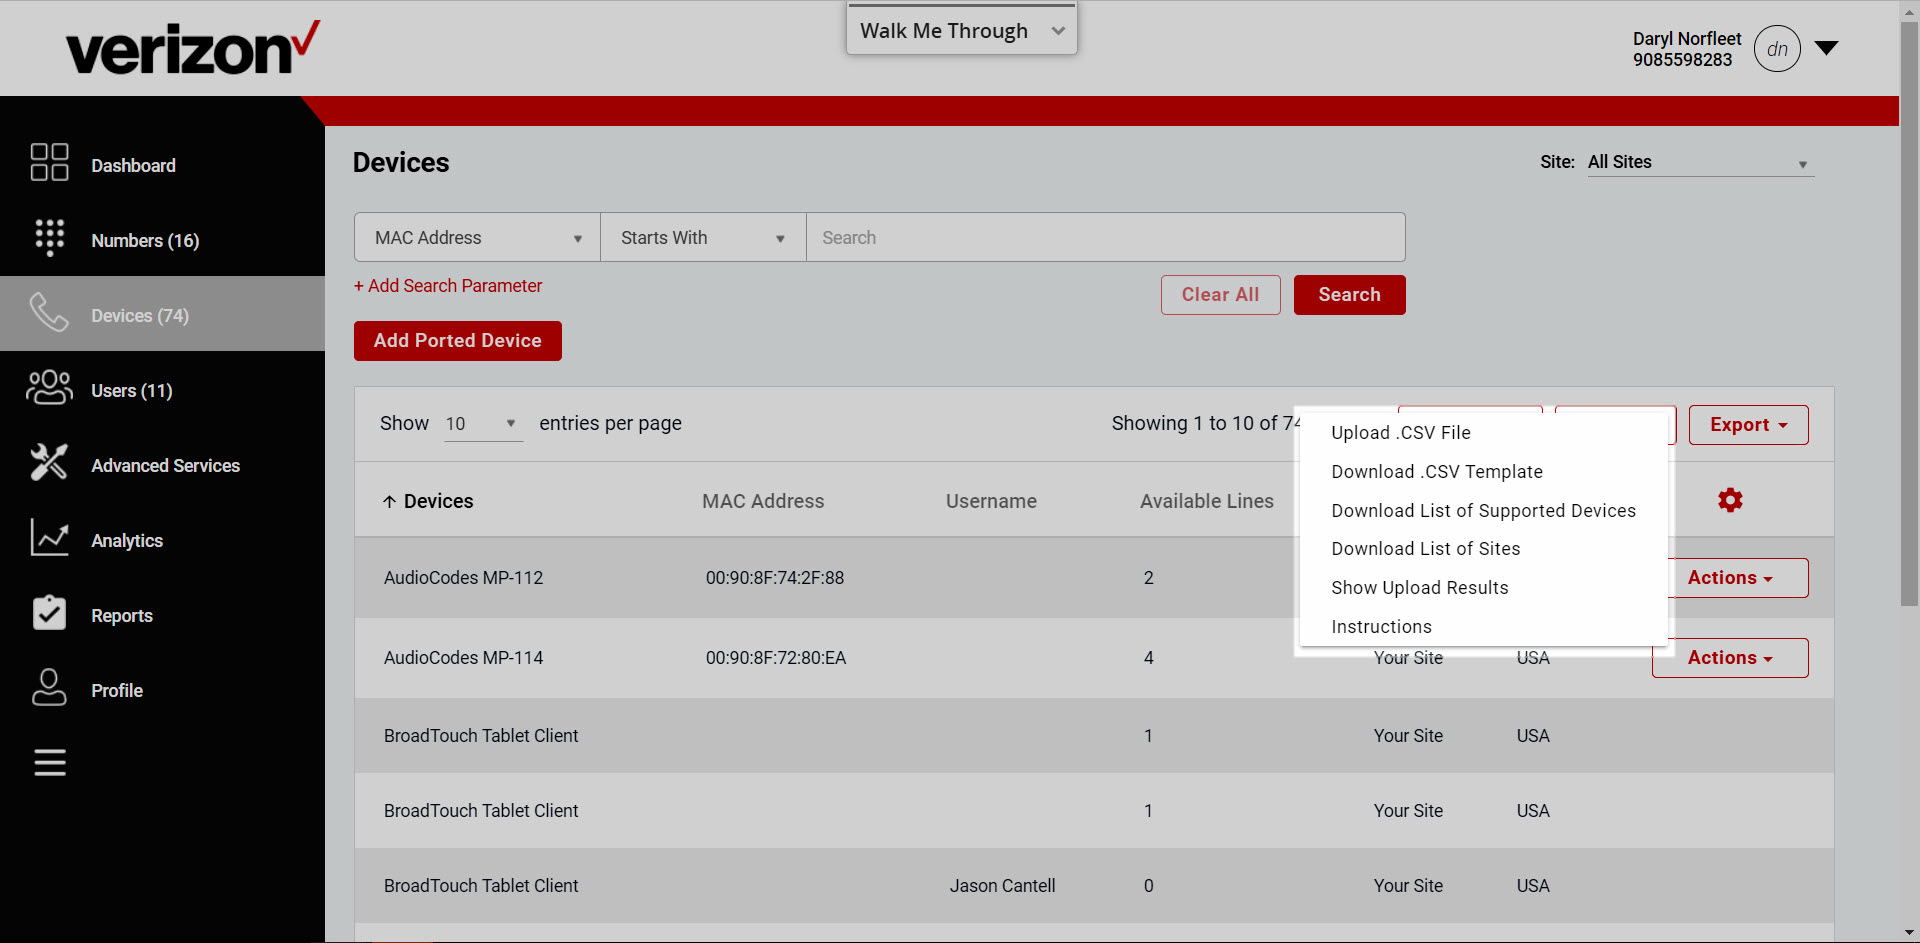
- Before performing a bulk upload, it is recommended to download the CSV template. Select the Import drop-down menu. Here you can find the following helpful tools for performing a bulk device upload:
- CSV Template
- List of Supported Devices
- List of Sites
- Instructions
- Once you have created and saved your CSV file, you are ready to perform a bulk upload. Select the Import drop-down menu and then select Upload .CSV File. Excel files can be saved as .csv files.
- Select the file to upload and the system will validate the records. If there are any problems, the system will display the results with the corresponding error message. A notification will appear once the file upload is successful, and the devices will be added to your inventory.

What’s next?
- Now that your device is added, it is managed on the Devices tab. For information on managing devices, visit the Device Management guide.
- Added devices are now available to assign to users. For steps on how to add a user, visit the Adding Users guide.


