Auto attendant
Auto Attendants are used to route calls to various destinations, employees within your company, specific groups of employees, voicemail, or other outside numbers. They provide callers with your company greeting and dialing menu options. Each Auto Attendant is assigned a unique 10-digit number for identification and setup purposes.
- The Auto Attendant has two modes, one for business hours and the other for after hours. Each mode allows administrators to set up options 1 - 9, #, and * to present callers with different options from which to select. To route callers to another set, or branch of options, an additional Auto Attendant must be assigned to your account. To add an additional Auto Attendant to your account, please contact your account manager.
- To route calls based on the time of day (e.g., after hours versus traditional business hours), you must configure an Auto Attendant schedule. You can also configure a company holiday schedule to identify the dates of holidays your company recognizes. On designated holidays, the after-hours greeting and menu dialing options are played to callers.
- To run the same greeting at all times of the day, you do not need to create and assign a time schedule to your Auto Attendant.
If you require a unique message, greetings can be uploaded to the admin portal as a .wav file or recorded from the Voice Portal.
How do I set up an auto attendant profile?
-
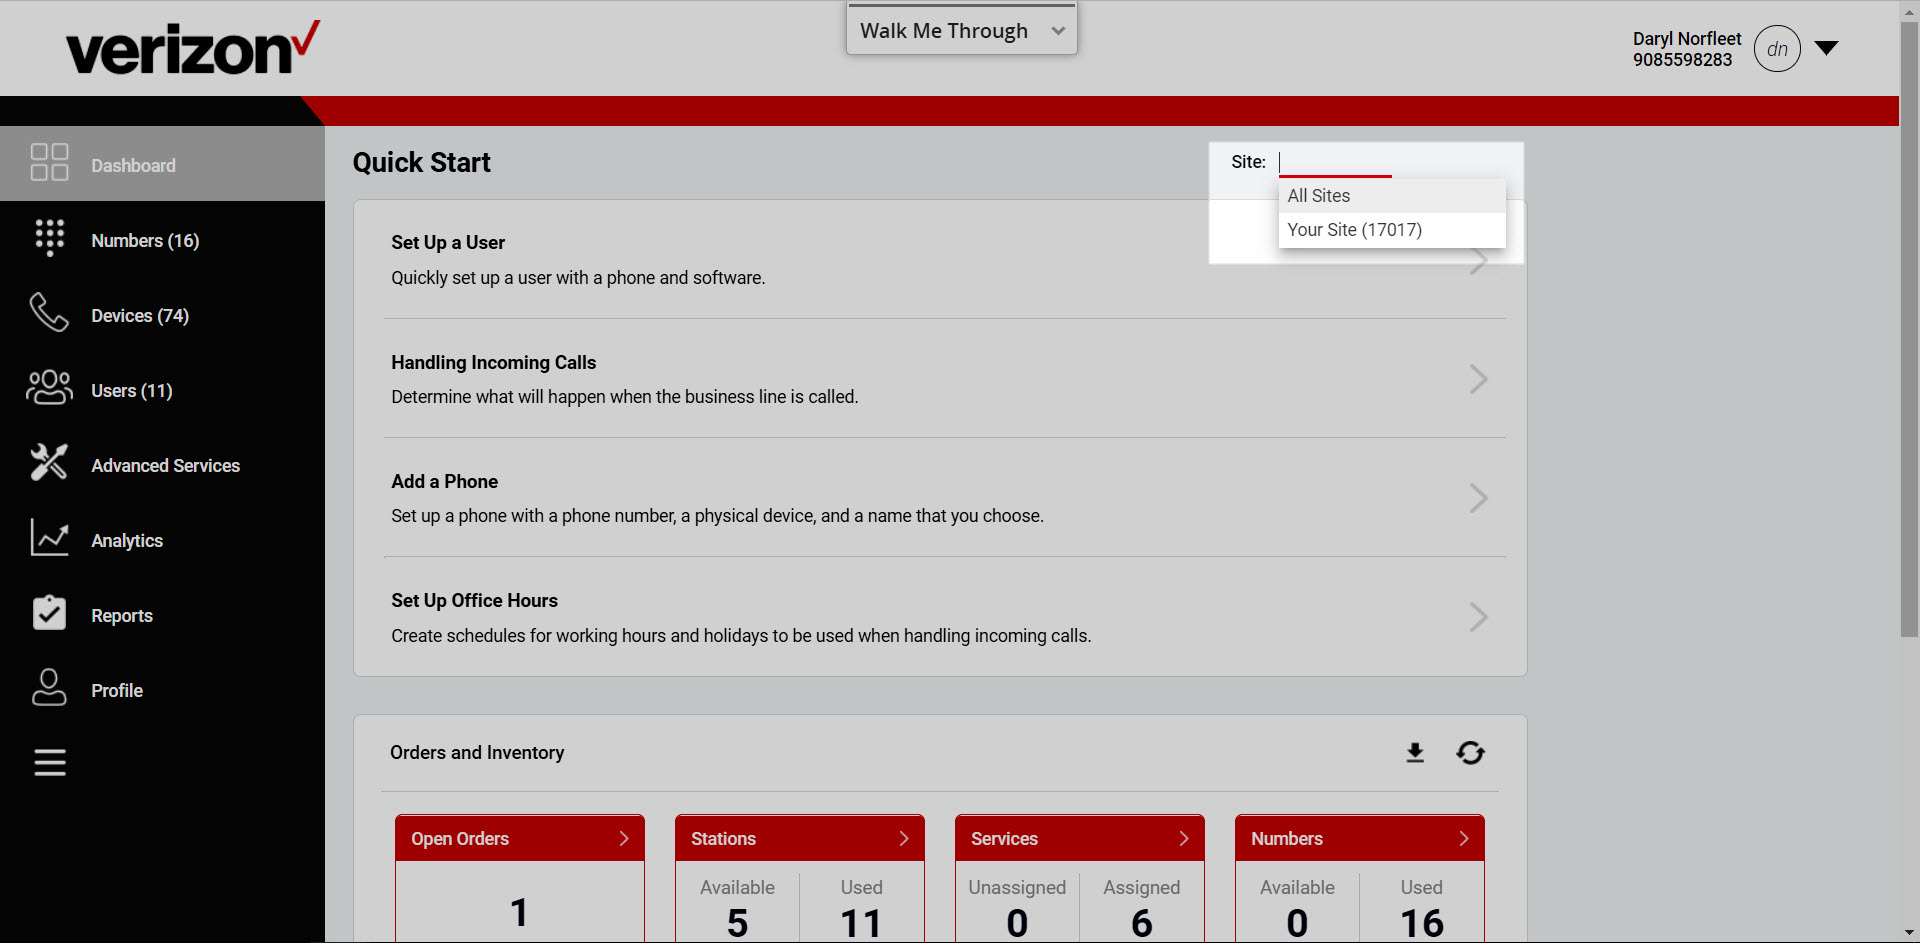
- Log in to the admin portal.
- Select your site from the drop-down menu.
-
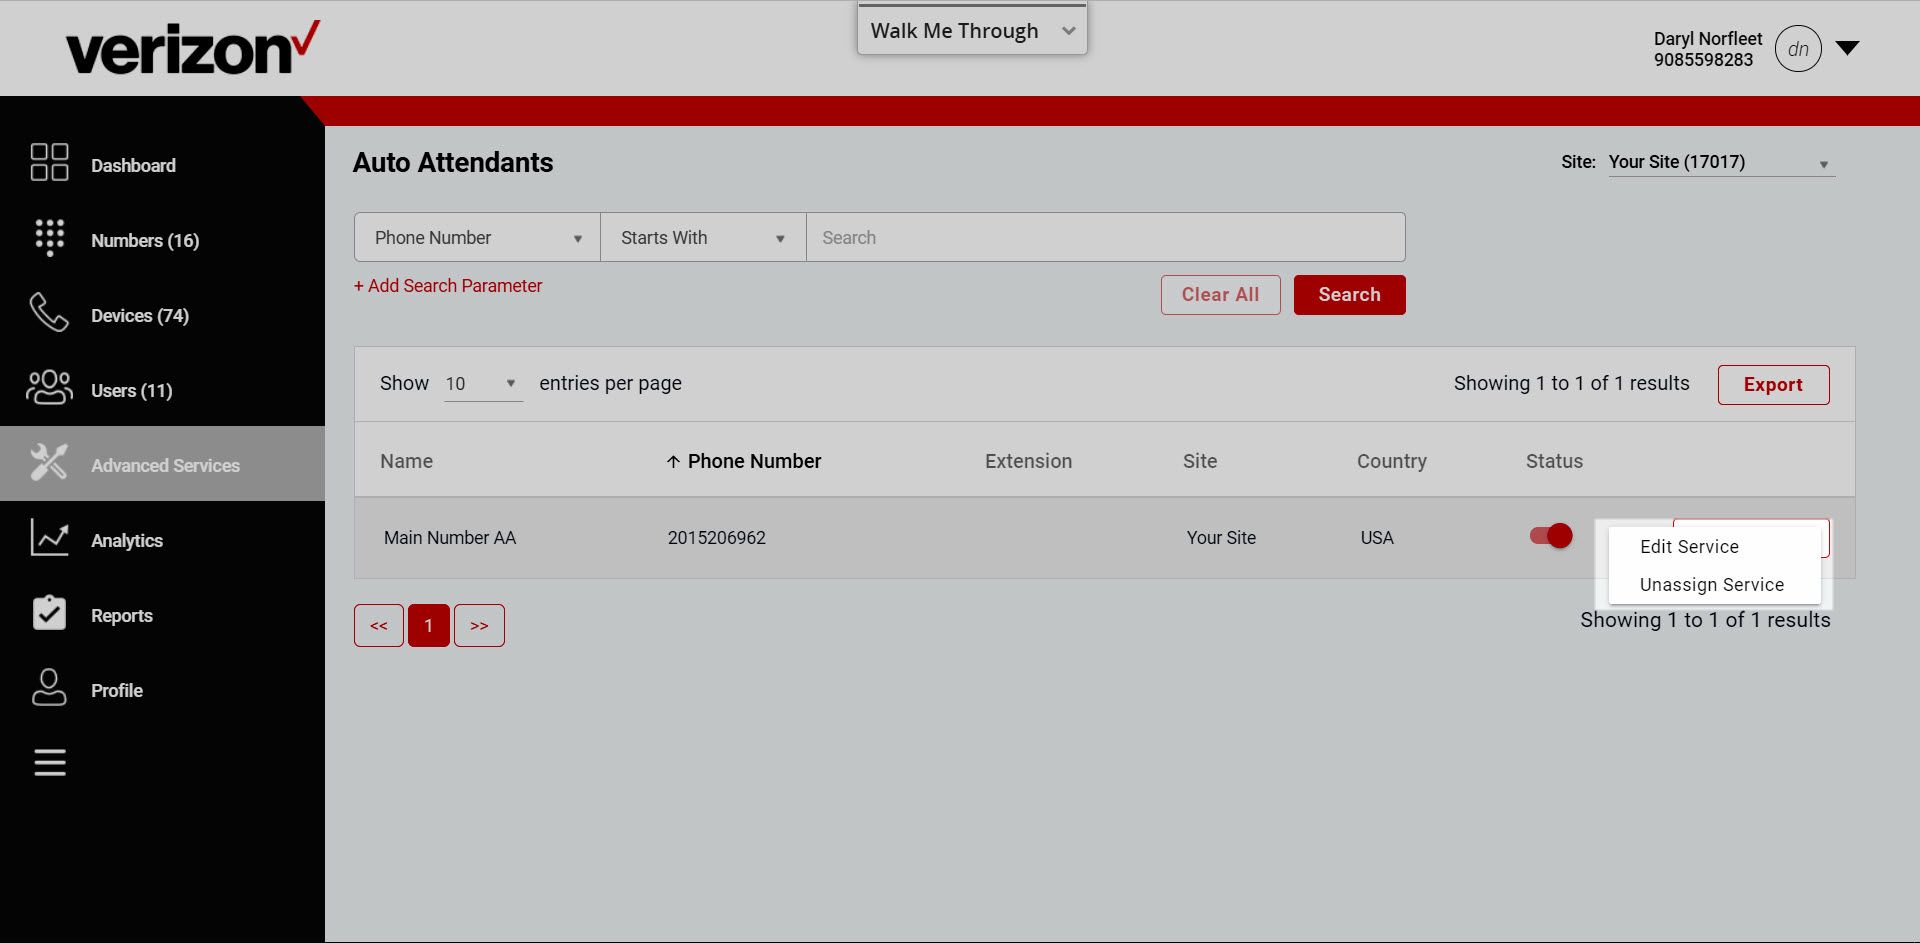
- Click the Advanced Services tab.
- Select Auto Attendants under Call Routing.
- Find the Auto Attendant you want to configure and select the Actions drop-down menu and select Edit Service.
-
- On the Edit Auto Attendant page you can create a name that reflects the purpose of this specific auto attendant (e.g. Main Line Auto Attendant).
- Modify the Extension assigned to the Auto Attendant, if applicable.
Extension-Only Feature Note: If you have the extension-only feature enabled and have assigned an auto attendant an extension only, you may not see a phone number assigned here.

-
- Select Edit Call Forwarding to forward your Auto Attendant to a different phone number. Options include:
- Do Not Forward - If selected, will not forward calls to another number.
- Call Forwarding Always - If selected, will forward calls to the number in the Forward to field.
- Call Forwarding Selective - If selected, will forward calls to a specified number at specified times. If enabled, you will be routed to the Call Forwarding Selective Details page to indicate:
- Which time and holiday schedule you would like to use.
- Which number to forward to during those schedules.
- If you would only like calls from specific numbers to be forwarded to the forward-to number you indicate.
- Select Edit Call Forwarding to forward your Auto Attendant to a different phone number. Options include:

-
- Another option is Alternate Numbers. You can assign multiple phone numbers or extensions to an Auto Attendant. Each number will reach the same greeting and each menu will function identically to the main number. The alternate numbers option enables you to have up to ten (10) phone numbers ring in to the auto attendant. To add an alternate number, select the number you would like to add from the Find Phone Number field.
- Select Save to save your changes.

-
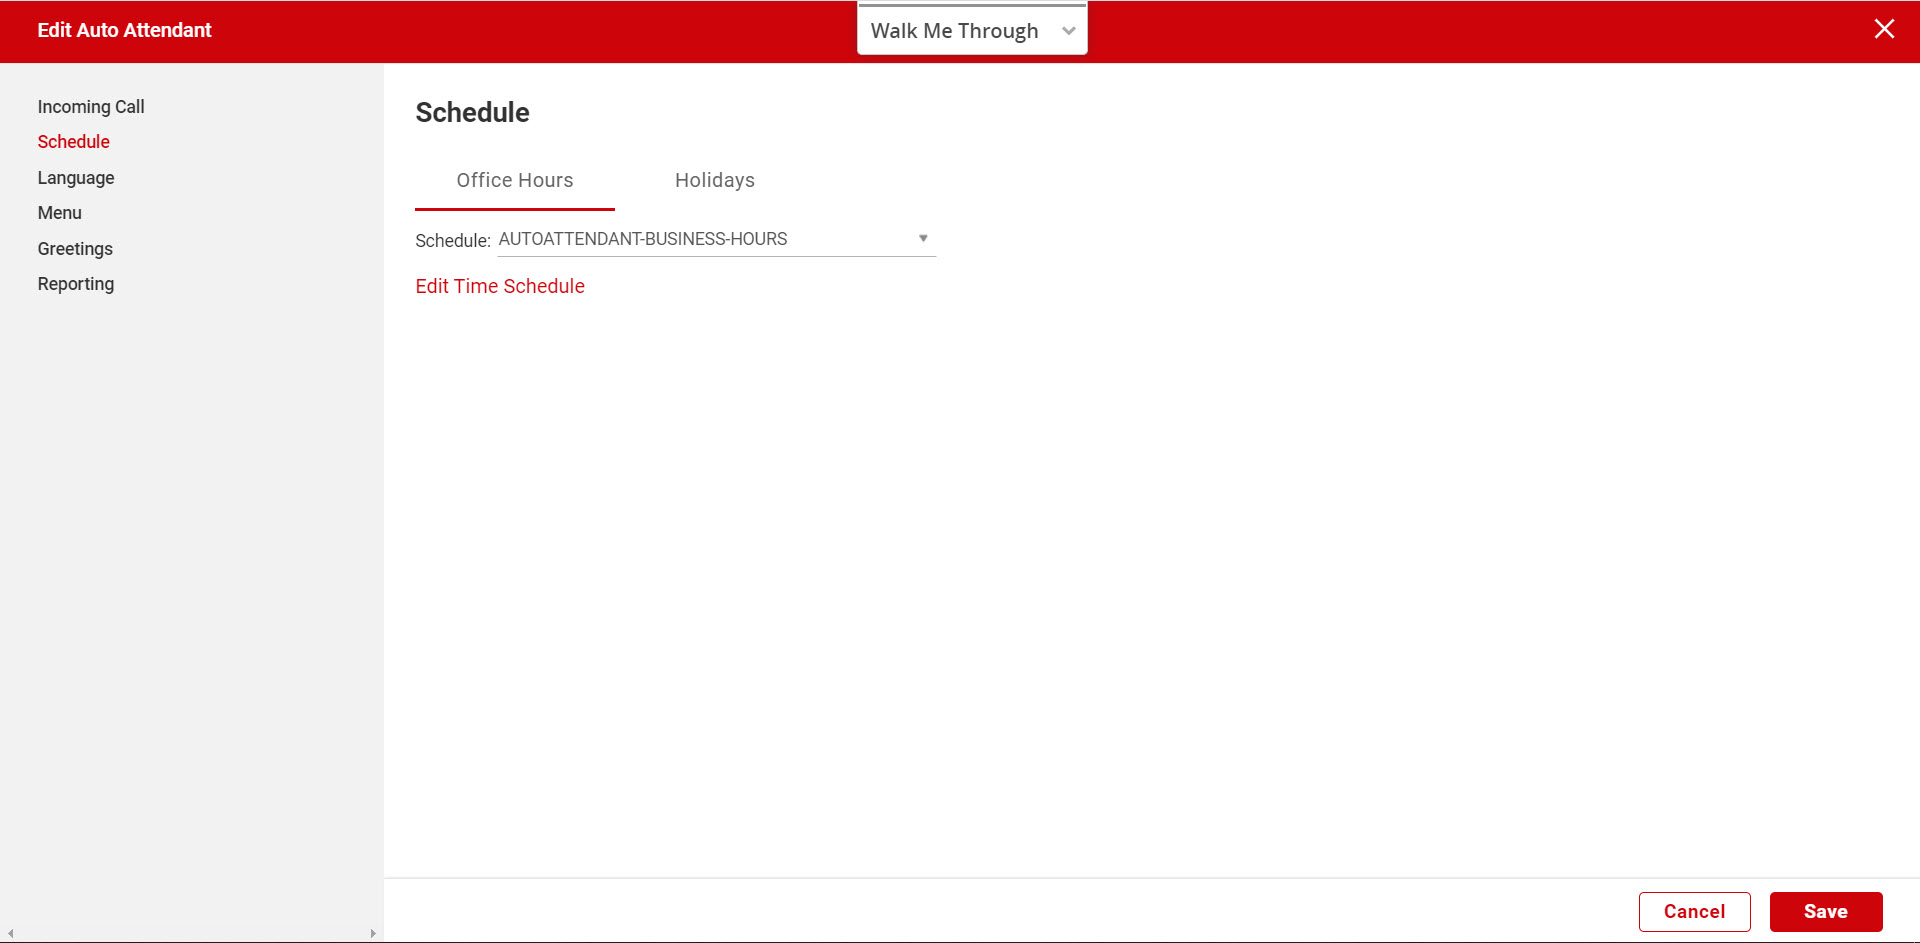
- Next, assign a Time Schedule to the auto attendant by selecting the Schedule tab. The selected time schedule determines when callers will hear your greetings. Note: The schedules here are configured within the Advanced Services area of the portal under Scheduling.
-
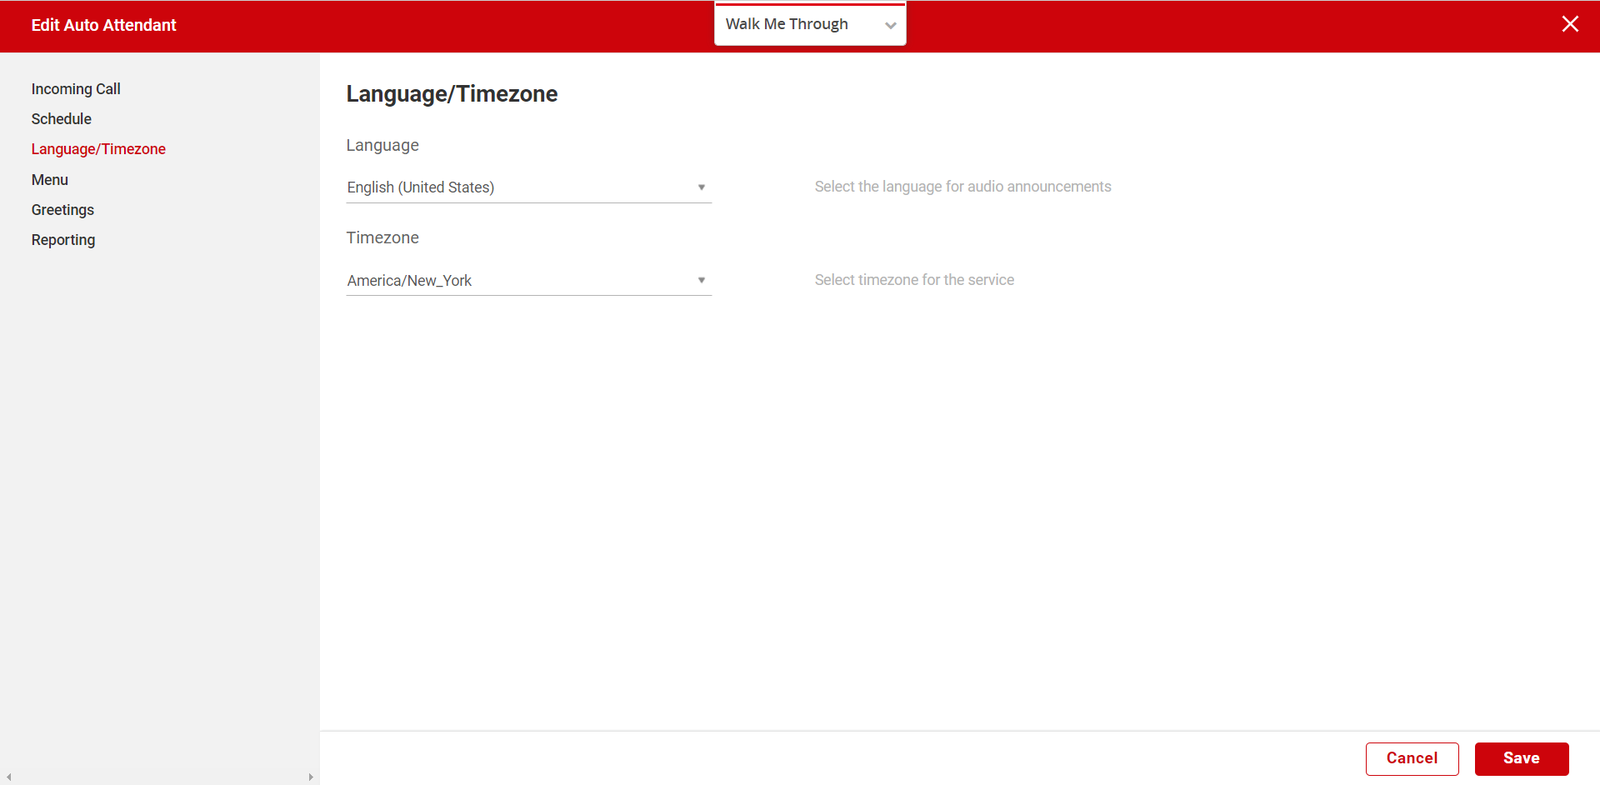
- On the Language/Timezone tab, you can assign a language for the audio announcements and the timezone for this auto attendant.
- On the Menu tab, select one of the dialing options - Enterprise or Site.
-
- Enterprise - Callers who reach the Auto Attendant and choose to dial by name or extension can reach any user at any location within the entire company. Note: User's with Privacy enabled may not be listed in the name or extension directory or may not be dialed.
- Site - Callers who reach the Auto Attendant and choose to dial by name or extension can reach any user located at the specific site associated with this Auto Attendant.

-
- Select Save to save your changes.
How do I modify the dialing menu for business hours and/or after hours?
-
- Here you will configure the business hours and/or after hours menu. You will determine which action the Auto Attendant will take when an incoming caller chooses a particular number of symbol on the keypad.
- The keypad numbers that can be configured include numbers 0-9, star (*) and pound (#).
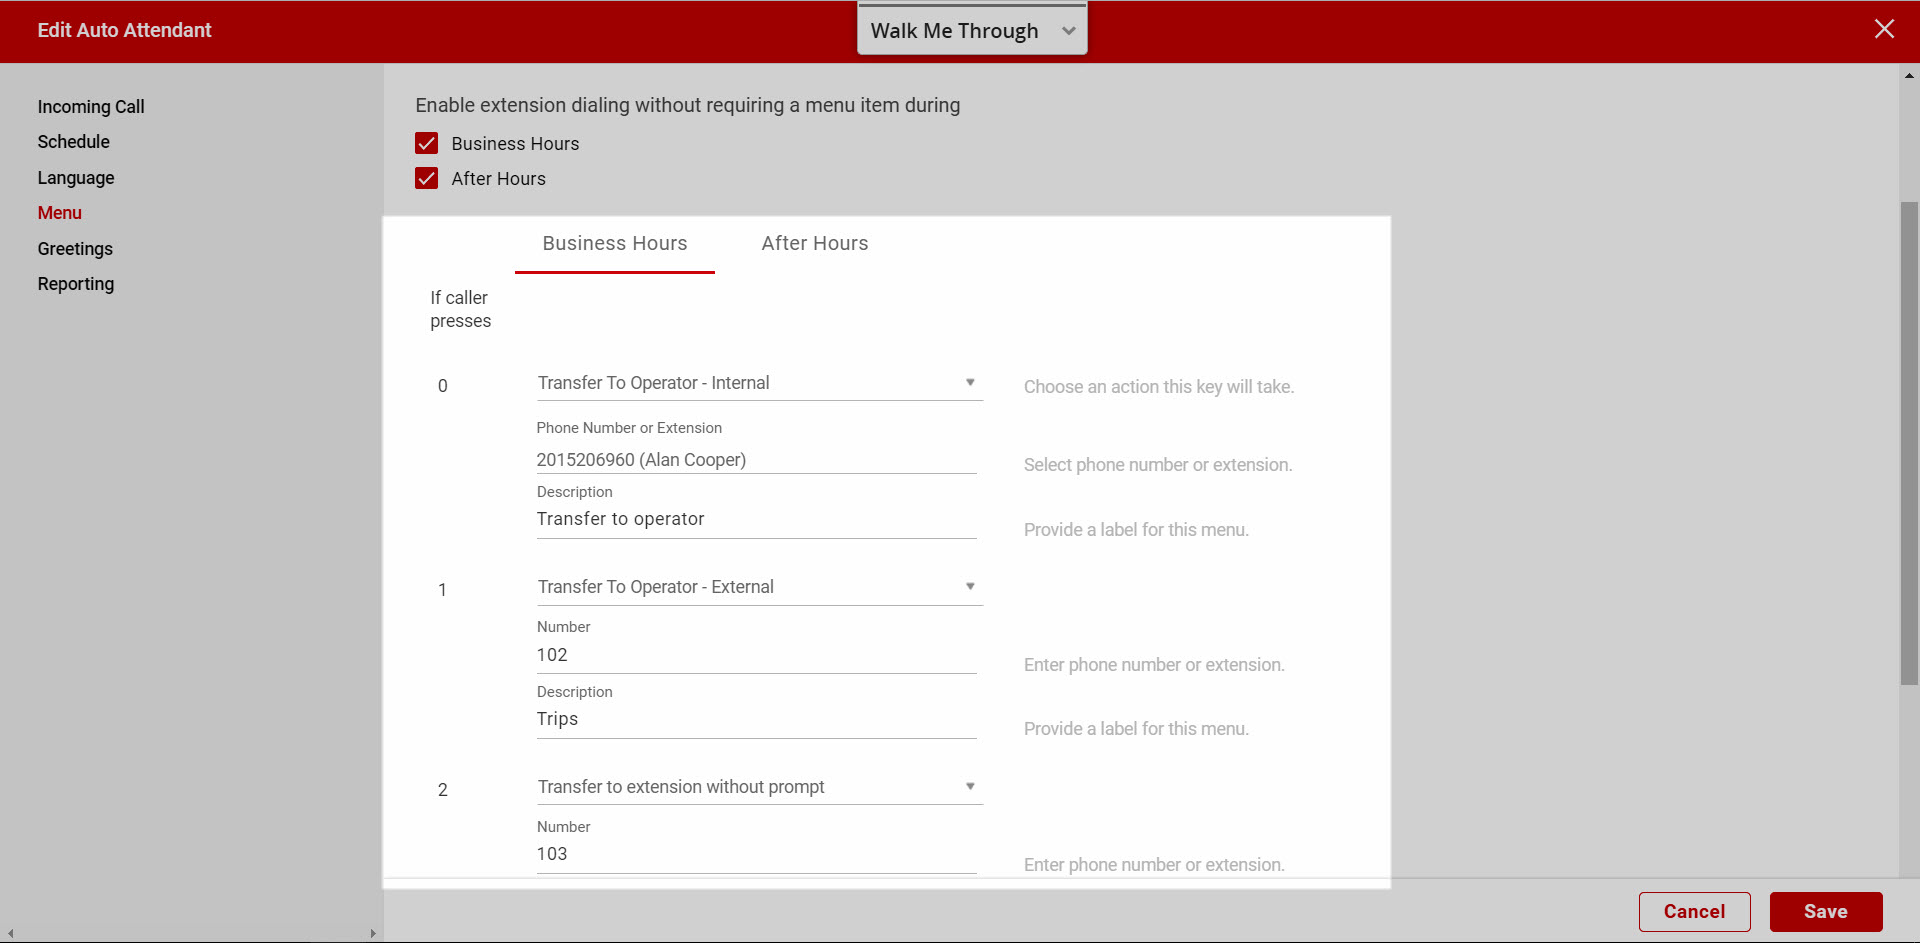
- Select the action for business hours from the drop-down list.
- Not Used: This is the default when an action has not been selected for that digit or character.
- Transfer Externally with Prompt: This action routes callers to a phone number that is not a User or Extension within the company. For example: A third-party answering service or corporate call center.
- Transfer Externally without Prompt: This action routes callers to a phone number that is not a User or Extension within the company. For example: A third-party answering service or corporate call center.
- Transfer to Operator - External: This will redirect callers to a configured operator, who will receive all calls that "time out" when a caller does not choose an option from the Auto Attendant. You will enter the phone number to which to route callers here.
- Transfer to Operator - Internal: This will redirect callers to a configured operator, who will receive all calls that "time out" when a caller does not choose an option from the Auto Attendant. You can select from existing phone numbers in the system.
- Transfer to Voicemail: This selection places callers directly into the Voicemail box of the Extension entered in the "Transfer To" Field. Please Note: This option will only transfer to an Extension Voicemail.
- Transfer to Internal Number with Prompt: This will route callers to a selected User's phone number within the company. As soon as the caller chooses this option, a prompt will play a message before the transfer is placed. It will include the User's name as recorded in the Voicemail box.
- Transfer to Internal Number without Prompt: This will route callers to a selected User's phone number within the company. This option will route the caller as soon it is selected.
- Transfer to Extension with Prompt: Callers are sent to a pre-configured User Extension. As soon as the caller chooses this option, a prompt will play a message before the transfer is placed. It will include the User's name as recorded in the Voicemail box.
- Transfer to Extension without Prompt: Callers are sent to a pre-configured User Extension. This option will route the caller as soon as it is selected.
- Dial by Name: This action permits callers to dial by recipient name, using the letters on the Keypad.
- Dial by Extension: This action lets callers dial by recipient Extension, using the numbers on the Keypad.
- Repeat Menu: If selected, this action will repeat the Greeting and Menu options.
- Exit Menu: This action allows callers to exit the menu system. This will terminate the call.
- Where applicable, in the second field, choose the number to which the call should be transferred from the drop-down menu.
- Finally, in the third field, add the description (e.g., Customer Service).
- Repeat the same steps for your After Hours dialing menu, if applicable.
- Select Save to save your changes.
How do I modify a greeting for auto attendants?
Auto Attendant Greetings are used to present callers with options to dial from on the Auto Attendant. These greeting can be customized and uploaded to the admin portal or recorded from the Voice Portal. To modify the greeting for Auto Attendants, follow these steps:
-
- Navigate to the Greetings tab in the left-hand navigation.
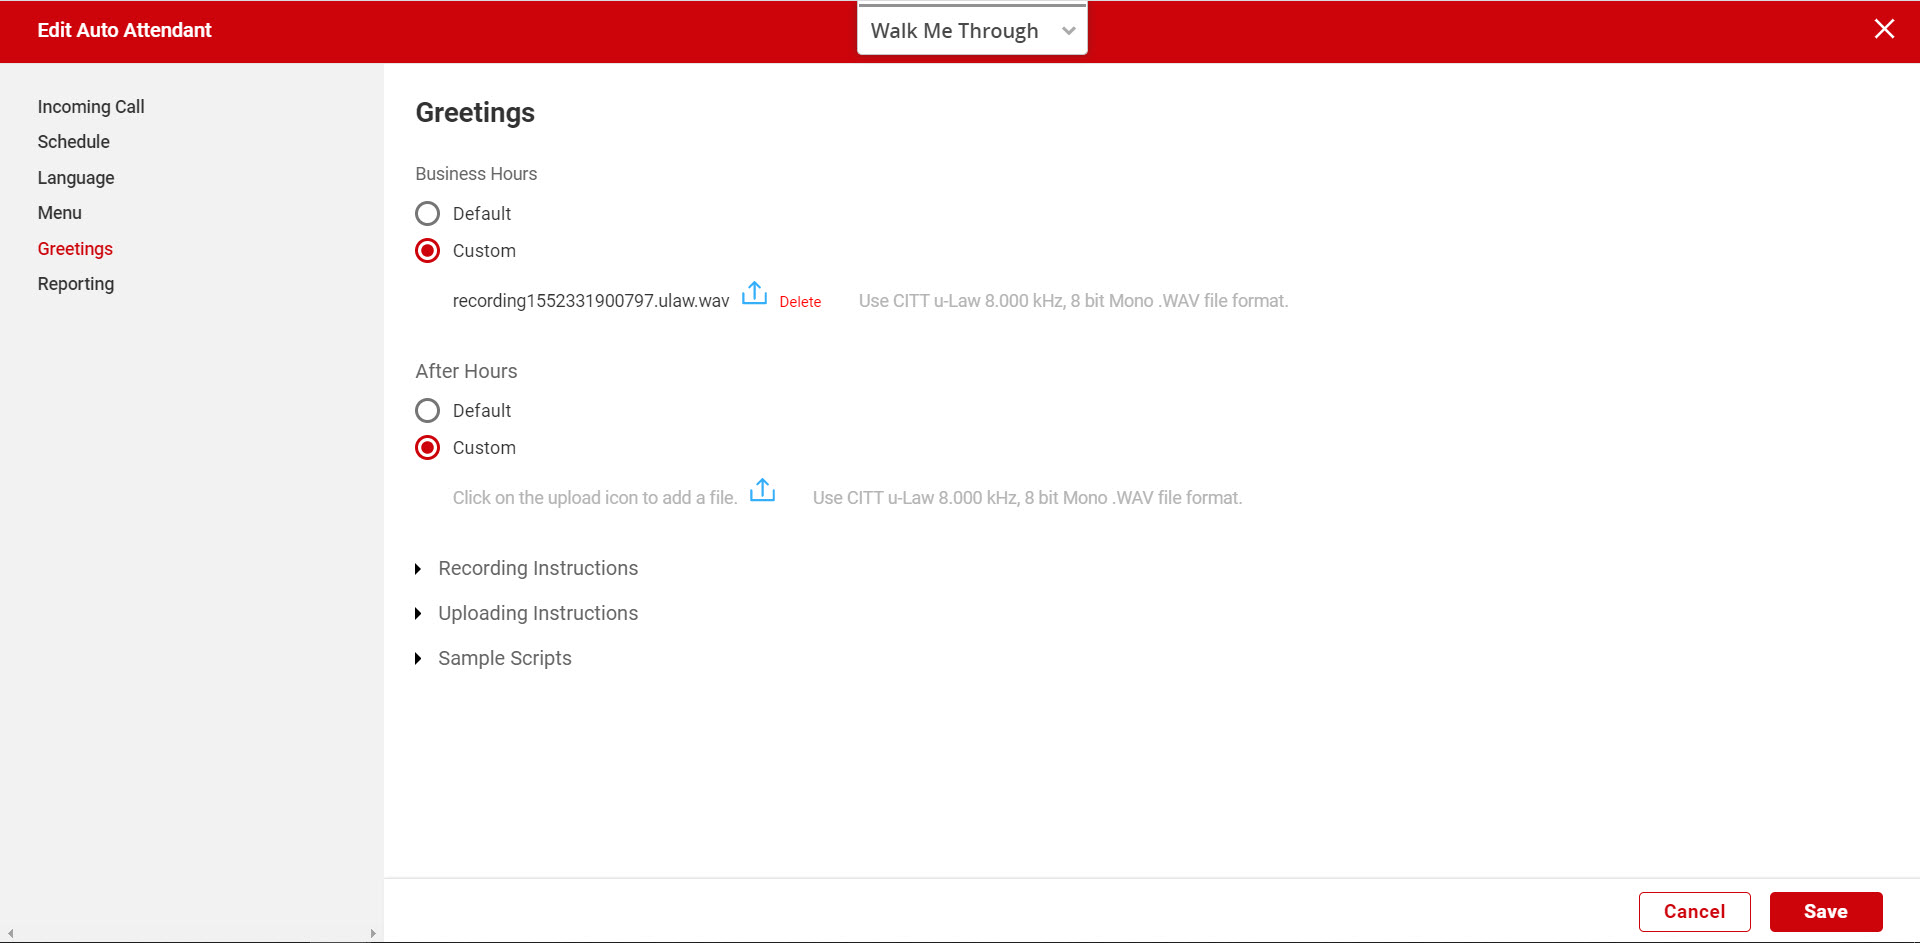
- By default, the system default greeting is assigned. Note: The default greeting states the following – "Welcome. Your call is being answered by an automated attendant. If you know your party's extension, press one (1). To use our automated name directory, press two (2). If you would like to speak to an operator, press zero (0). Thank you for calling,"
- If you would like to add a customized greeting, choose Custom. There are two ways to add a customized greeting:
- Upload an already recorded custom greeting – To upload a custom Business Hours and/or After Hours greeting:
- Enter a description for the .wav file.
- Click the upload-from-computer icon next to the description field.
- Choose the file from your computer and select Open.
- For greeting files to properly upload, they must be saved as a .wav file in CCITT u-Law 8.000 kHz, 8 bit Mono attributes with a maximum file size of 2MB. Using a basic sound converter allows you to save your .wav file in this format.
- Record a greeting from the Voice Portal – To record your own personalized greeting from the Voice Portal:
- Dial your Voice Portal number.
- If initially prompted to enter your passcode, press * to return to the enter mail box ID prompt.
- At the enter mail box ID prompt, enter the Voice Portal extension followed by #.
- At the enter passcode prompt, enter the Voice Portal administrator passcode followed by #. Note: If you do not have your default Voice Portal passcode, you can set a new one. It must consist of numbers only.
- Enter the new Voice Portal password.
- Confirm the new Voice Portal password.
- Click Save.
- Press 1 to change Auto Attendant greetings.
- Press 1 for Business Hours. Then record the greeting at the prompt.
- Press 2 for After Hours then record the after hours greeting.
- Each auto attendant includes a greeting option for After Hours callers. Repeat step 2 for the after-hours greeting.
- Upload an already recorded custom greeting – To upload a custom Business Hours and/or After Hours greeting:
How do I configure a holiday schedule for an auto attendant?
You can configure a holiday schedule so that on designated holidays, the After Hours greeting and menu options are automatically played.
-
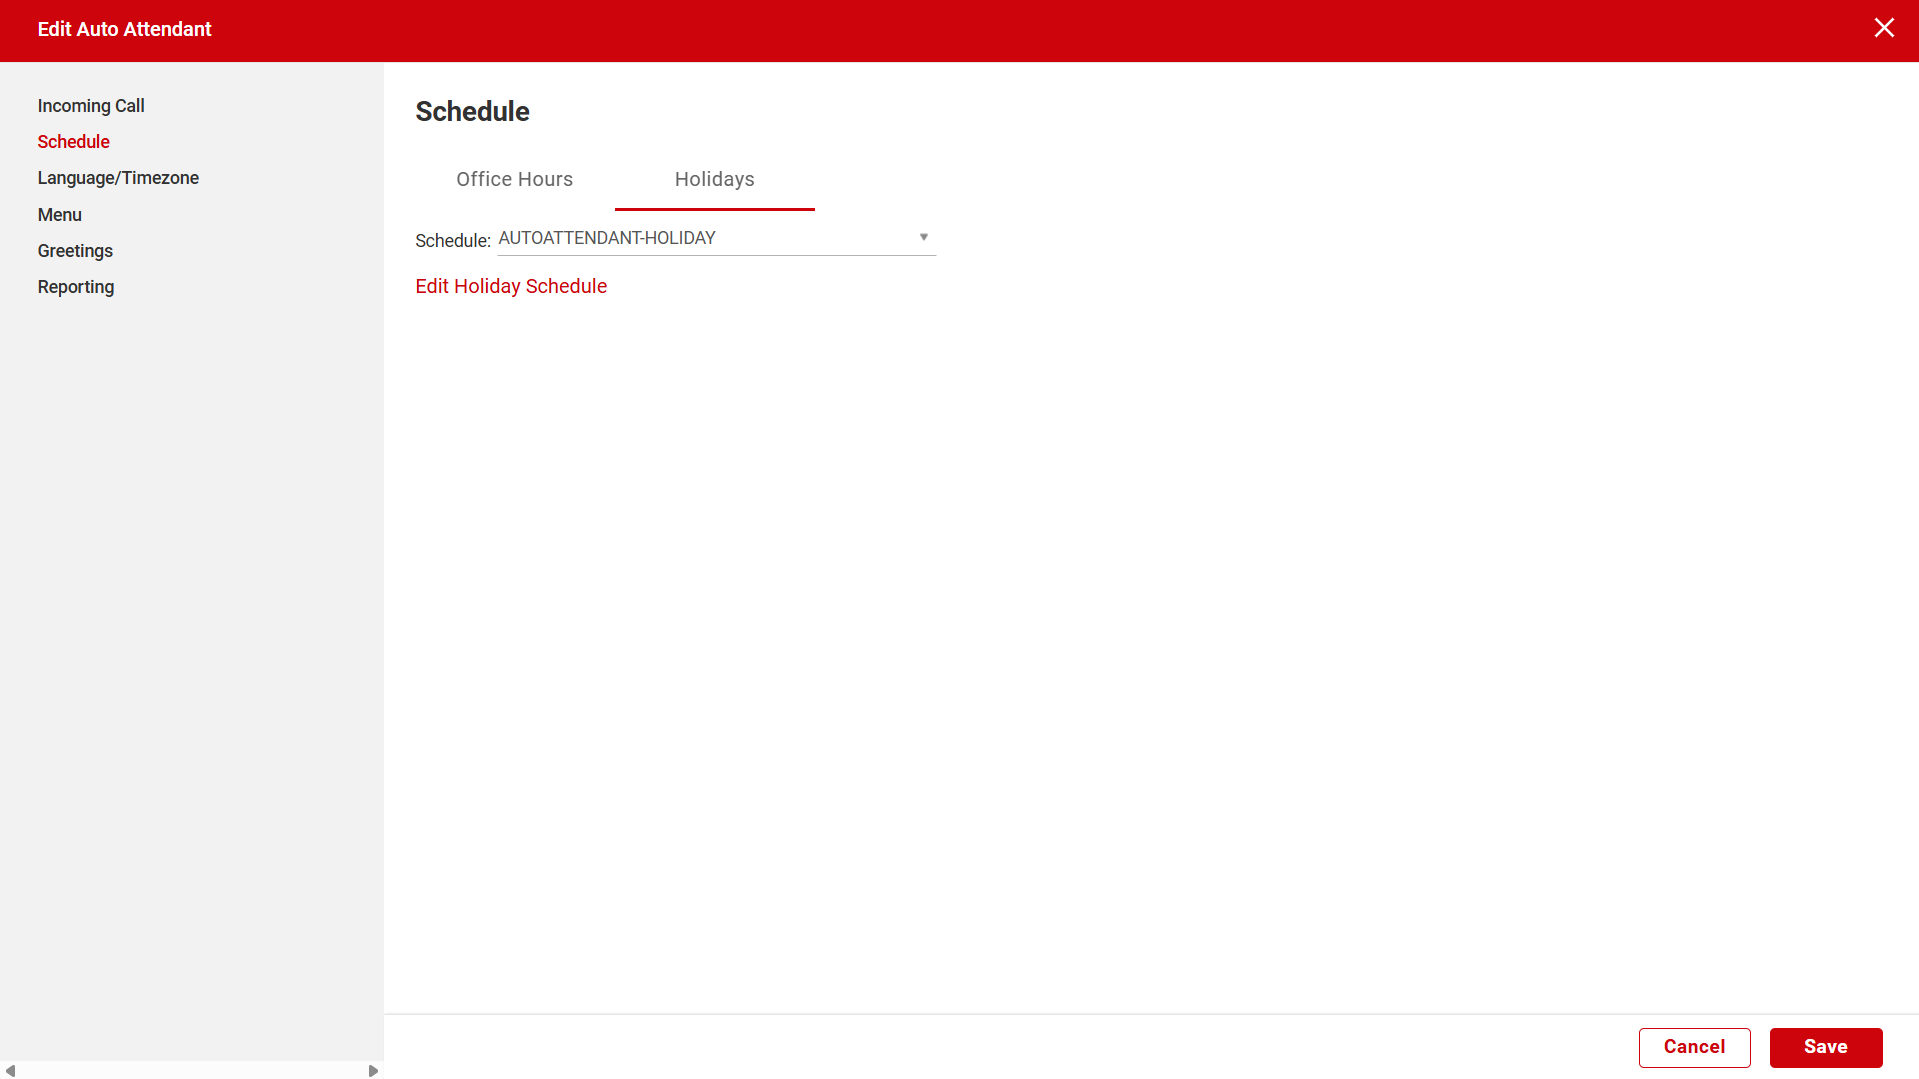
- Navigate to the Schedule tab in the left menu.
-
- Select Holidays.
- Using the Schedule drop-down, select the holiday schedule you wish to use.
Note: The schedule options shown in the drop-down are configured within the Advanced Services area of the portal under Scheduling.
-
- If necessary, you can click Edit Holiday Schedule to modify the selected schedule.
- When finished, click Save to save the holiday schedule.
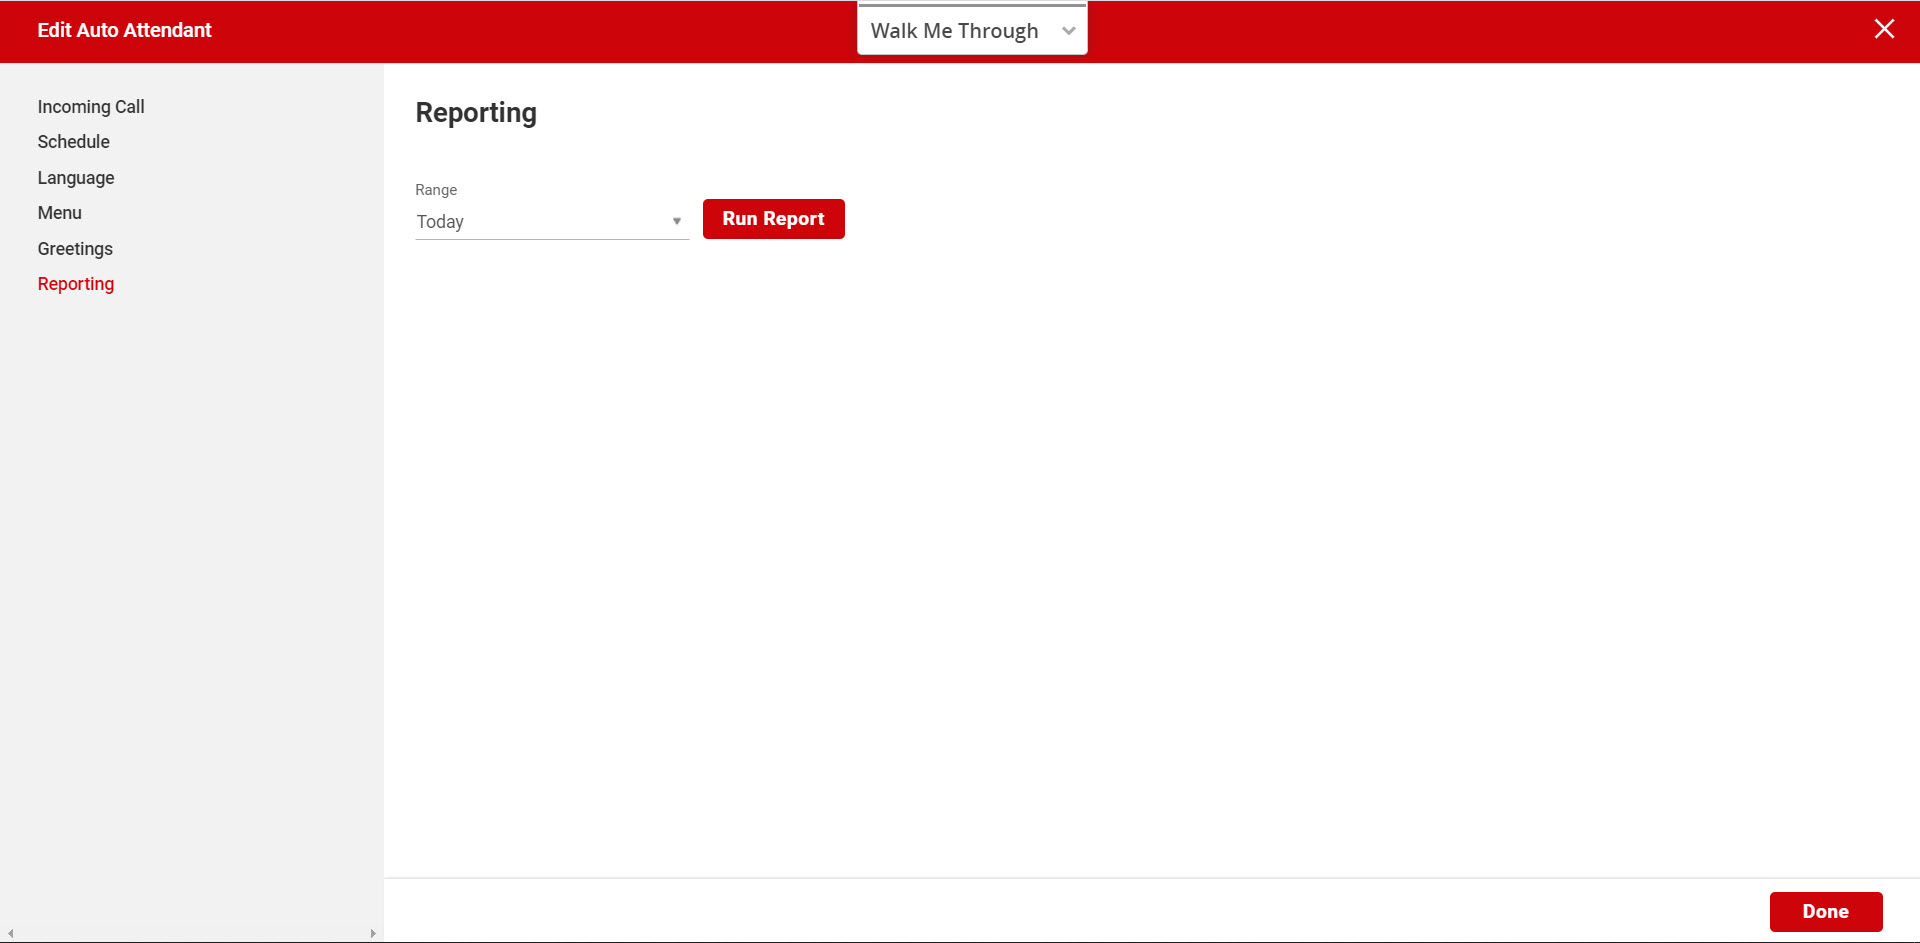
How do I run an auto attendant report?
Auto Attendant Reports show the complete utilization totals for the Auto Attendant including answered calls, busy calls, not answered calls and duration of calls.
-
- On the Reporting tab, select the date and date range you would like to pull the report on.
- Select Run Report and the following information will appear.