Admin portal: Calling permissions
Configuring outbound calling
Configuring inbound calling
Configuring call waiting
Calling permissions
Administrators can configure incoming and outgoing calling permissions for a user within the admin portal. By modifying these features, the user will no longer have the default calling permissions set up for the organization. For example, if you would like for a user to be able to receive incoming collect calls, while continuing to block collect calls for the rest of the organization, you can modify that specific user’s incoming call permissions.
This guide reviews how an administrator can configure Outbound Calling, Inbound Calling, and Call Waiting for a user.
Configuring outbound calling
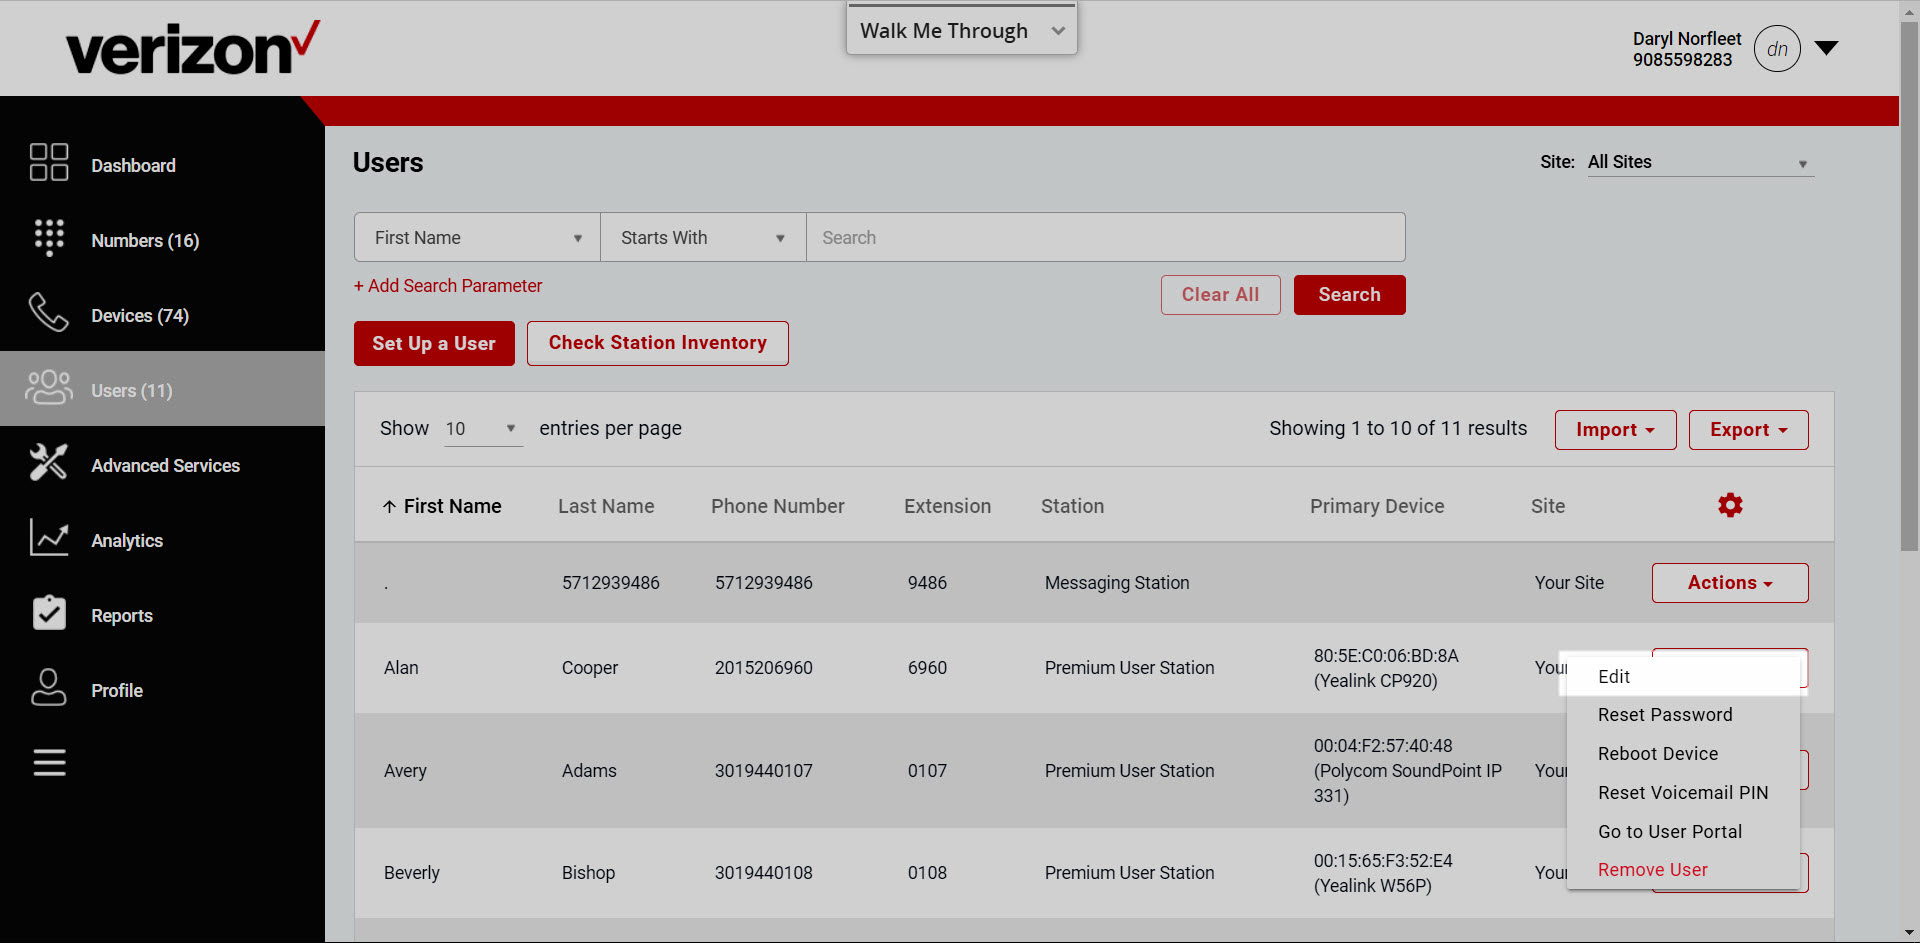
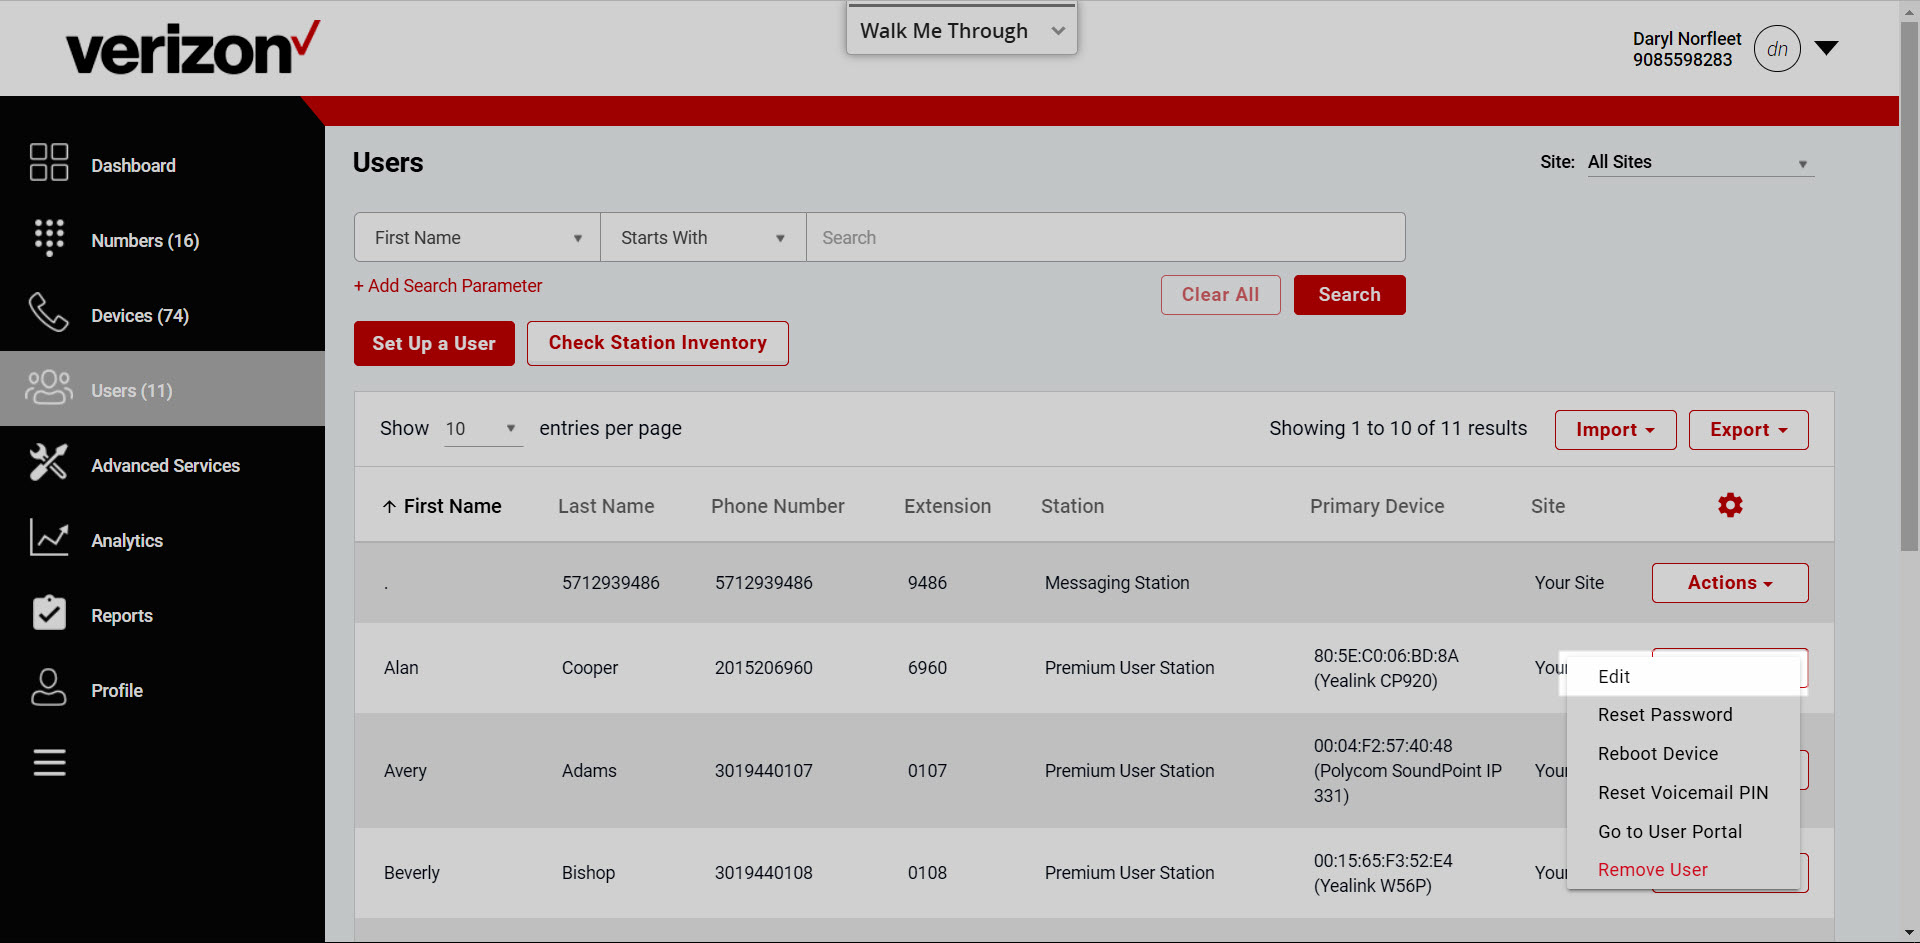
- Log in to the admin portal.
- Go to the Users tab.
- Find the user you would like to modify calling permissions for and select the Actions drop-down menu.
- Select Edit.
- Select Calling Permissions from the left-hand menu, under Advanced.
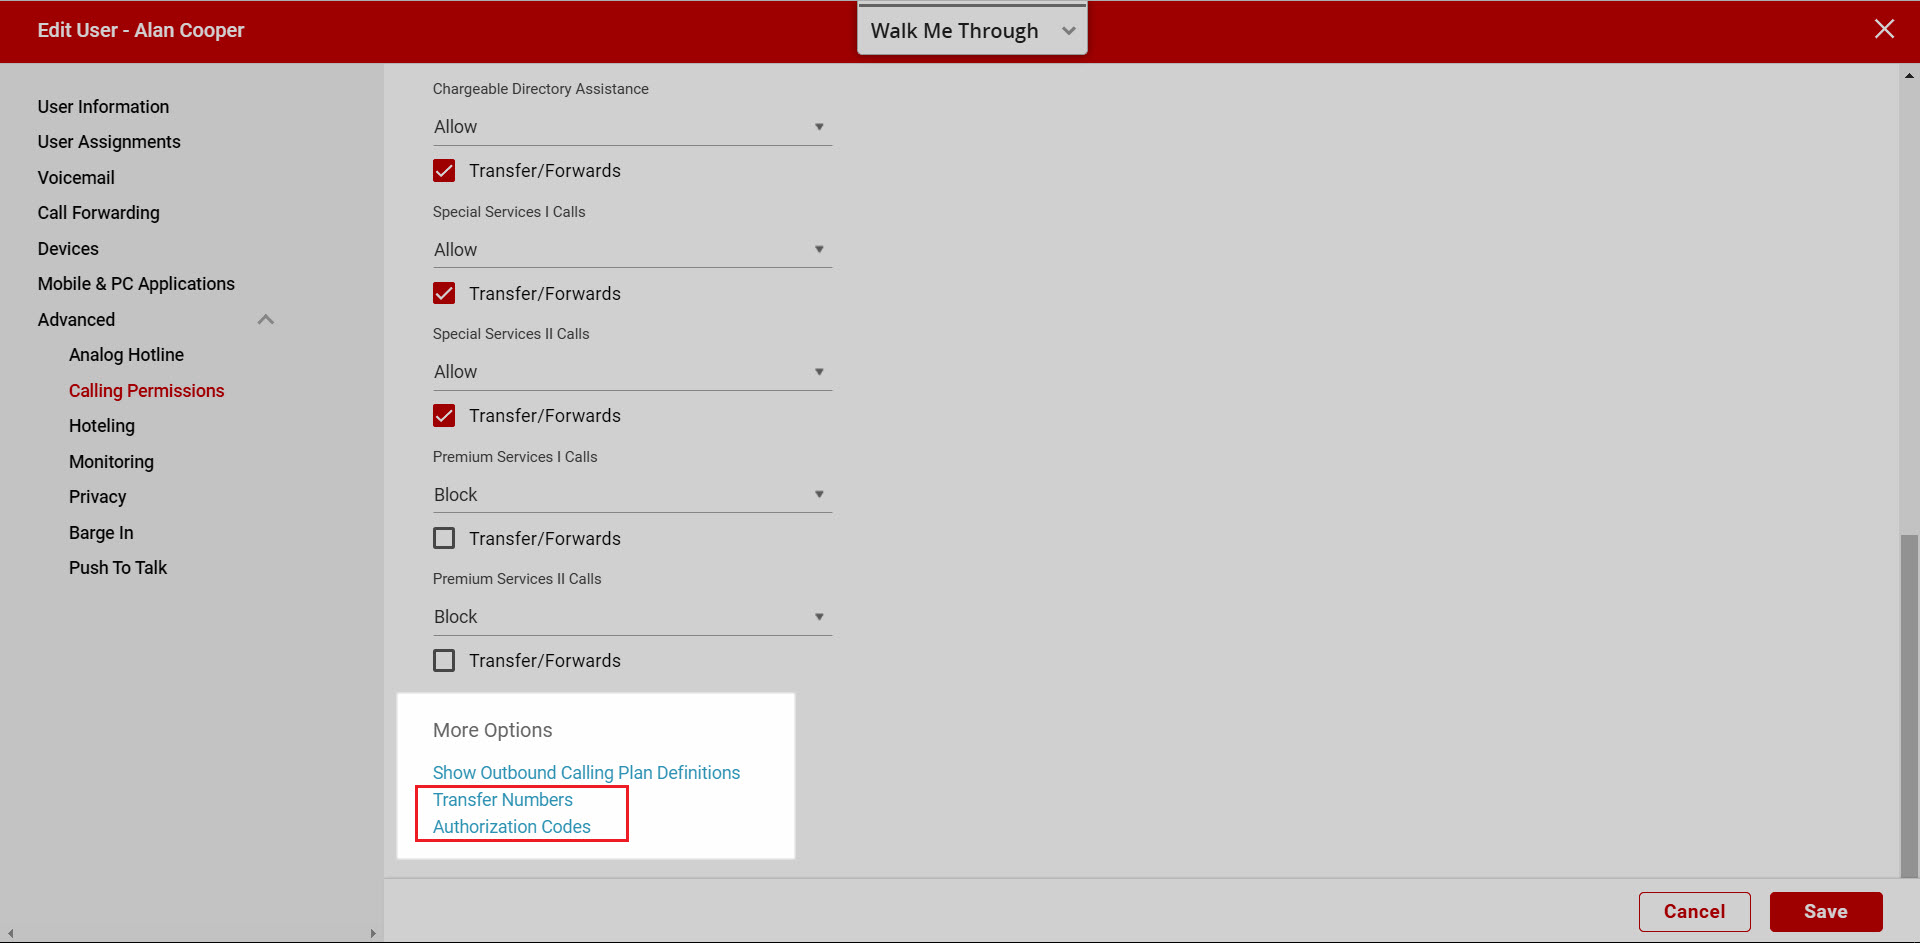
- On the Outbound Calling tab, check the box next to Use Custom Settings to expand additional options to modify:
- Internal Calls are calls within your own company. It includes calls to others within your own site and to other locations as well.
- Local Calls are calls placed to your local calling area that do not require a leading 1.
- Toll Free Calls are calls using the 800, 888, 877, 866, 855 or 844 prefixes.
- Long Distance Calls are calls using 1 plus and placed to North America, Canada, or extended Caribbean locations.
- International Calls are calls to locations outside of the Long Distance areas that require an international calling code before the number is dialed.
- Operator Assistance Calls are any call starting requiring Operator Assistance. Both “0” and “0 plus” calls are included.
- Chargeable Directory Assistance Calls are calls to the 411 prefix.
- Premium Services I are calls to the 900 prefix and Premium Services II are calls to the 976 prefix.

- For each call type, you can modify, as needed. Options include:
- Allow – Callers at this location can make these types of calls.
- Block – Callers at this location can’t make these types of calls.
- Require Authorization Code – Callers must enter the authorization code that you set before placing an outgoing call. Note: Authorization codes must be set before they can be applied.
- Transfer to number 1, 2, or 3 – If you select this, then these types of calls are transferred automatically to the number you choose. Note: Transfer numbers must be set before they can be applied.
- Additionally, for each call type you can enable the Transfer/Forwards feature. Checking this box will allow those calls to be transferred or forwarded.
- If you choose to assign Require Authorization Code or Transfer to number 1, 2, or 3, you can define/configure the transfer numbers and/or the Authorization Codes under More Options.
- Select Save to save your changes.

Configuring inbound calling
- Log in to the admin portal.
- Go to the Users tab.
- Find the user you would like to modify calling permissions for and select the Actions drop-down menu.
- Select Edit.
- Select Calling Permissions from the left-hand menu, under Advanced.
- On the Inbound Calling tab, check the box next to Use Custom Settings to expand additional options to modify:
- Allow internal calls – Check this box to allow calls originating internally.
- Allow collect calls – Check this box to allow inbound collect calls. Note: The system is set to block collect calls by default.
- Select your Transfer and Forward options for incoming calls by selecting one of the following options:
- Allow all external calls
- Allow transferred external calls only
- Block all external calls

- Select Save to save your changes.
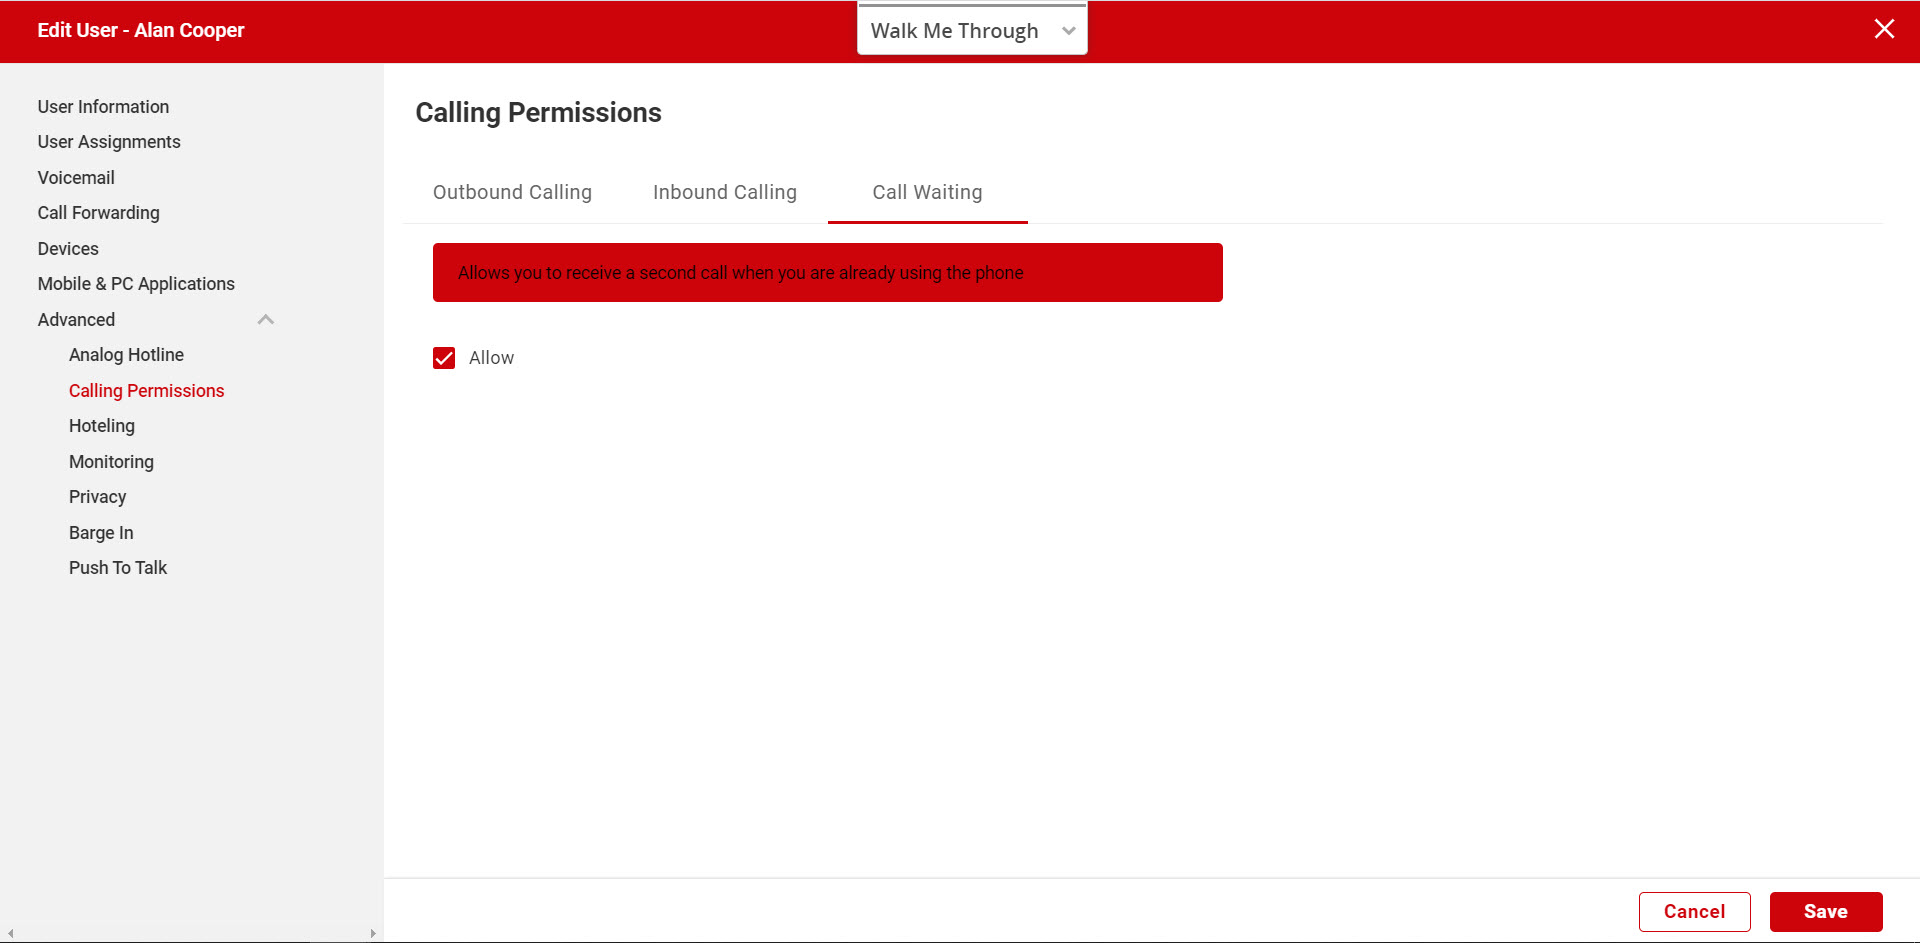
Configuring call waiting
- Log in to the admin portal.
- Go to the Users tab.
- Find the user you would like to modify calling permissions for and select the Actions drop-down menu.
- Select Edit.
- Select Calling Permissions from the left-hand menu, under Advanced.
- On the Call Waiting tab.
- Check the box next to Allow to enable call waiting for the user.
- Select Save to save your changes.