Office Anywhere
Office Anywhere (sometimes simply called “Anywhere”) is a Mobility feature supporting the following functions on the phone of your choice, such as your personal mobile phone:
- Receive calls on an alternate phone – Office Anywhere allows calls placed to a user’s office phone to ring any phone(s) set up with the feature. Most users designate their mobile phone as their “Office Anywhere phone.”
- Place long distance and international calls from an alternate phone – Refer to https://businessdigitalvoice.verizon.com/office-anywhere-admin/
This feature can be configured from the User Portal found at the following URL:
https://businessdigital.verizon.com/myphonenext/
How do I configure Office Anywhere?
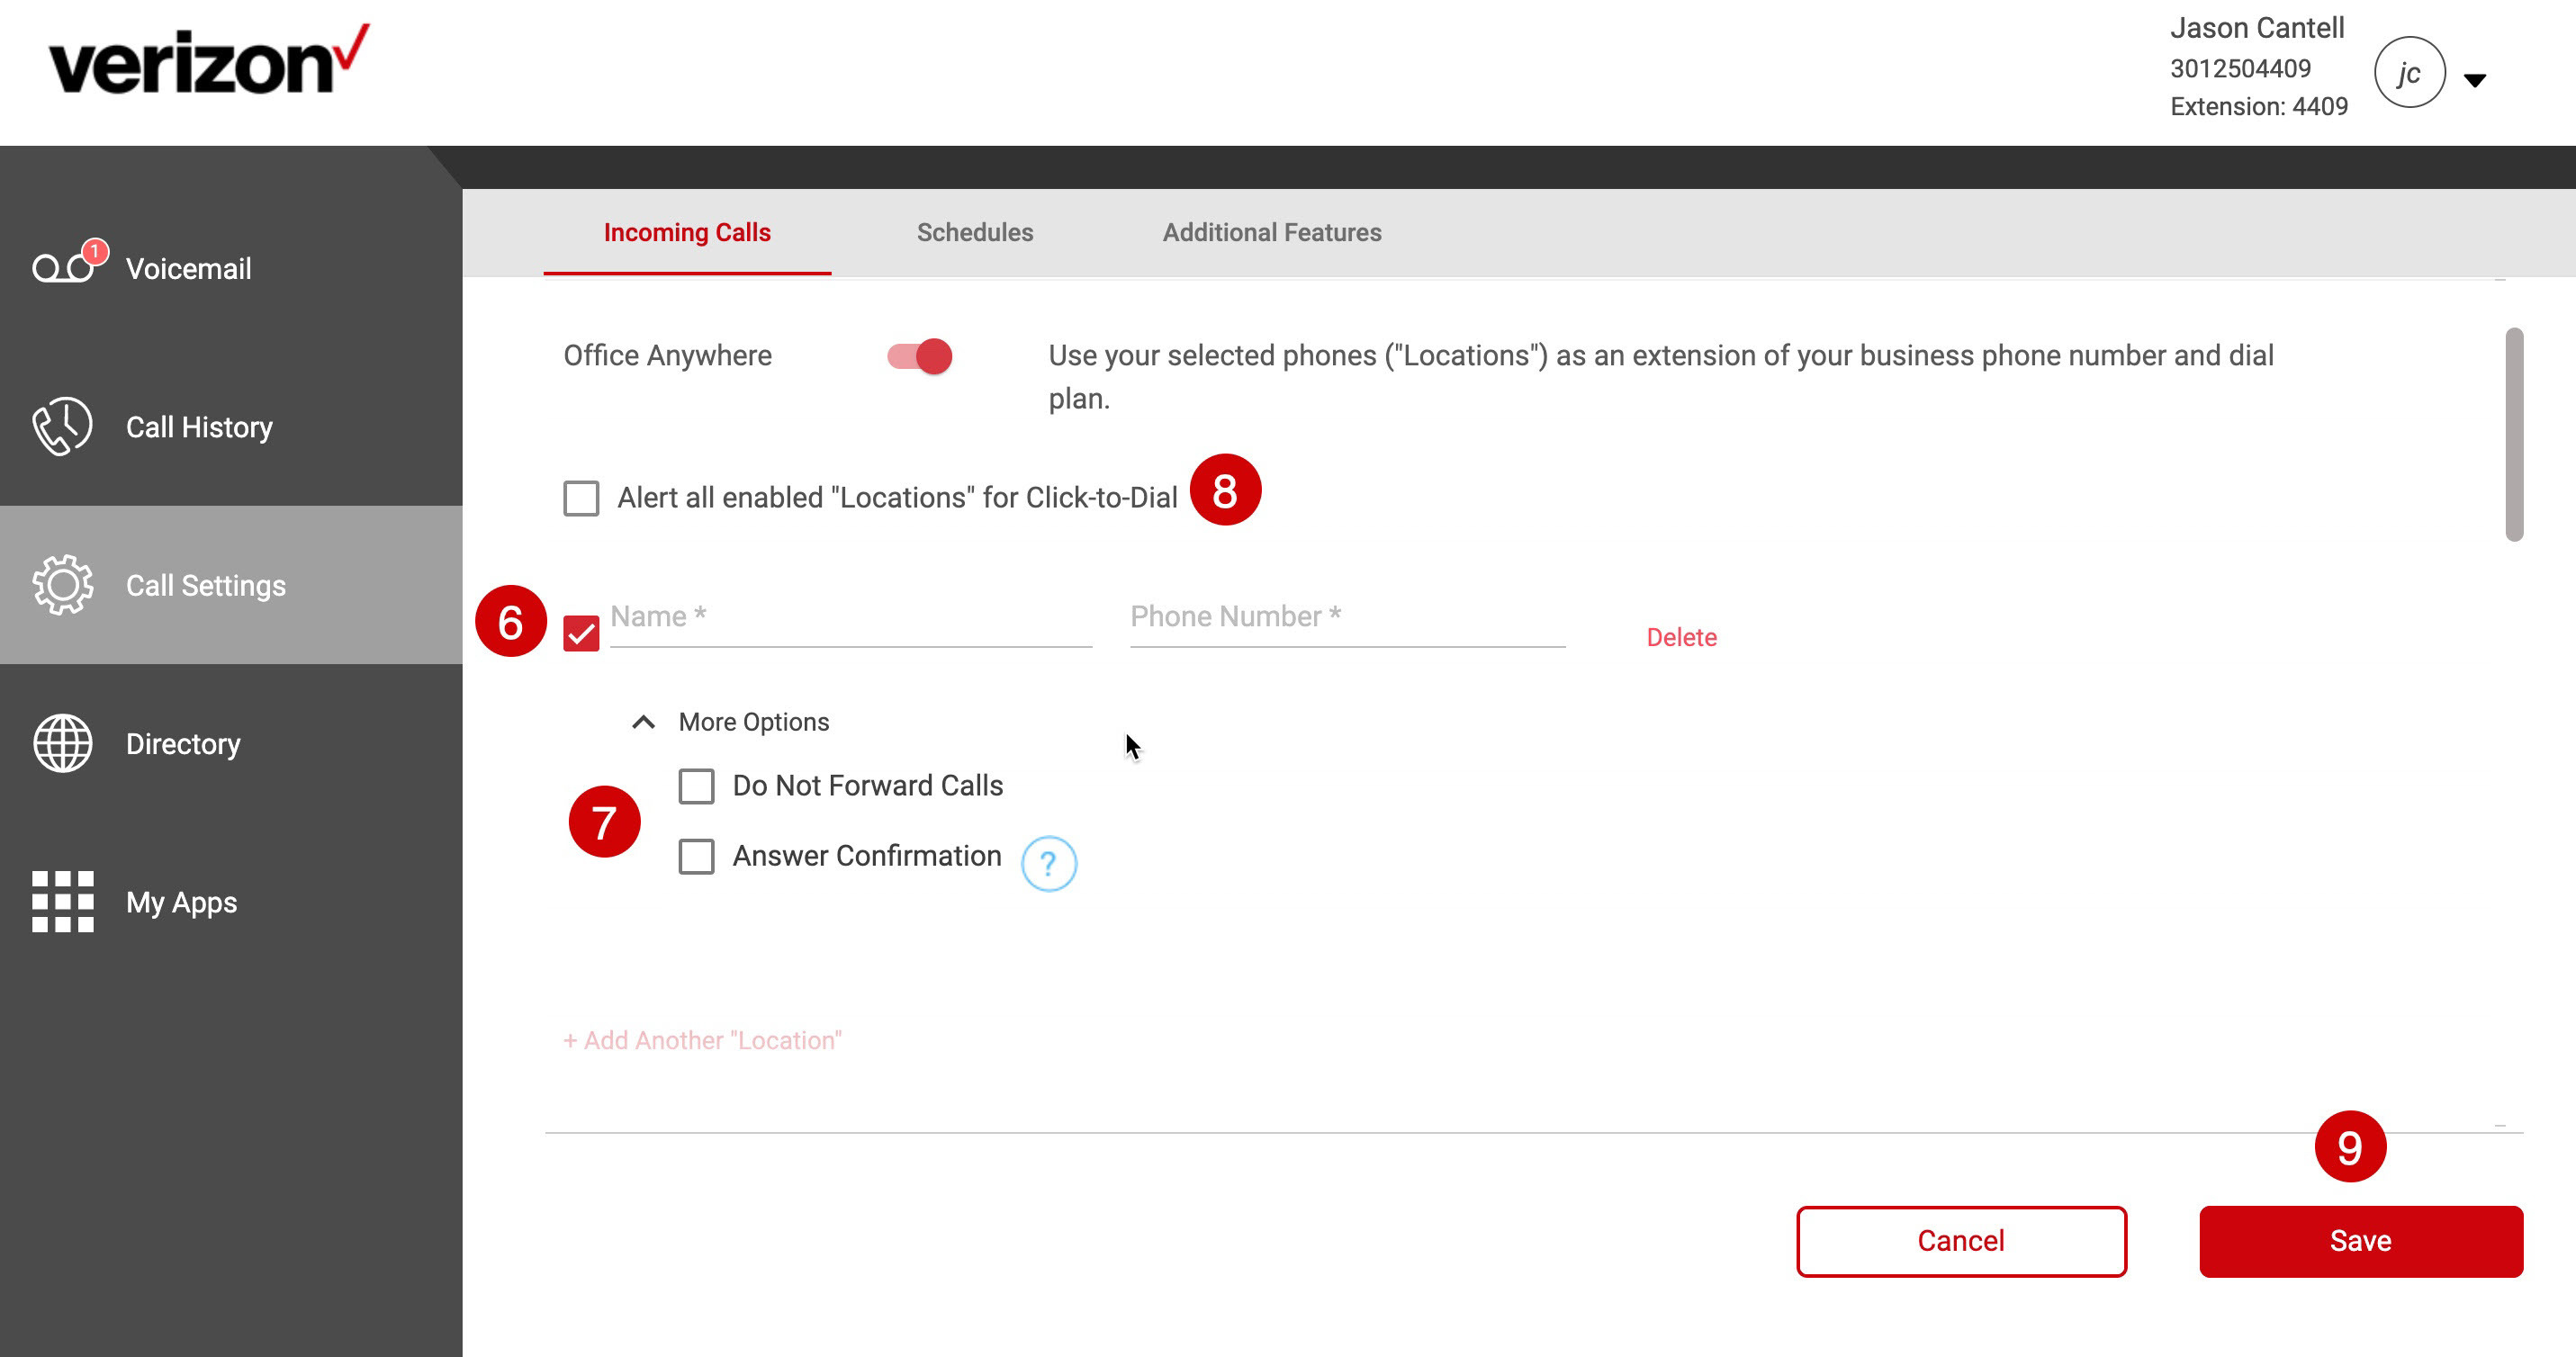
To set up the Office Anywhere feature:
- Sign in to the My Phone Next portal. You will see the Voicemail page when you first enter.
- Click the Call Settings menu option.
- Scroll to find the Office Anywhere feature.
- To enable this feature, click the toggle button to active. It should change from gray (inactive) to black (active).
- To add a device, click the Add Another “Location” link.
- When done, you should see the fields to input your name and phone number above that link. Please enter the information in the respective fields. This device is automatically activated as shown by the checkbox on the left.
- For each “Location: you add, you can enable specific options, including:
- Do Not Forward Calls: If enabling, a "do not forward request" is sent on the SIP Invite message. Most phone systems may not honor this message on the SIP Invite, so this feature may not have an effect on the call.
- Answer Confirmation: enabling this will have the call recipient press a key before being connected. This allows the recipient to know that a call was not sent to that direct line.
- If you would like all phones that have been set up as Anywhere phones to be alerted when you place Click-to-Dial Calls from the User Portal, select Alert all enabled “Locations” Click-to-Dial.
- Then, click the Save Button. You can now begin receiving calls on your configured Anywhere number.