


Phone installation for Yealink T33G
The following includes step-by-step instructions for how to install your T33 phones:
Introduction to the Yealink T33
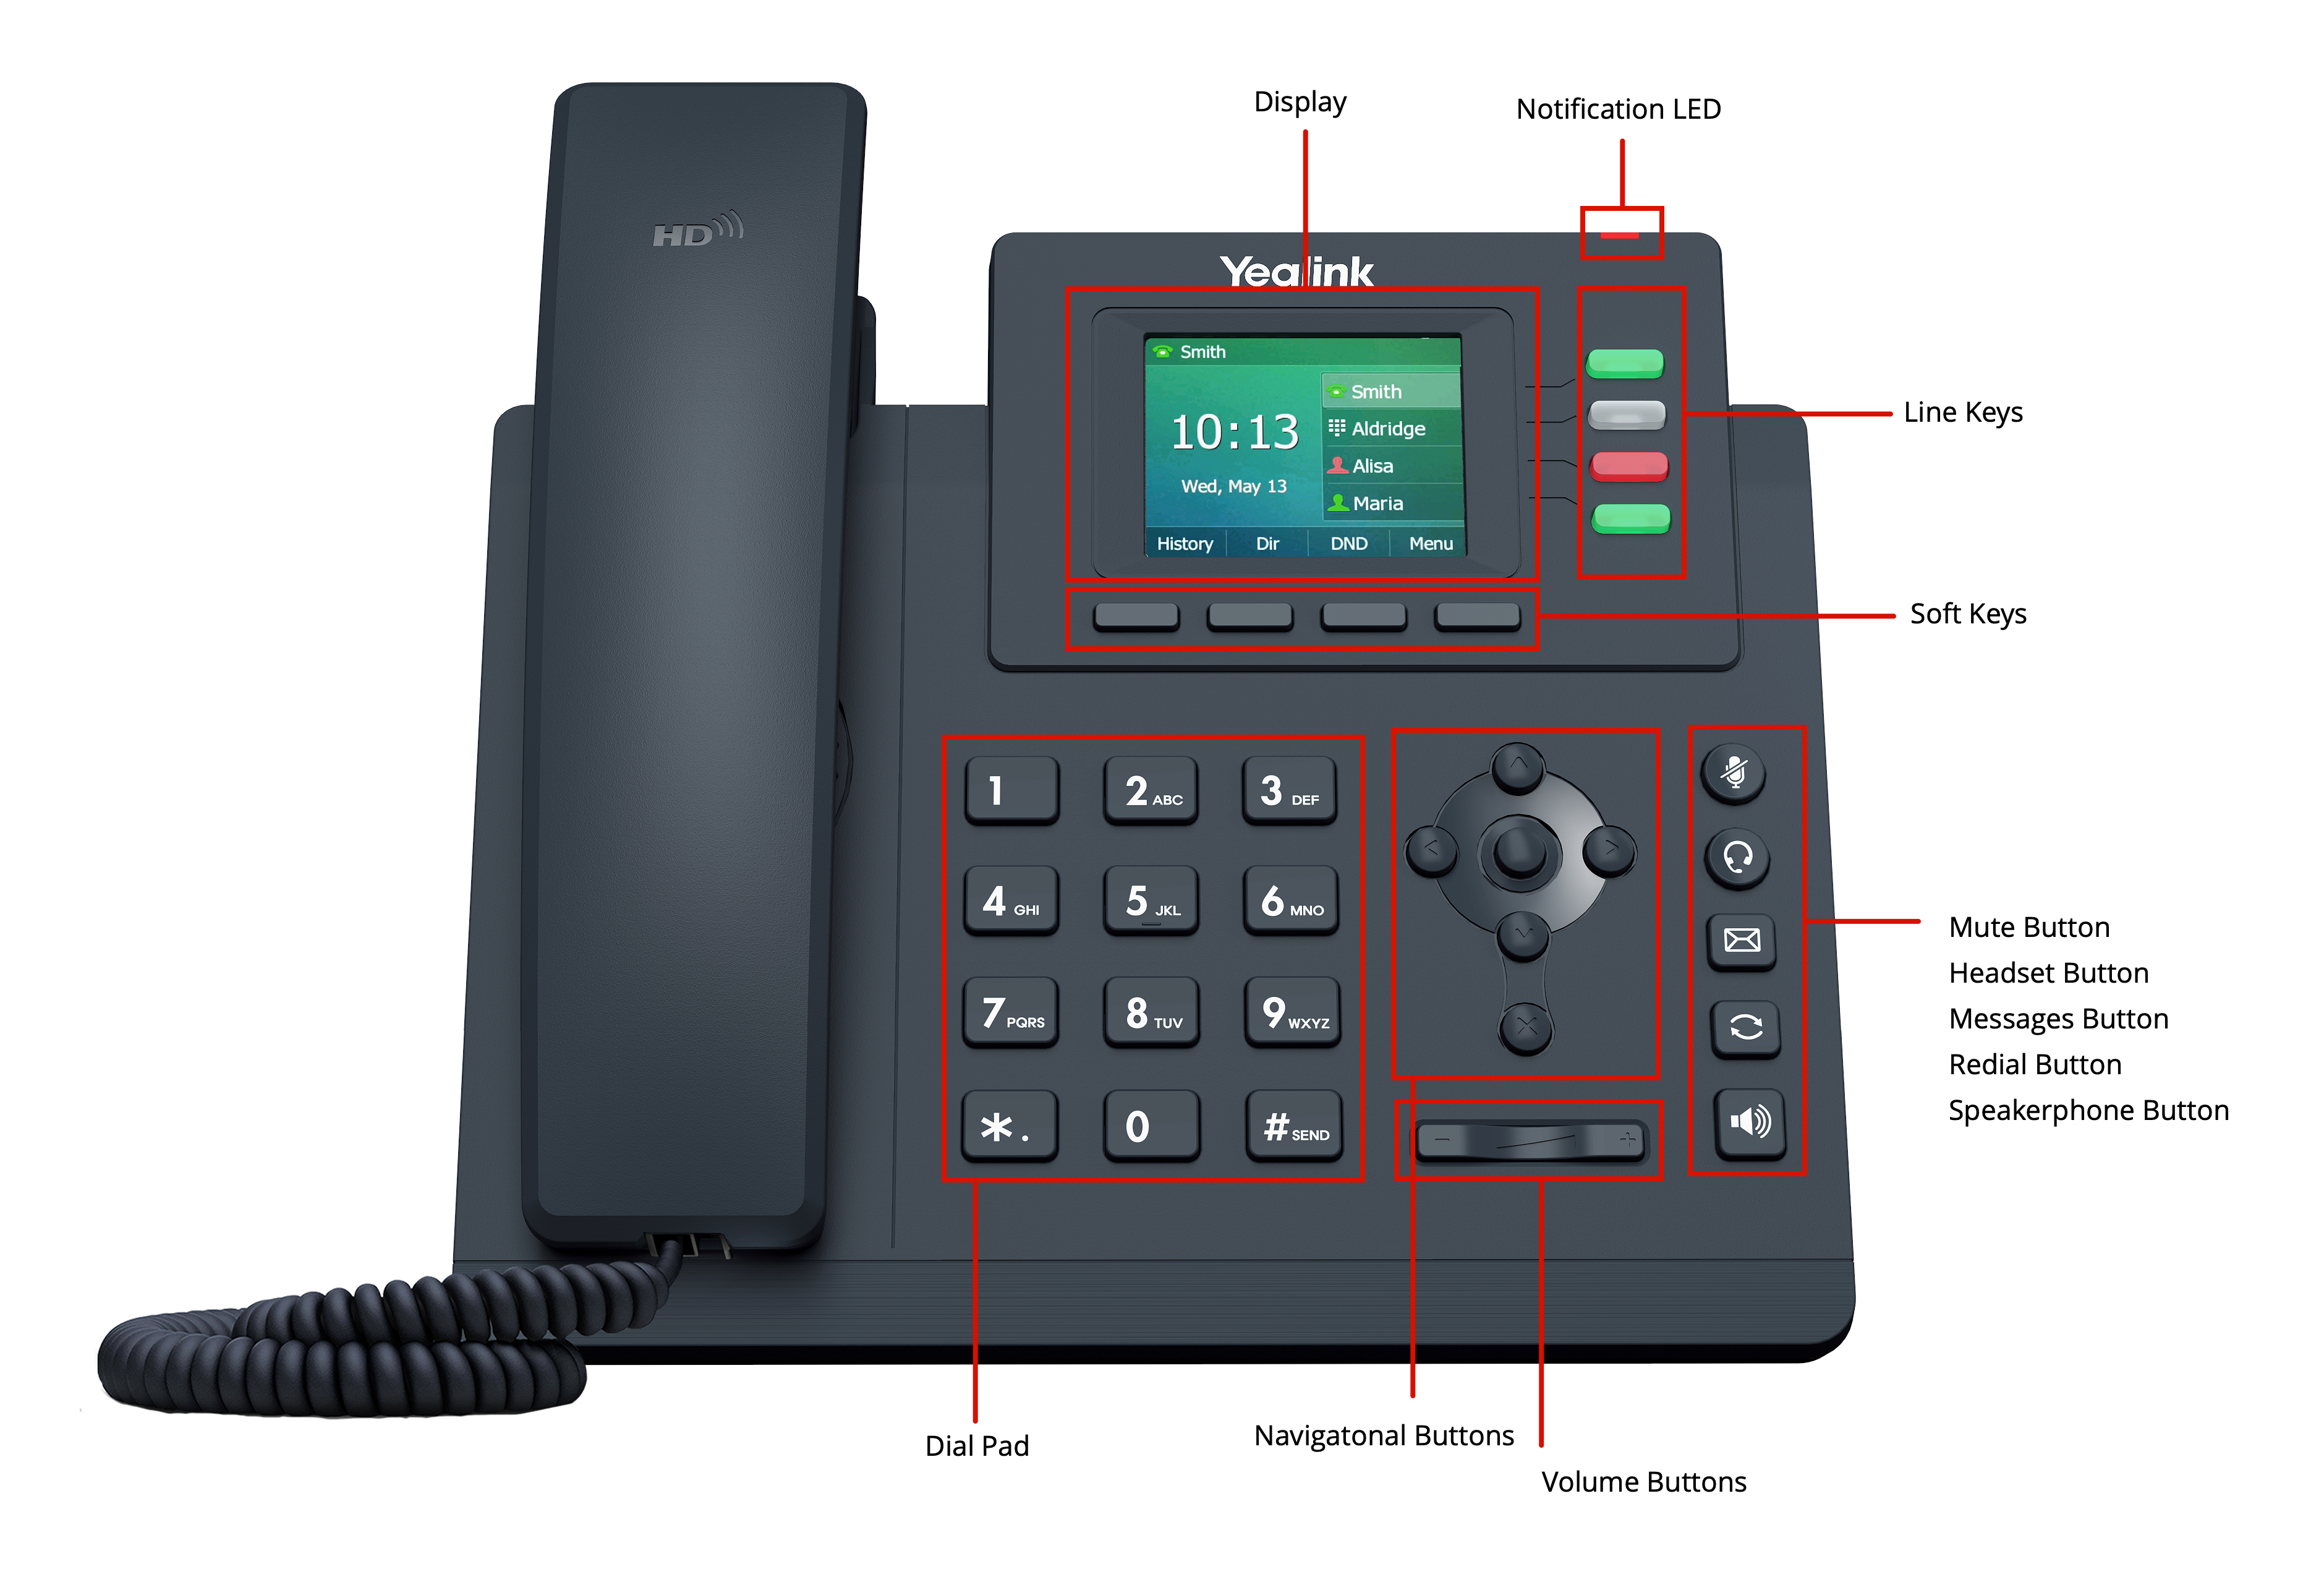
The Yealink T3 series provides distraction-free communications with Smart Noise Filtering Technology, which delivers excellent sound quality without extraneous noises and allows fluent conversations. The Yealink T33G supports up to four lines and includes local 5-way conferencing. The T33G has an extra-large 320x240-pixel color backlight display that brings users a comfortable operation experience with clear visuals. Designed with a new powerful chip, it helps greatly improve work efficiency.
Additional features include the following:
- Four LED Line Keys
- A dual-port Gigabit Ethernet with integrated PoE
- EHS35 support for Yealink wireless headset
- Adjustable multi-angle stand support
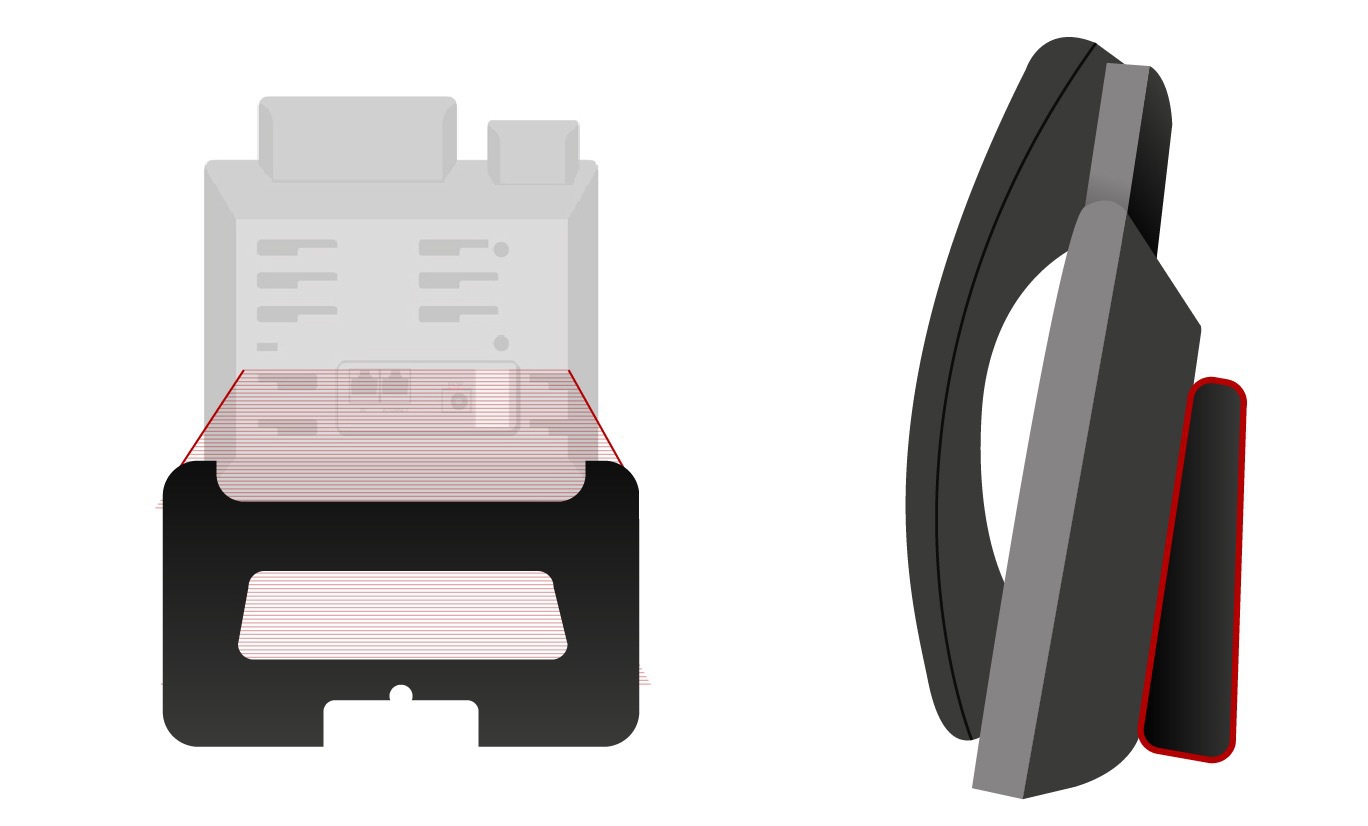
How do I attach the desk stand or wall mount?
Desk Stand

Wall Mount
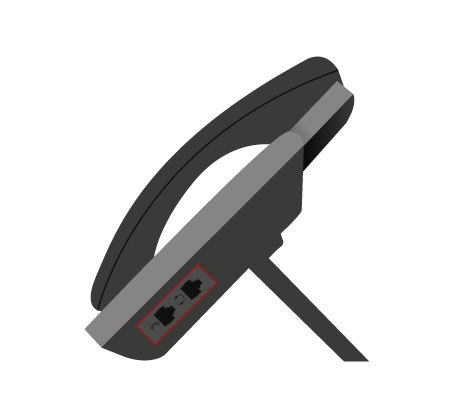
How do I connect the handset (and optional headset)?
Connect the handset by plugging in the handset cord into the bottom of the handset and then into the port located on the side of the phone where it is indicated with the handset icon. For the headset (optional), connect the cord into the headset port located on the side of the phone with the headset icon.
How do I connect the network and power?
You can connect your network and power using one of the following methods. See your system administrator to best determine which of the two power and network connection options to use:
- AC Power
- Power over Ethernet (PoE)
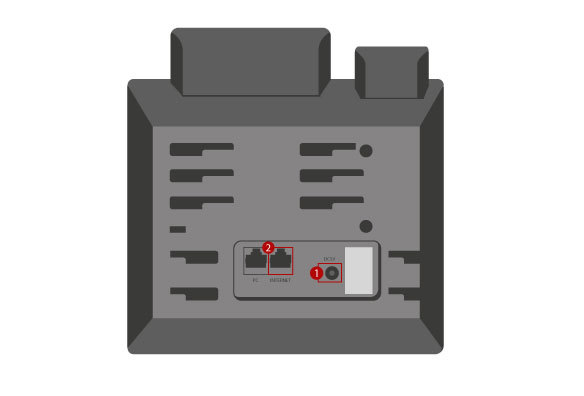
- AC Power:
- Connect the power adapter to the DC5V port on the phone. Then, plug the other end of the power adaptor into an electrical power outlet.
- Connect the Ethernet cable into the Internet port on the back of the phone and then into the wall or switch/hub device port.
Note: Only use the Yealink original power adapter (5V/1.2A). Using a third-party power adapter may cause damage to the phone.
- Power over Ethernet (PoE):
- Connect the Ethernet cable into the Internet port on the back of the phone and then into an in-line power switch/hub.
Note: Make sure the switch/hub is PoE-compliant. If in-line power is provided, do not connect the phone to the power adapter.
What happens during the phone initialization?
Once the phone is powered on, the system will perform the following:
- Automatic Phone Initialization: The screen will display “Welcome Initializing…please wait” while the phone finishes initialization by loading the saved configuration.
- DHCP (Dynamic Host Configuration Protocol): By default, the phone will attempt to contact the DHCP server in your network to obtain valid IPv4 network settings (e.g. IP address, subnet mask, default gateway address, and DNS address).