Yealink T33G phone user guide
This Yealink user guide reviews the basic functions you need to know to use the Yealink T33G desktop phone.
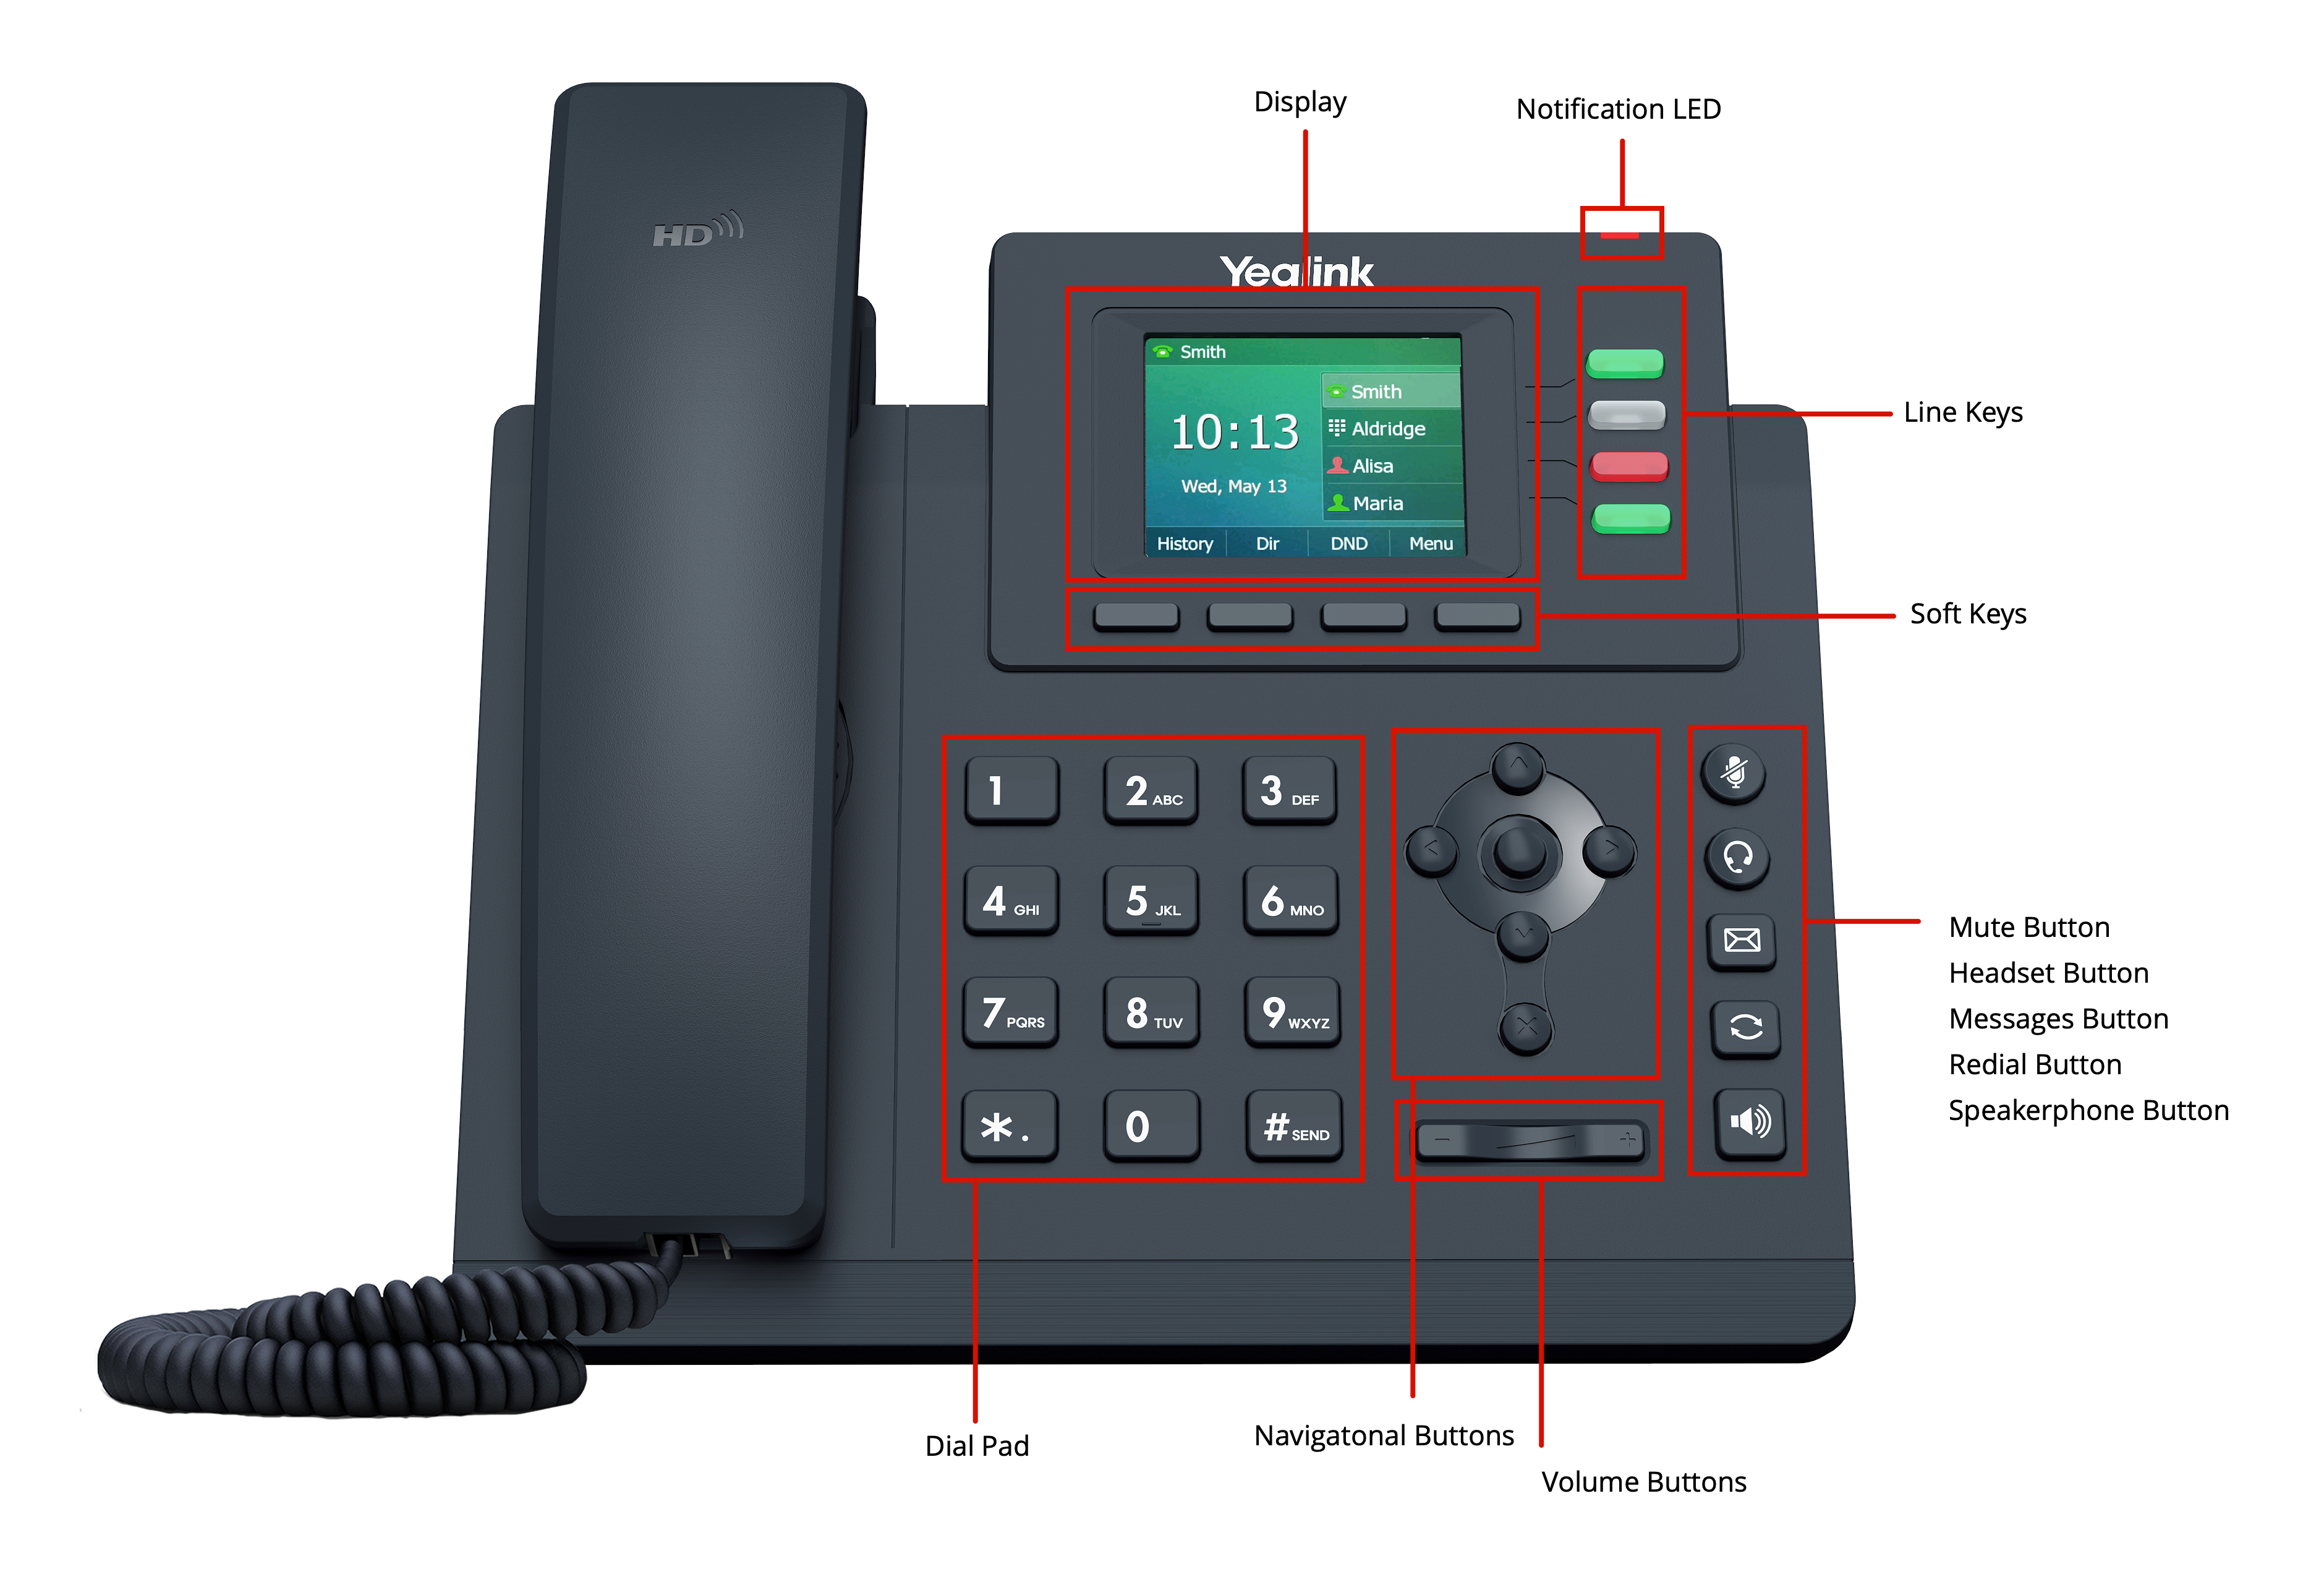
Introduction to the Yealink T33G
The Yealink T3 series provides distraction-free communications with Smart Noise Filtering Technology, which delivers excellent sound quality without extraneous noises and allows fluent conversations. The Yealink T33G supports up to four lines and includes local 5-way conferencing. The T33G has an extra-large 320x240-pixel color backlight display that brings users a comfortable operation experience with clear visuals. Designed with a new powerful chip, it helps greatly improve work efficiency.
Additional features include the following:
- Four LED Line Keys
- A dual-port Gigabit Ethernet with integrated PoE
- EHS35 support for Yealink wireless headset
- Adjustable multi-angle stand support
Placing calls
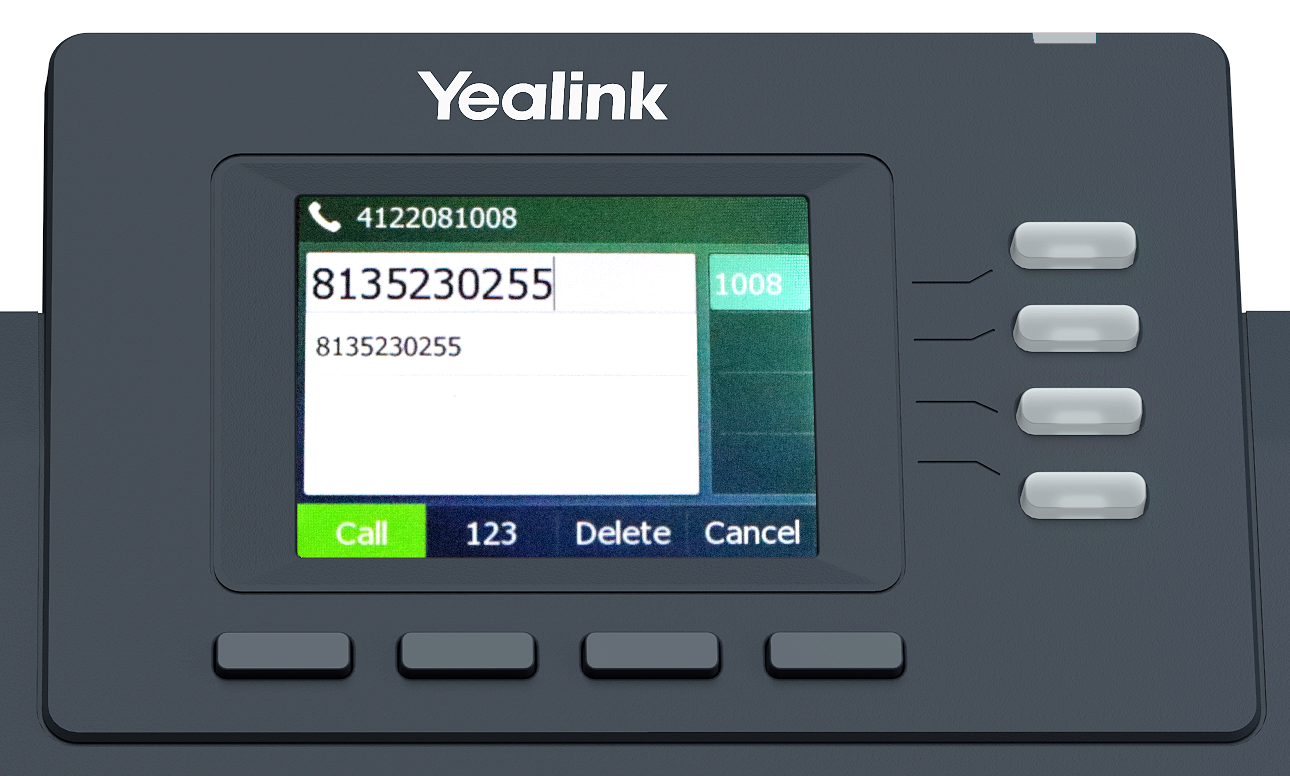
To place a call:
- Pickup the handset.
- Dial the number using the Keypad.
- Call is placed.
Placing a call on hold
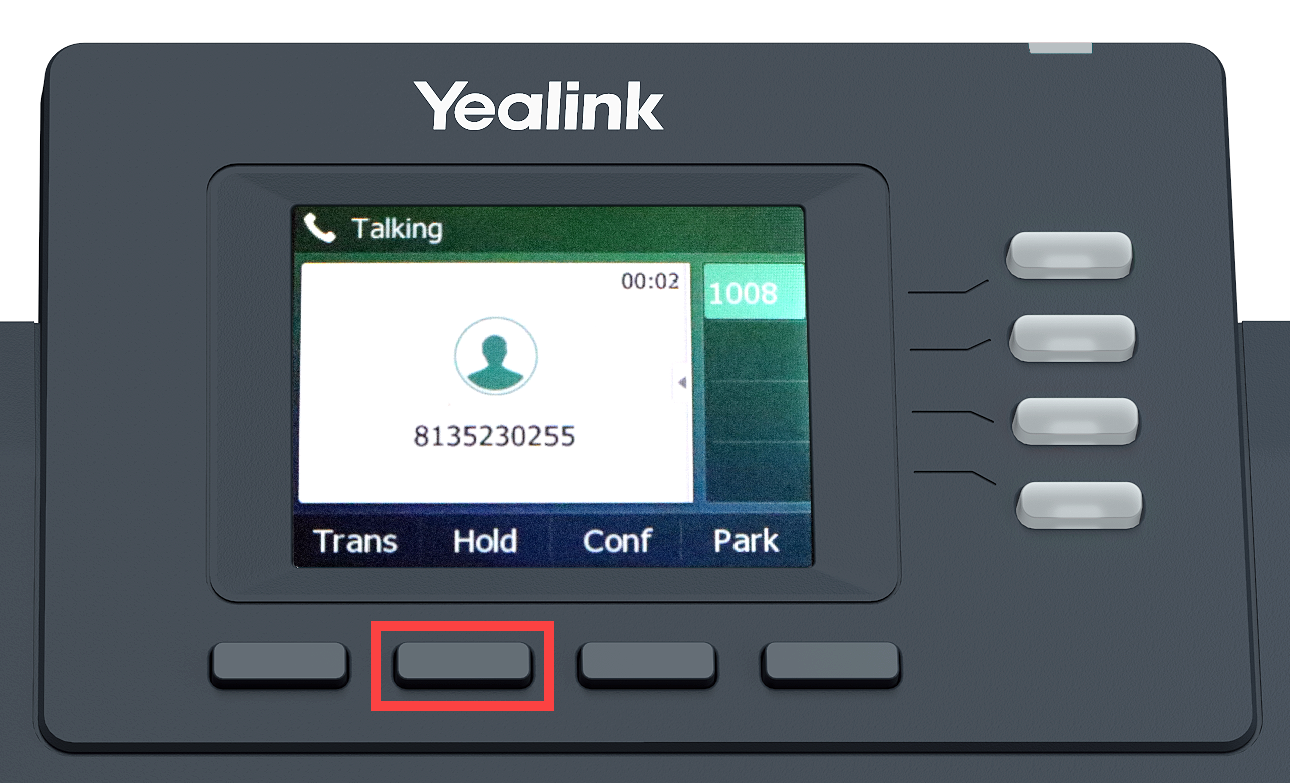
To Place a Call on Hold:
- When on an active call, press the Hold softkey.
- To resume the call, press the Resume softkey.
Conducting a transfer
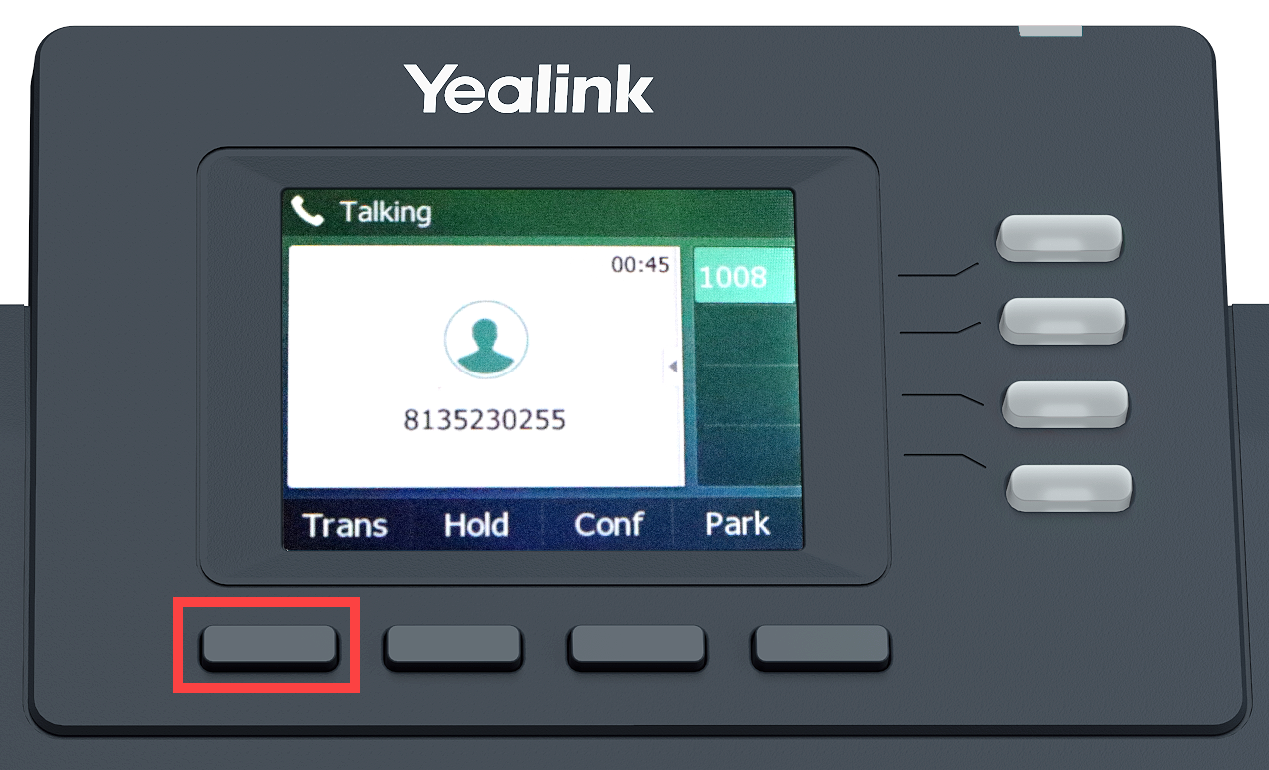
To Transfer a call:
- When on an active call, press the Transfer softkey.
- Enter the destination you wish to transfer the call.
- Then tap the Transfer softkey.
Conducting a blind transfer
A Blind (or unannounced) Transfer takes place when you transfer a call to someone else without announcing the call first.
To conduct a blind transfer while on an active call:
- Press the Transfer softkey.
- Enter the destination to which you wish to transfer the call.
- Then, press the Blind Transfer softkey.
Please Note: When performing a Blind Transfer, the caller ID of the transfer recipient will show the information of the contact who you are transferring.
Conducting a consulted transfer
A Consulted (or announced) Transfer is performed when you announce the call to the recipient prior to transferring the call.
To conduct a Consulted Transfer, while on an active call:
- Press the Transfer softkey. The caller is automatically placed on hold.
- Dial the receiving party.
- Press the Send softkey.
- Once the receiving party answers, announce the call.
- To complete the transfer, press the Transfer softkey again.
Please Note: When performing a Consulted Transfer, the caller ID of the transfer recipient will show your contact information, as you will be announcing the call first. If you prefer to transfer the caller ID as well, you should perform a Blind Transfer.
Conducting a voicemail transfer
A Direct-to-Voicemail Transfer is performed when you wish to transfer a call directly to another user’s Voicemail.
To conduct a Direct-to-Voicemail Transfer, while on an active call:
- Press the Transfer softkey. The caller is automatically placed on hold.
- Next, enter Star 55, and follow the audio prompts to complete the transfer.
Please Note: If your default transfer method is Consulted Transfer, you will need to perform a Blind Transfer to use the Direct-to-Voicemail option.
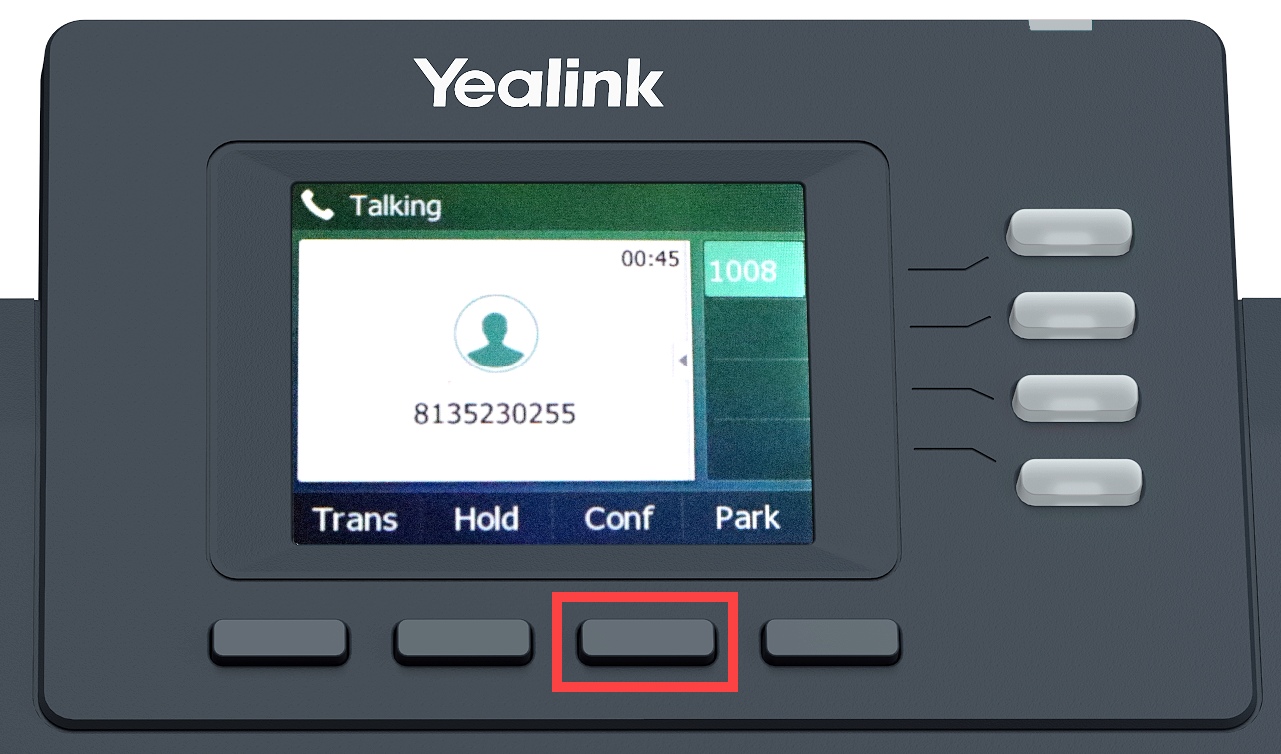
Conducting a conference call
To start a conference call:
- When on an active call, press the Conference softkey.
- Use the Keypad to dial the second number.
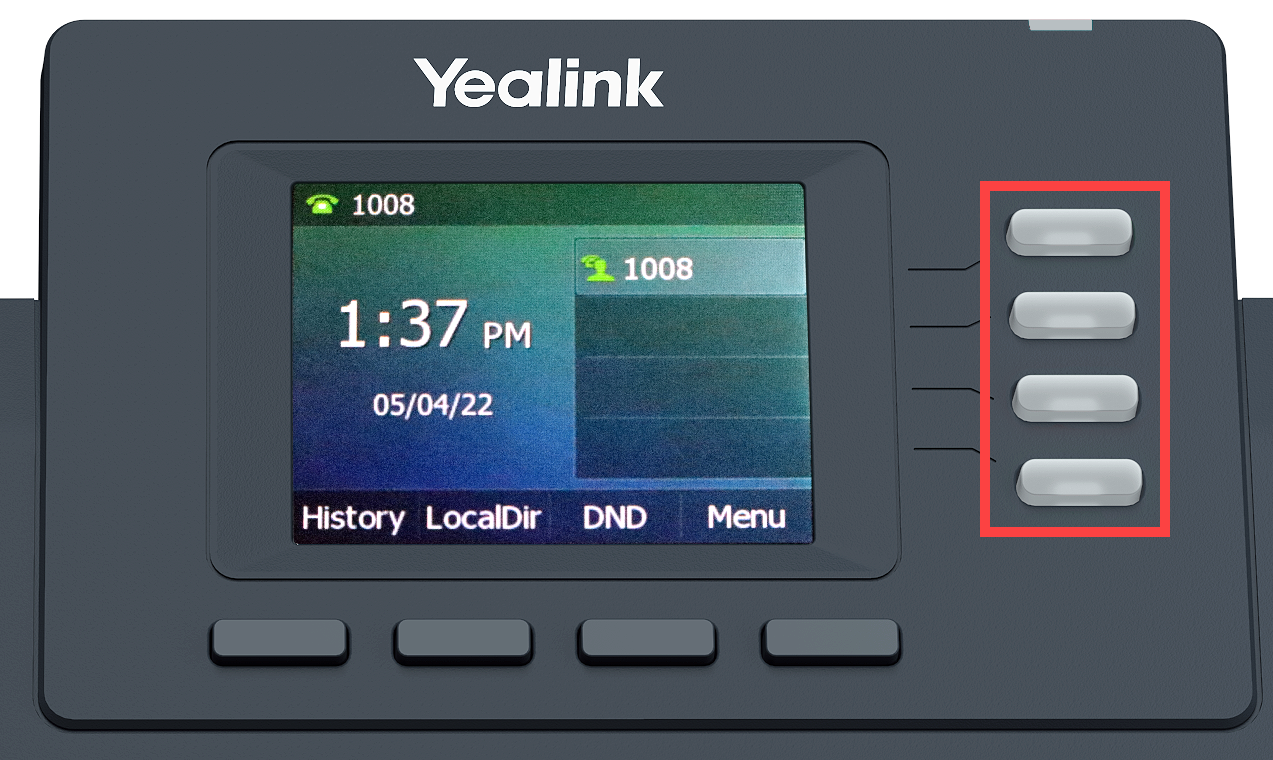
Assigning a DSS key
To assign a Direct Station Selection (DSS) key:
- Long-press the line key you would like to set up as a DSS key.
- Use the right and left arrows to choose the type of DSS key you would like to assign the line key.
- For this example, let’s choose to make this key a Speed Dial key. Press Save.
- Enter a phone number using the Keypad.
- Press Save.
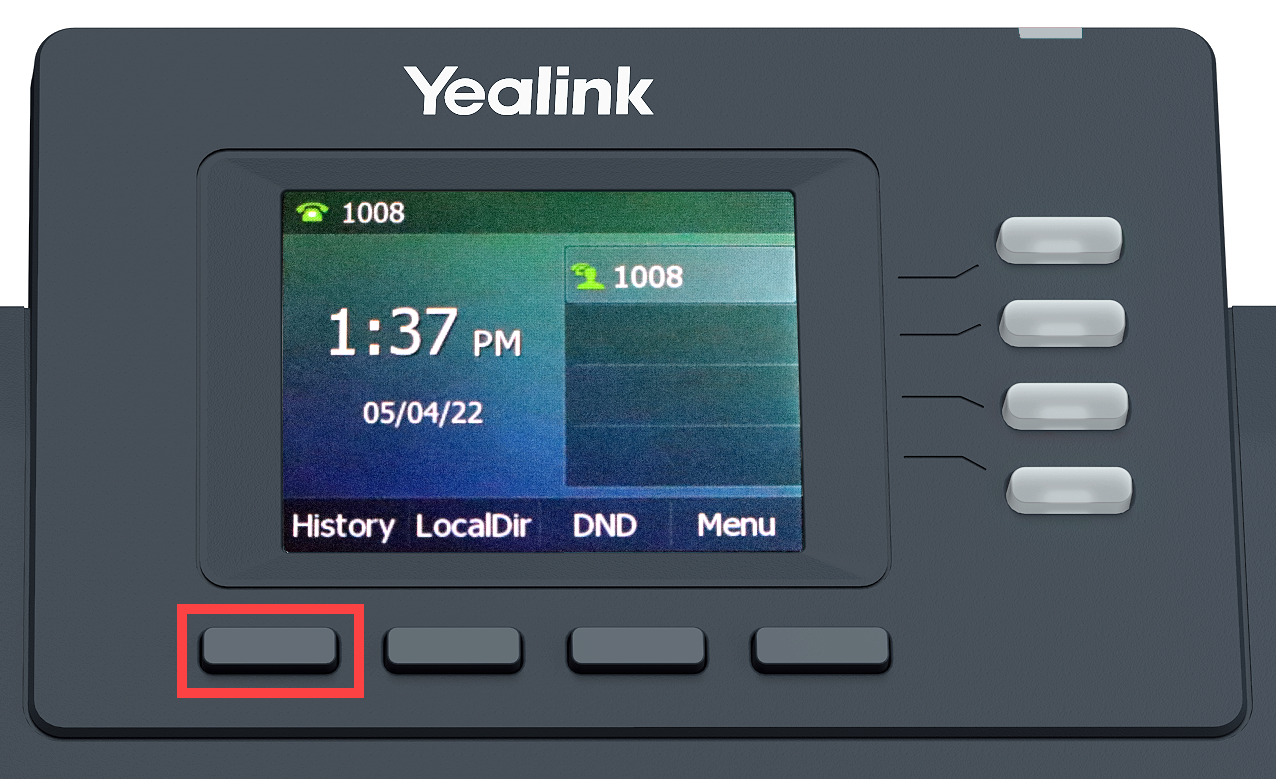
Viewing call history
To view call history:
- Press the History softkey.
- Use the Navigation Arrows to choose from All Calls, Missed Calls, Placed Calls, Received Calls, or Forwarded Calls.
- When finished, press the Back key to go back to the home screen.
Adding groups and contacts to the local directory
To add new groups and contacts to the local directory:
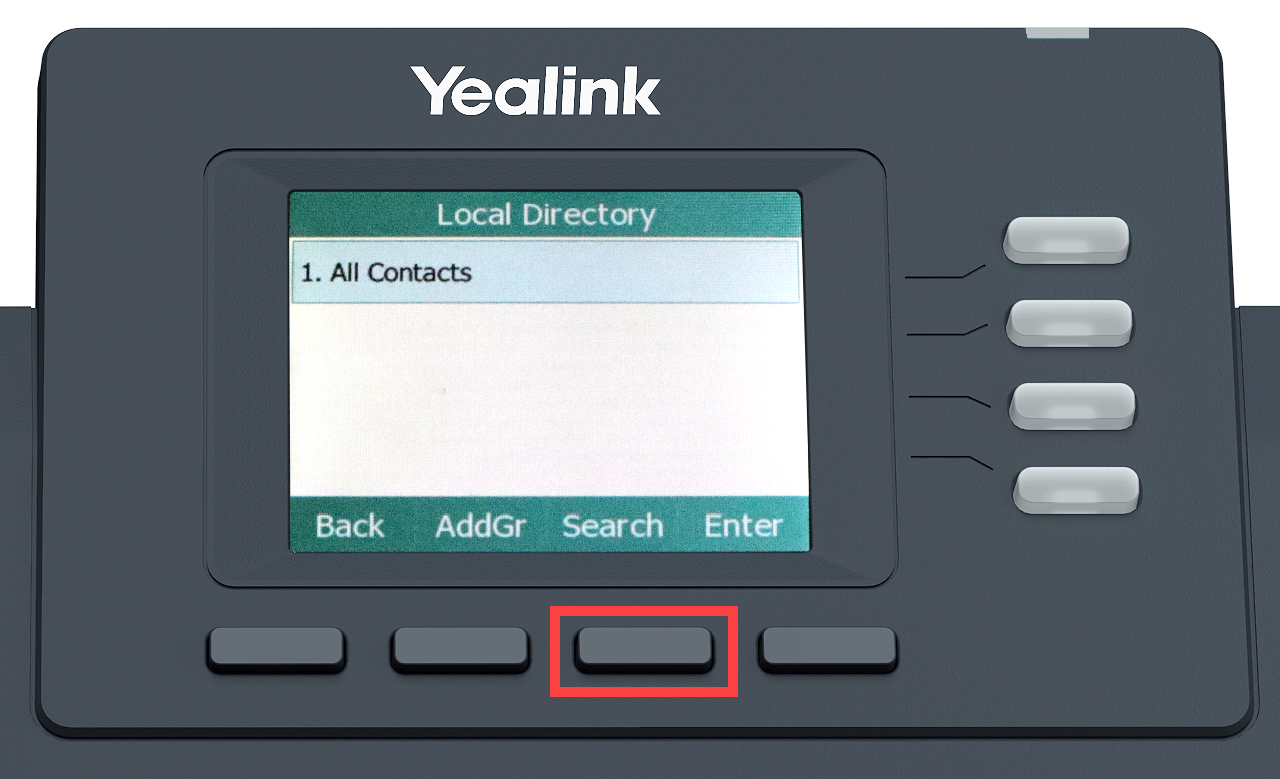
- Press the Local Directory softkey.
- Press the Add Group softkey to add a group to your Local Directory.
- Use the Keypad to enter the name of the group.
- Press Save.
- Now, let’s add a contact to the new group in the Local Directory. Use the Navigation Arrows to choose the group you would like to add a contact to.
- Press the Enter softkey.
- Press the Add softkey.
- Enter the Name using the Keypad.
- Press the down arrow to add additional information, like the office or mobile number.
- Use the Keypad to enter the phone numbers.
- Press Save.
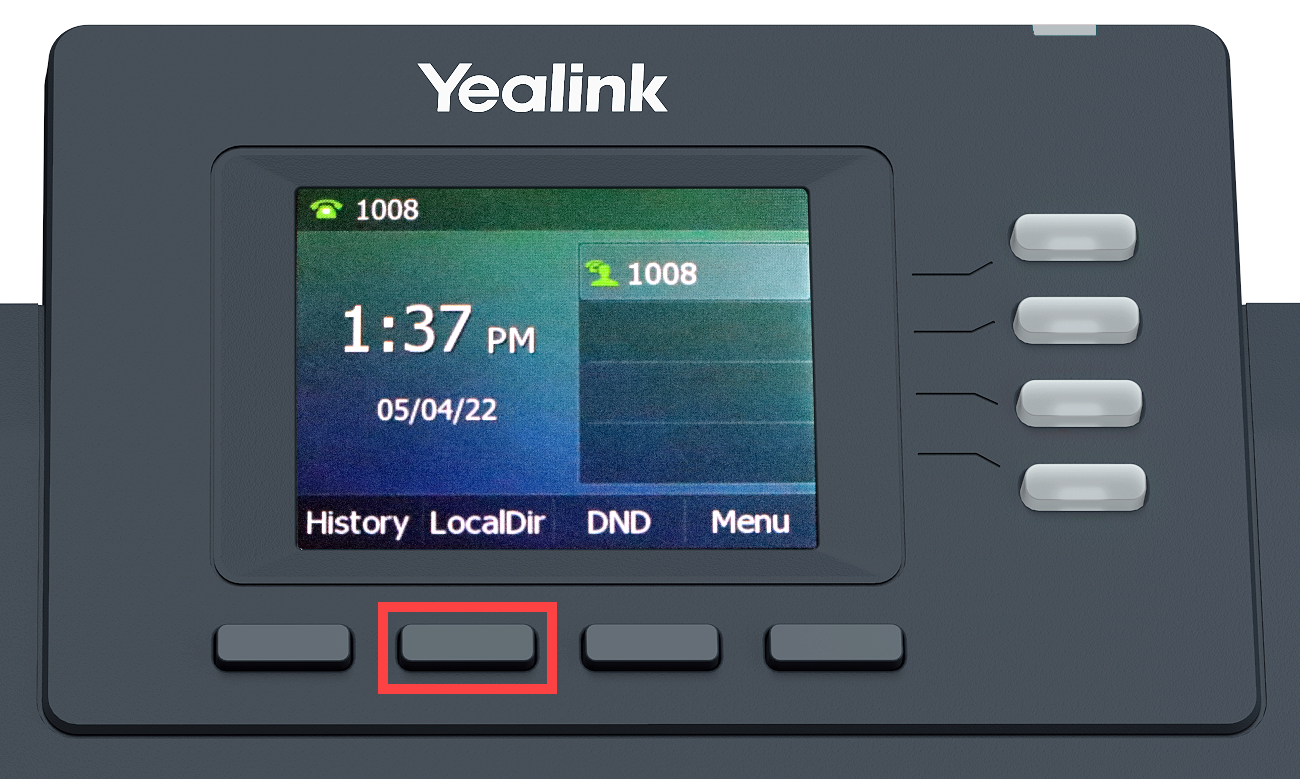
Searching the local directory
To search the local directory:
- Press the Local Directory softkey.
- Press the Search softkey.
- Press the Abc softkey to change the Keypad options for entering the name or phone number you would like to search for.
- Use the Keypad to enter the name or phone number you would like to search for.
- When the name or number appears, use Navigation Arrows to select it.
- Press the Call softkey to place a call to this contact.
- Or, press the Options softkey to see the Details, Delete, or Add to Blacklist options and make your selection.
Enabling and disabling do dot disturb (DND)
To enable or disable the DND feature:
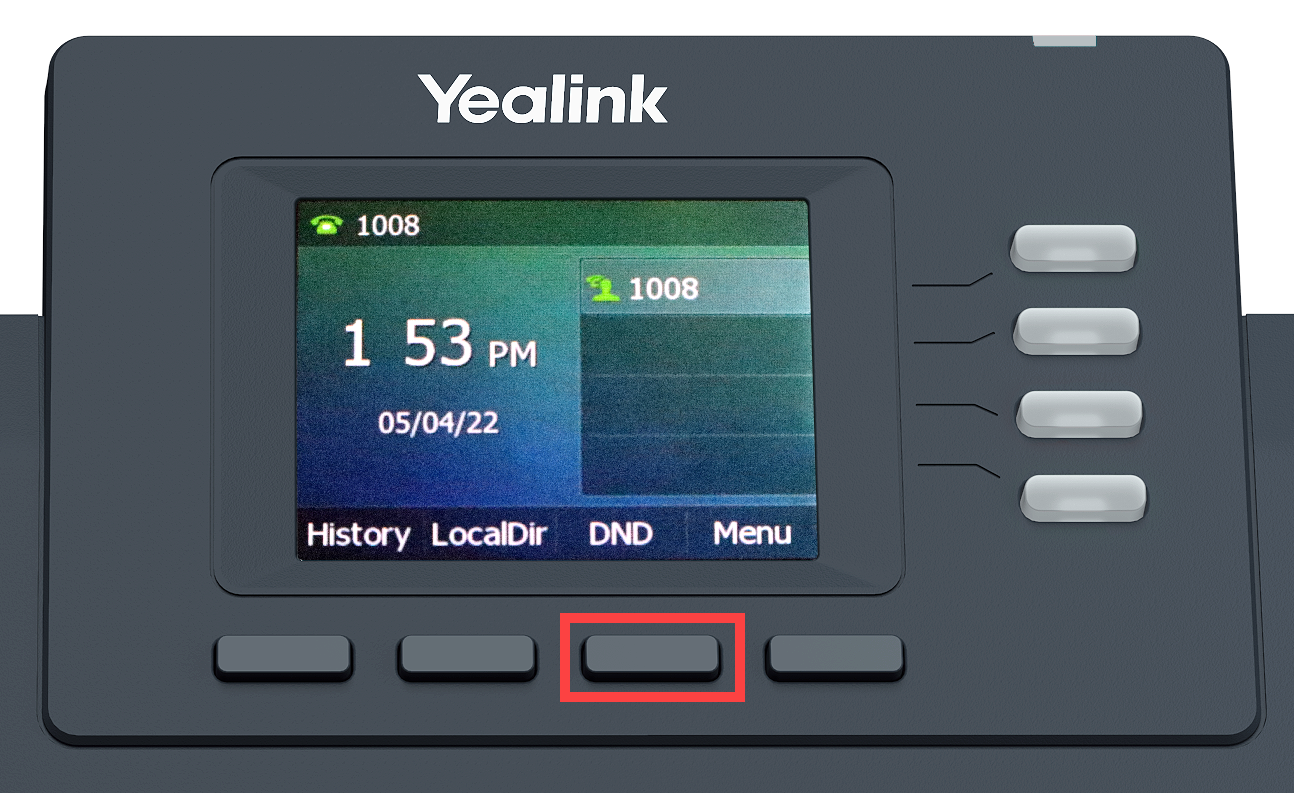
- Press the DND softkey. The DND icon appears, signaling DND is enabled.
- To turn DND off, press the DND softkey again. The DND icon is removed, signaling DND is disabled.
Setting up voicemail
To set up your Voicemail for the first time:
- Press the Messages key.
- Enter your default password and then the Pound (#) key.
- Enter your new passcode followed by the Pound (#) key.
- Confirm your new passcode, once again followed by the Pound (#) key.
- Record your name when prompted.
Accessing voicemail
A Message Waiting Indicator notifies you when you have a new voicemail message.
To check your voicemail:
- Press the Messages button.
- Enter your voicemail passcode followed by the Pound (#) key.
- Follow the audio prompts to retrieve your voicemail messages.
If you forget your voicemail passcode, please contact your system administrator to have it reset.
Navigating the menu
To navigate the phone's menu:
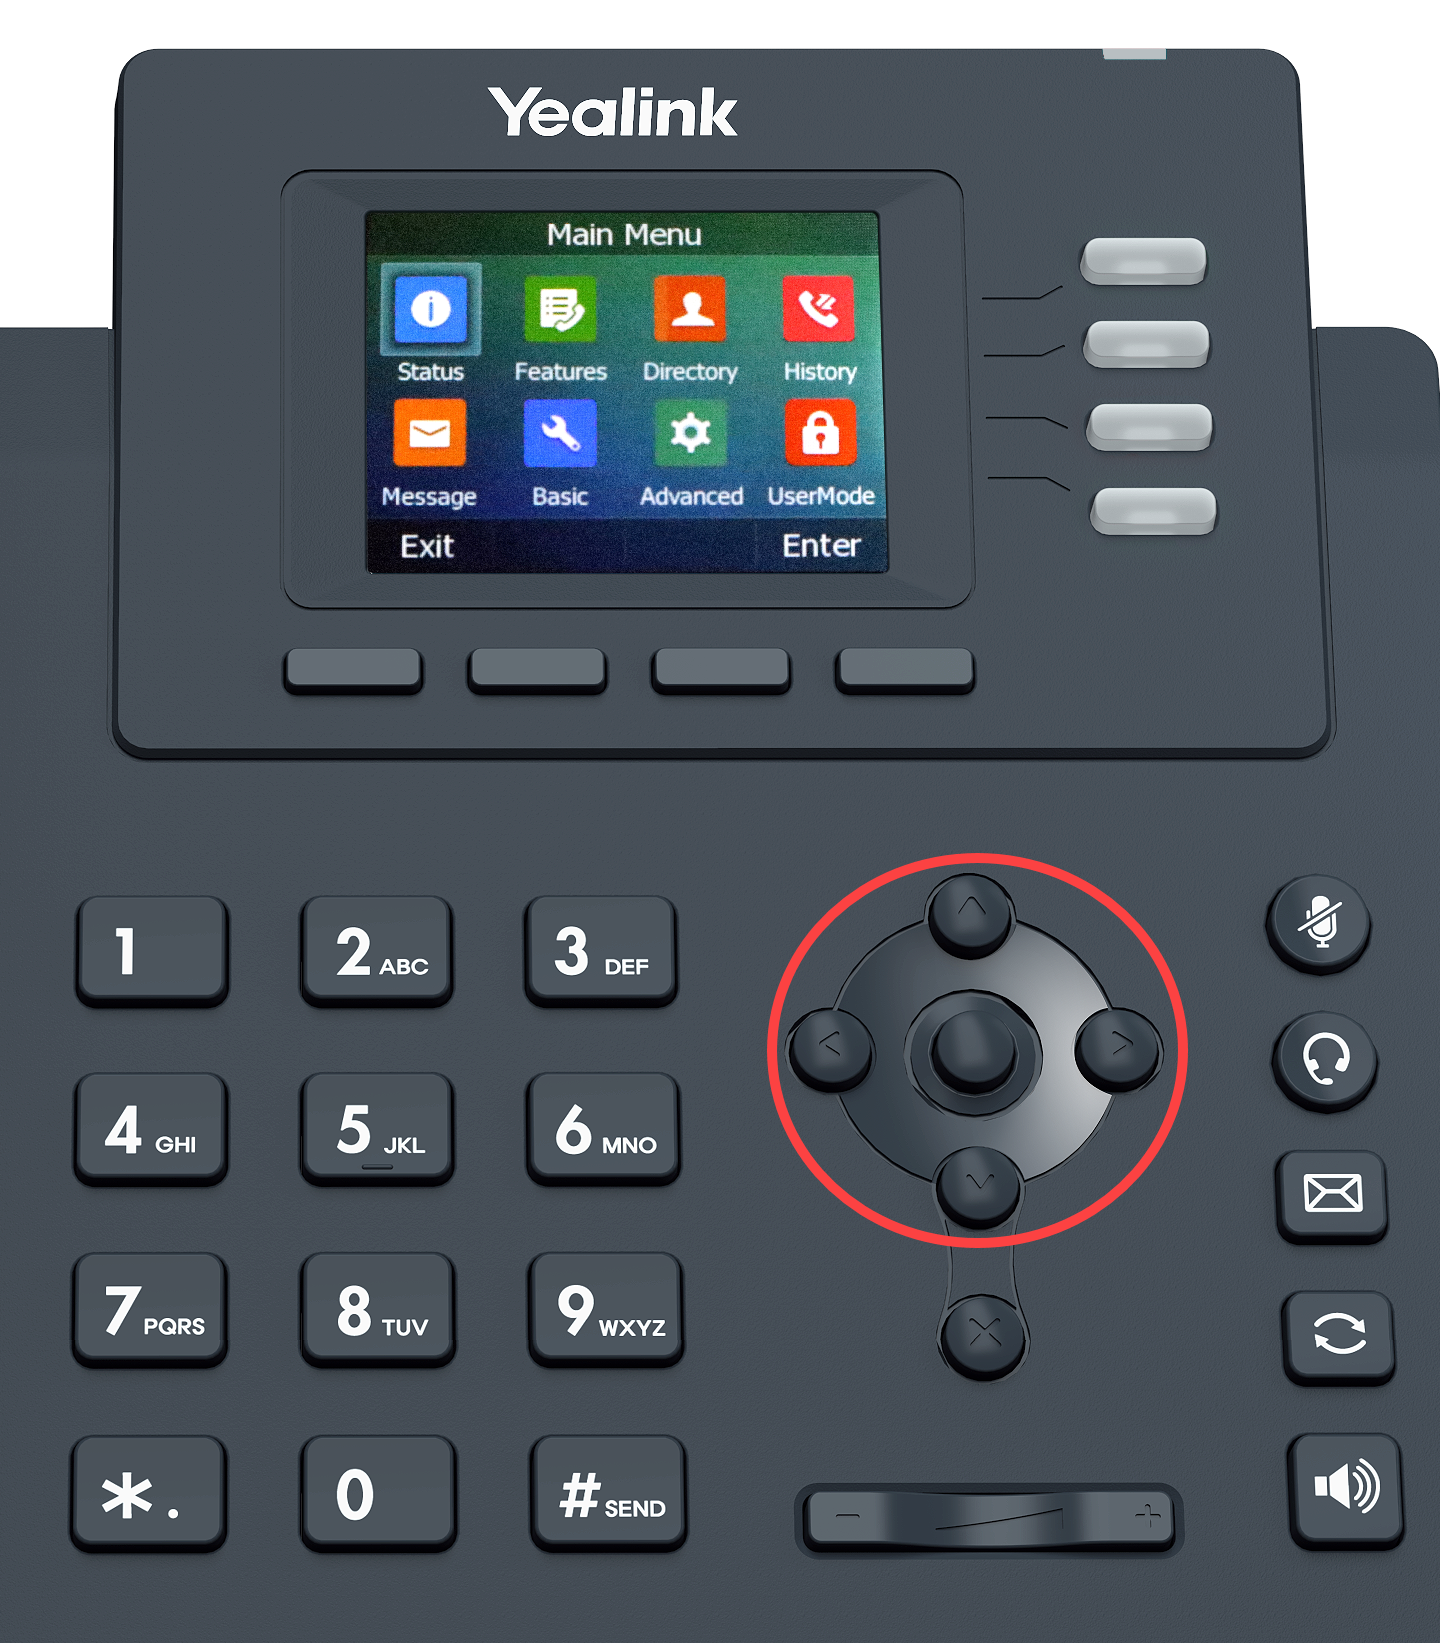
- Press the Menu softkey.
- Use the Navigation Arrows to choose from Status, Features, Directory, History, Messages, Basic, Advanced, or User Mode.
- To view or modify any of these settings use the Navigation Arrows to scroll and then press Enter.
Factory reset
- Hold down the OK button for 5 seconds while in idle status.