


Selective calls
Selective Calls is where you can create different rules to accept, reject, or forward certain calls based on the phone number or the person calling and/or the time of day and day of the week when the calls are received.
This feature can be configured from the User Portal found at the following URL:
https://businessdigital.verizon.com/myphonenext/
Introduction
Selective Calls is where you can create different rules to accept, reject, or forward certain calls based on the phone number or the person calling and/or the time of day and day of the week when the calls are received. You can also add Schedules that determine when your selective calls are active.
Note: Only the site administrator can setup users in the User Portal. Ask your site administrator if you do not have access into the User Portal.
Configuring selectively accepting calls
The Selectively Accept Calls feature allows you to create a rule to accept calls based on a pre-configured rule.
- From the User Portal, click the Call Settings page. Scroll down to Selectively Accept Calls.
- To enable Selectively Accept Calls, click on the toggle button to the right of the text. When it’s enabled, it will turn to color from gray-scale. To disable, click on the toggle button again, when disabled, it should change from color back to gray scale.
- Select a pre-defined schedule from the drop-down menu or create a new schedule by clicking the Add Schedule Button (see section on creating Schedules).
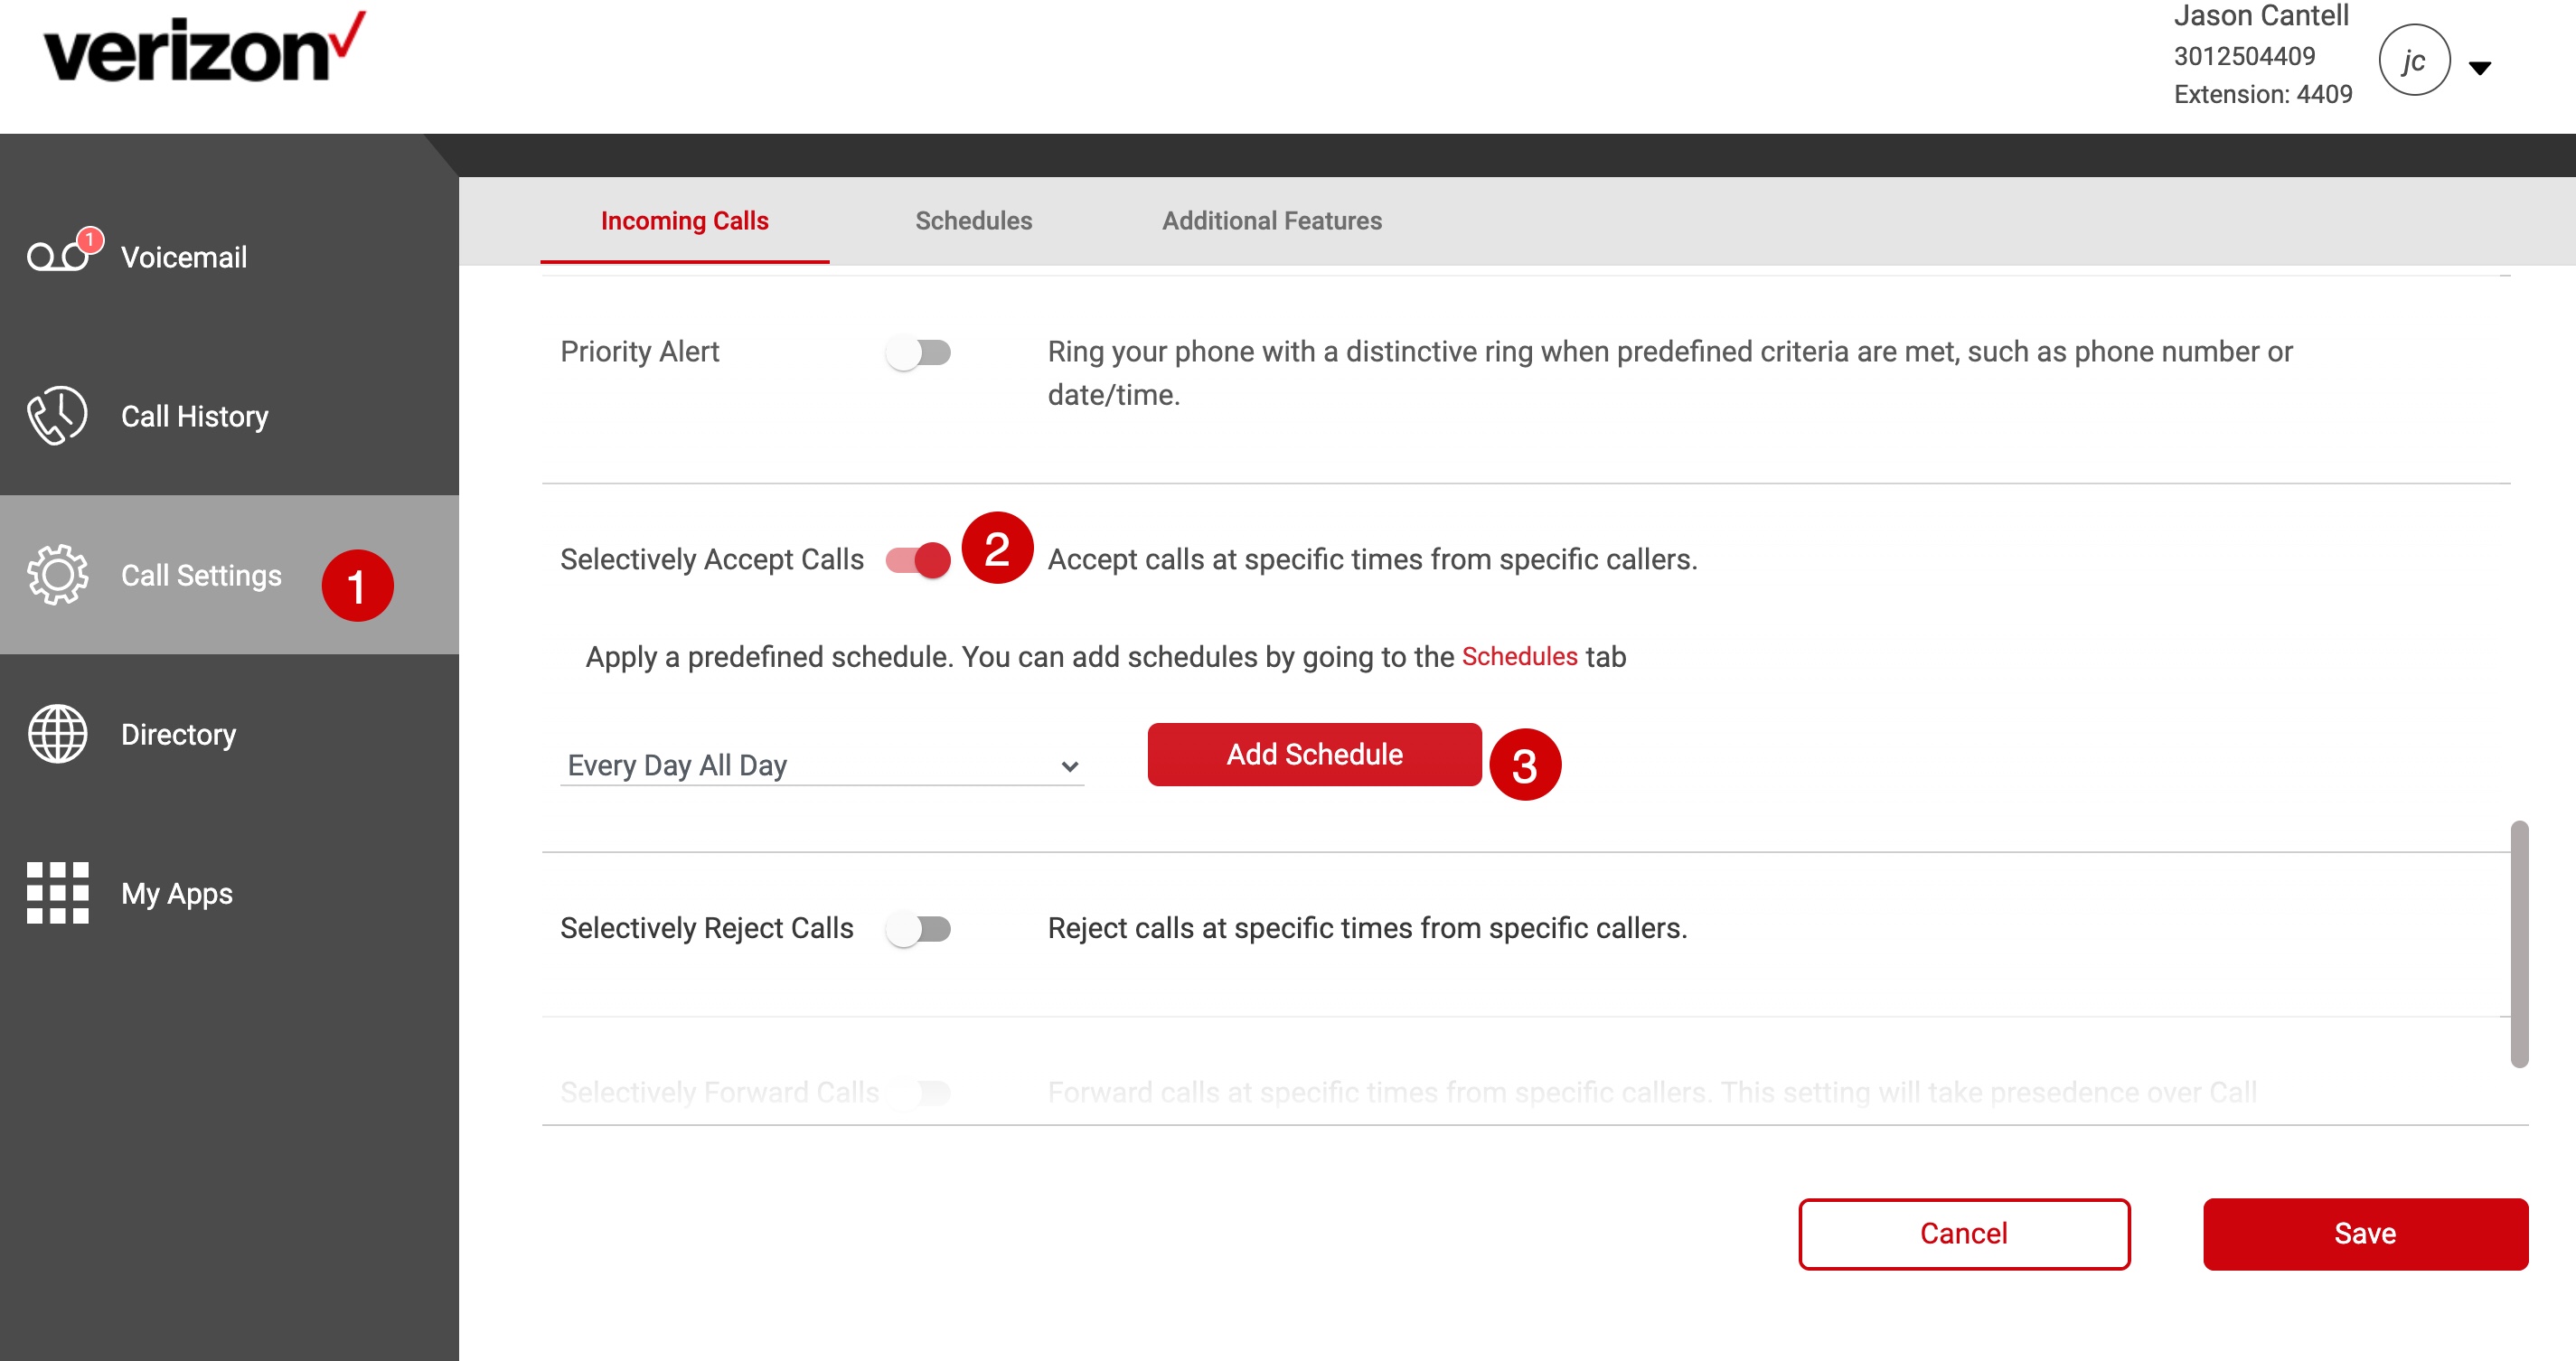
- Click the Save button.
Configuring selectively reject calls
The Selectively Reject Calls feature allows you to create a rule to accept calls based on a pre-configured rule.
- To enable Selectively Reject Calls, click on the toggle button to the right of the text. When it’s enabled, it will turn to color from gray scale. To disable, click on the toggle button again, when disabled, it should change from color back to gray scale.
- Select a pre-defined schedule from the drop-down menu or create a new schedule by clicking the Add Schedule button (see section on creating Schedules).

- Click the Save button.
Configuring selectively forward calls
The Selectively Forward Calls feature allows you to create a rule to accept calls based on a pre-configured rule.
- To enable Selectively Forward Calls, click on the toggle button to the right of the text. When it’s enabled, it will turn to color from gray scale. To disable, click on the toggle button again, when disabled, it should change from color back to gray scale.
- Input a valid phone number.
- (Optional) To send calls to an internal voicemail, enter the internal extension number and select the Send to voicemail checkbox.;
- Select a pre-defined schedule from the drop-down menu or create a new schedule by clicking the Add Schedule button (see section on creating Schedules).


Adding a new schedule
Schedules allow you to apply specific call settings at different times of the day or week.
- From the User Portal, click the Call Settings page.
- Click the Schedules tab.

- Enter the Schedule Name.
- Select the appropriate Start Date/Time and End Date/Time. If applicable, mark All Day Event or Repeat.
- Click Save.
