Admin portal: Voicemail and fax
Feature prerequisites
Configuring voicemail for a user
Settings
Voice messaging
Fax messaging
Message storage
Greetings
Voicemail and fax
Administrators can set up and modify a user's voicemail and fax messaging options within the admin portal. With this feature, users users can retrieve voice and fax messages via the end user portal. Voicemails are sent in .wav format, and faxes are sent in .tiff format. Optionally, notifications can be sent to a mobile phone via text or email.
This guide reviews the following help topics related to configuring voicemail and fax messaging for a user within the admin portal:
Feature prerequisites
Before the voicemail feature can be used, the user must have a station assigned to them with at least one in-bound number.
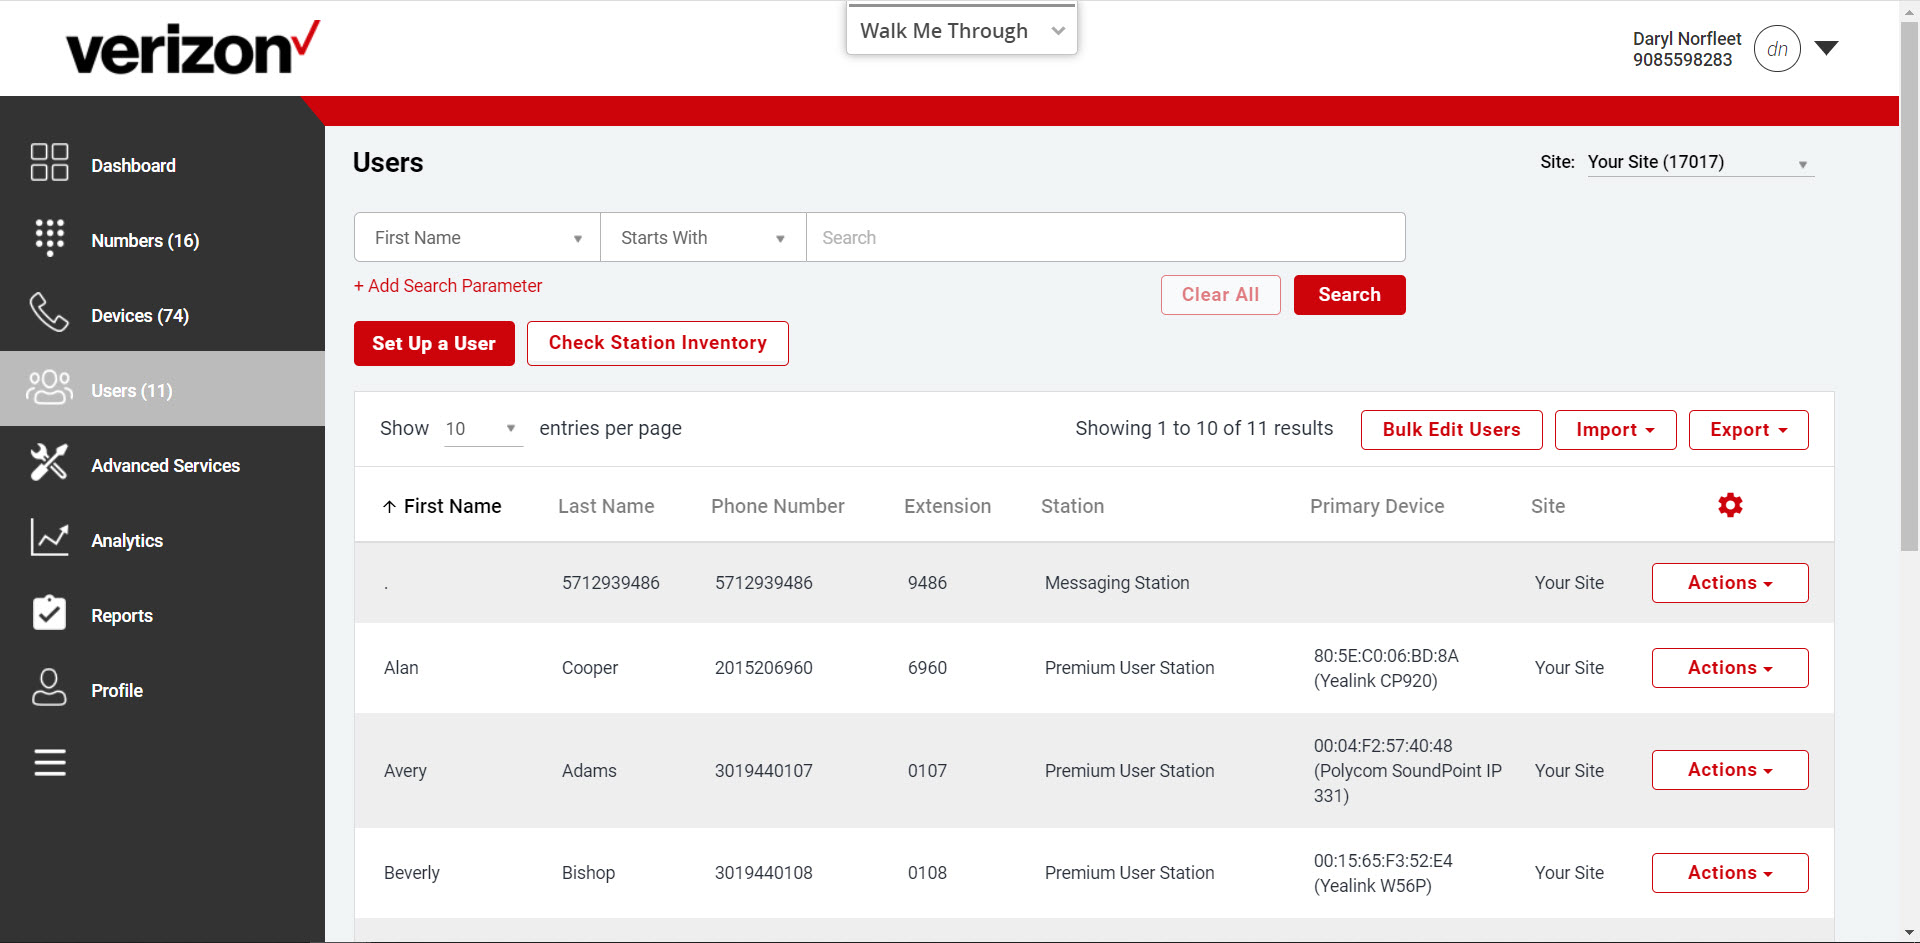
Configuring voicemail for a user
- Log in to the admin portal.
- Select your site from the drop-down menu.
- Select Users from the left menu.
- Select the Actions drop-down menu and then Edit next to the user you would like to modify.
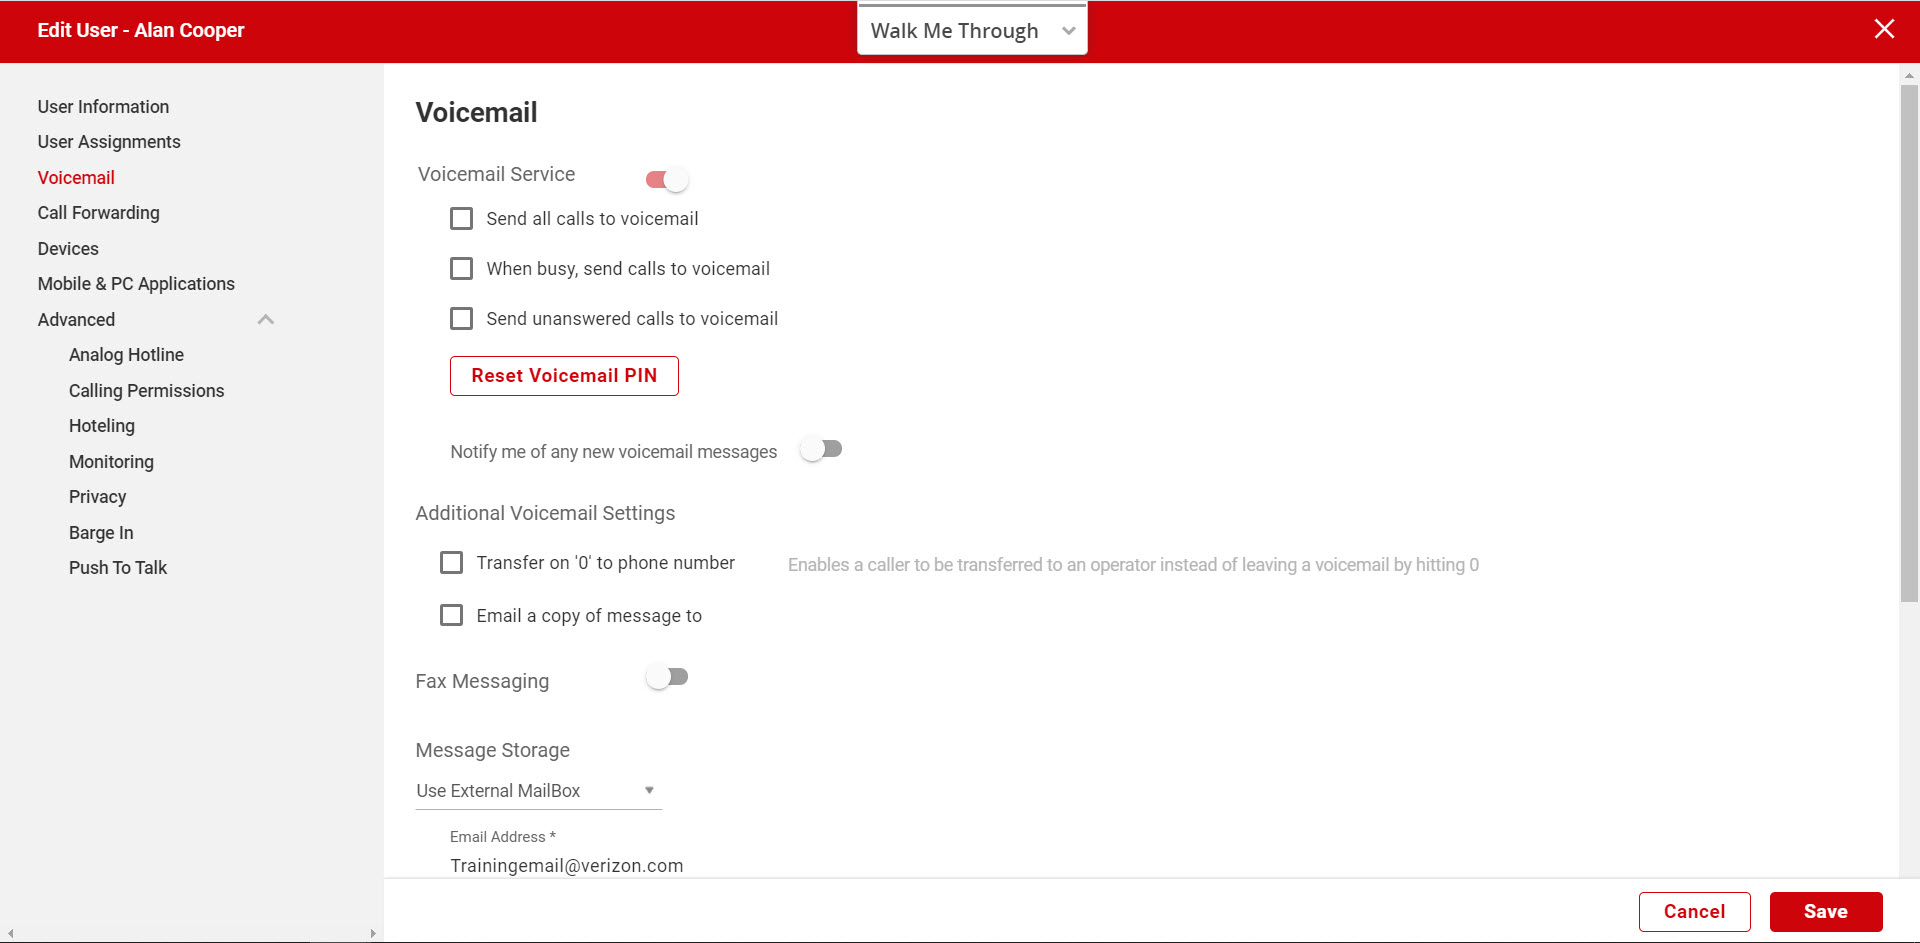
- On the Edit User page, select the Voicemail tab.
Settings
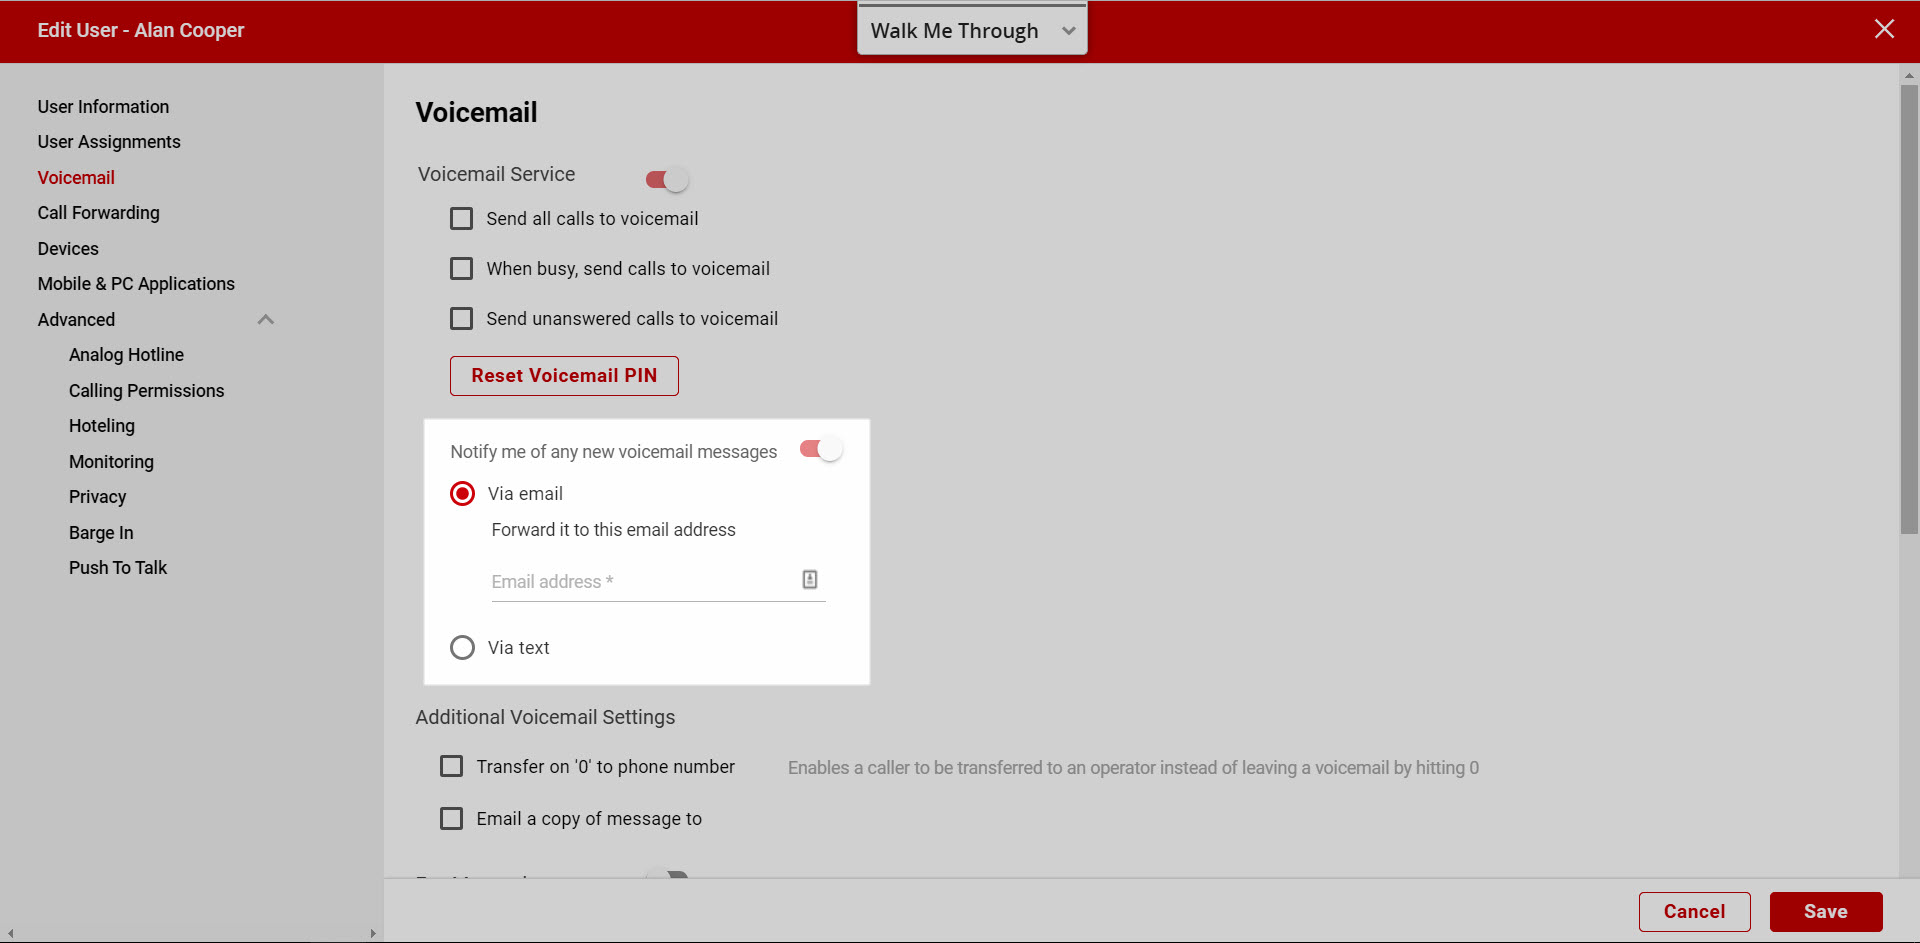
- Select the Notify me of any new voicemail messages and then select:
- Via email – Enter the email address that should receive an alert when there is a message (voicemail and fax).
- Via text – Enter the mobile number and select the wireless provider from the drop-down list.
- Next, check Send a copy of all new messages to another email address and enter the address, if applicable.
- Check Transfer on 0 to phone number and enter a phone number where callers can transfer from voicemail by dialing 0, if applicable.
- If enabled, enter the destination to which calls should be transferred. If this feature is configured, be sure to record your voicemail greetings with appropriate guidance for the caller. For example, “To reach me on my assistant, press zero.”
Voice messaging
- To enable voicemail, tap the toggle next to Voicemail Service. The following options will be expanded:
- Send all calls to voicemail
- When busy, send calls to voicemail
- Send unanswered calls to voicemail

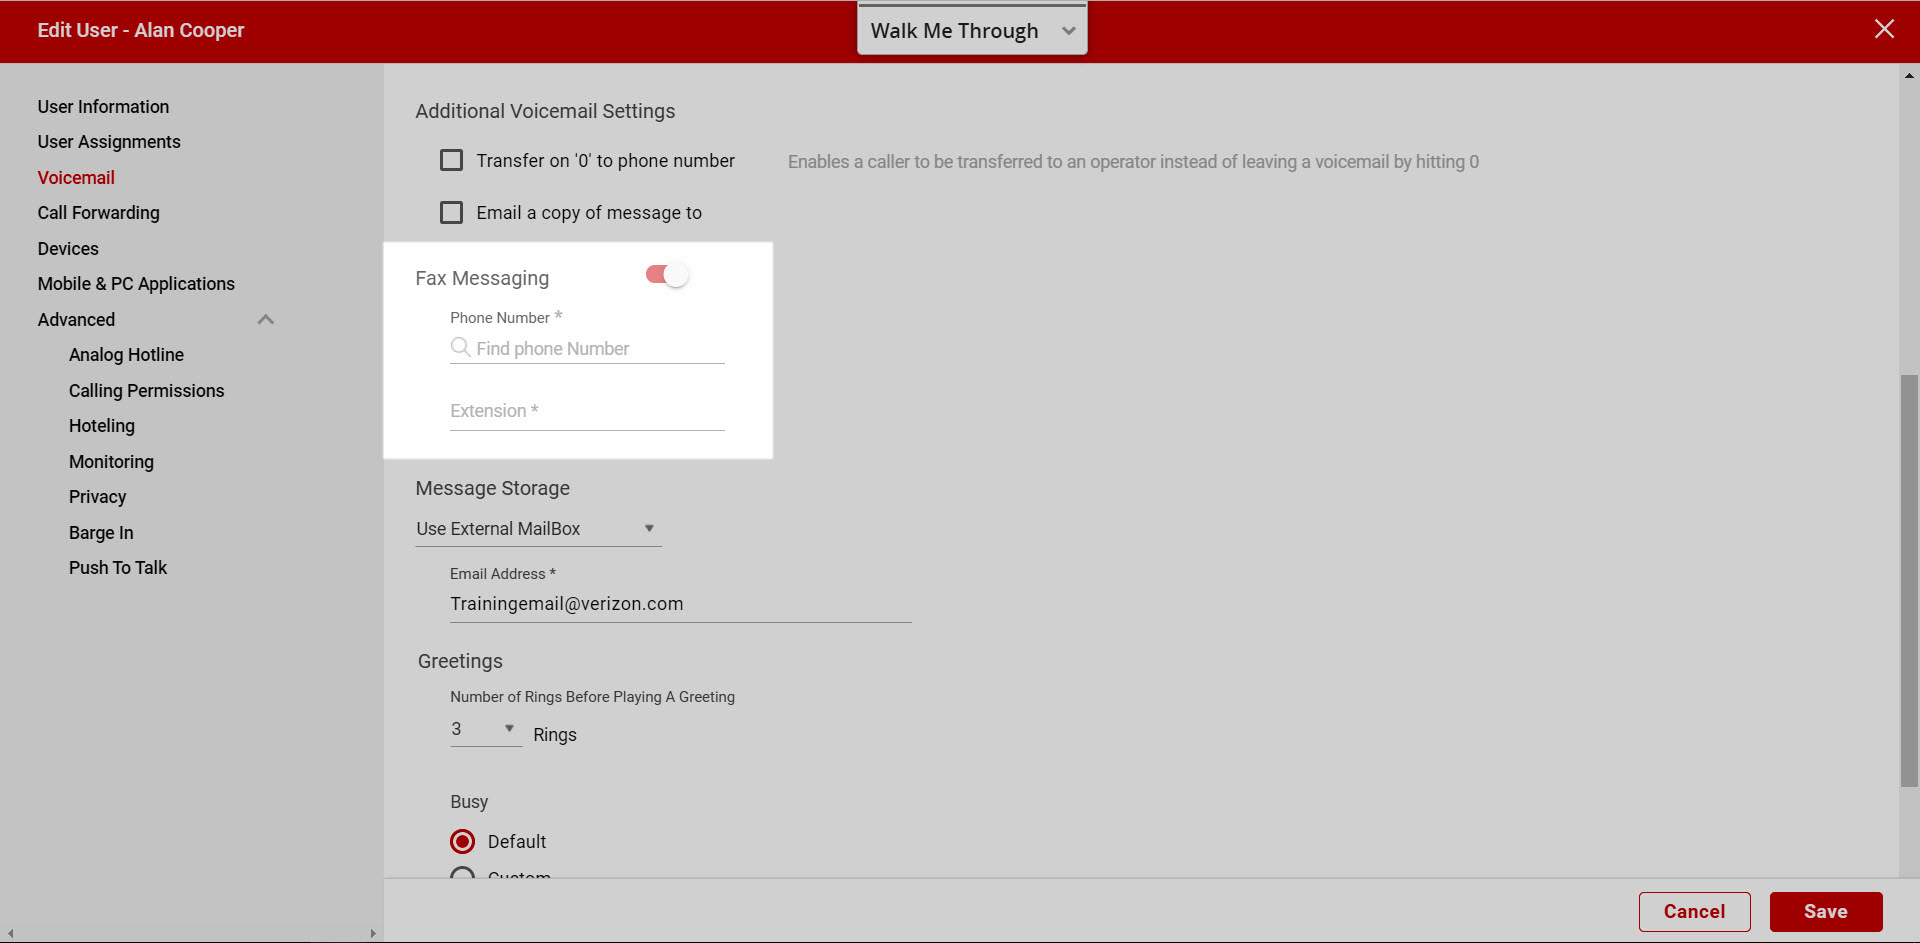
Fax messaging
- To enable Fax Messaging, select the toggle next to Fax Messaging.
- If enabled, select the phone number you want to receive inbound faxes for the user from the Phone Number drop-down list.
- Assign an extension for the fax number, if applicable.
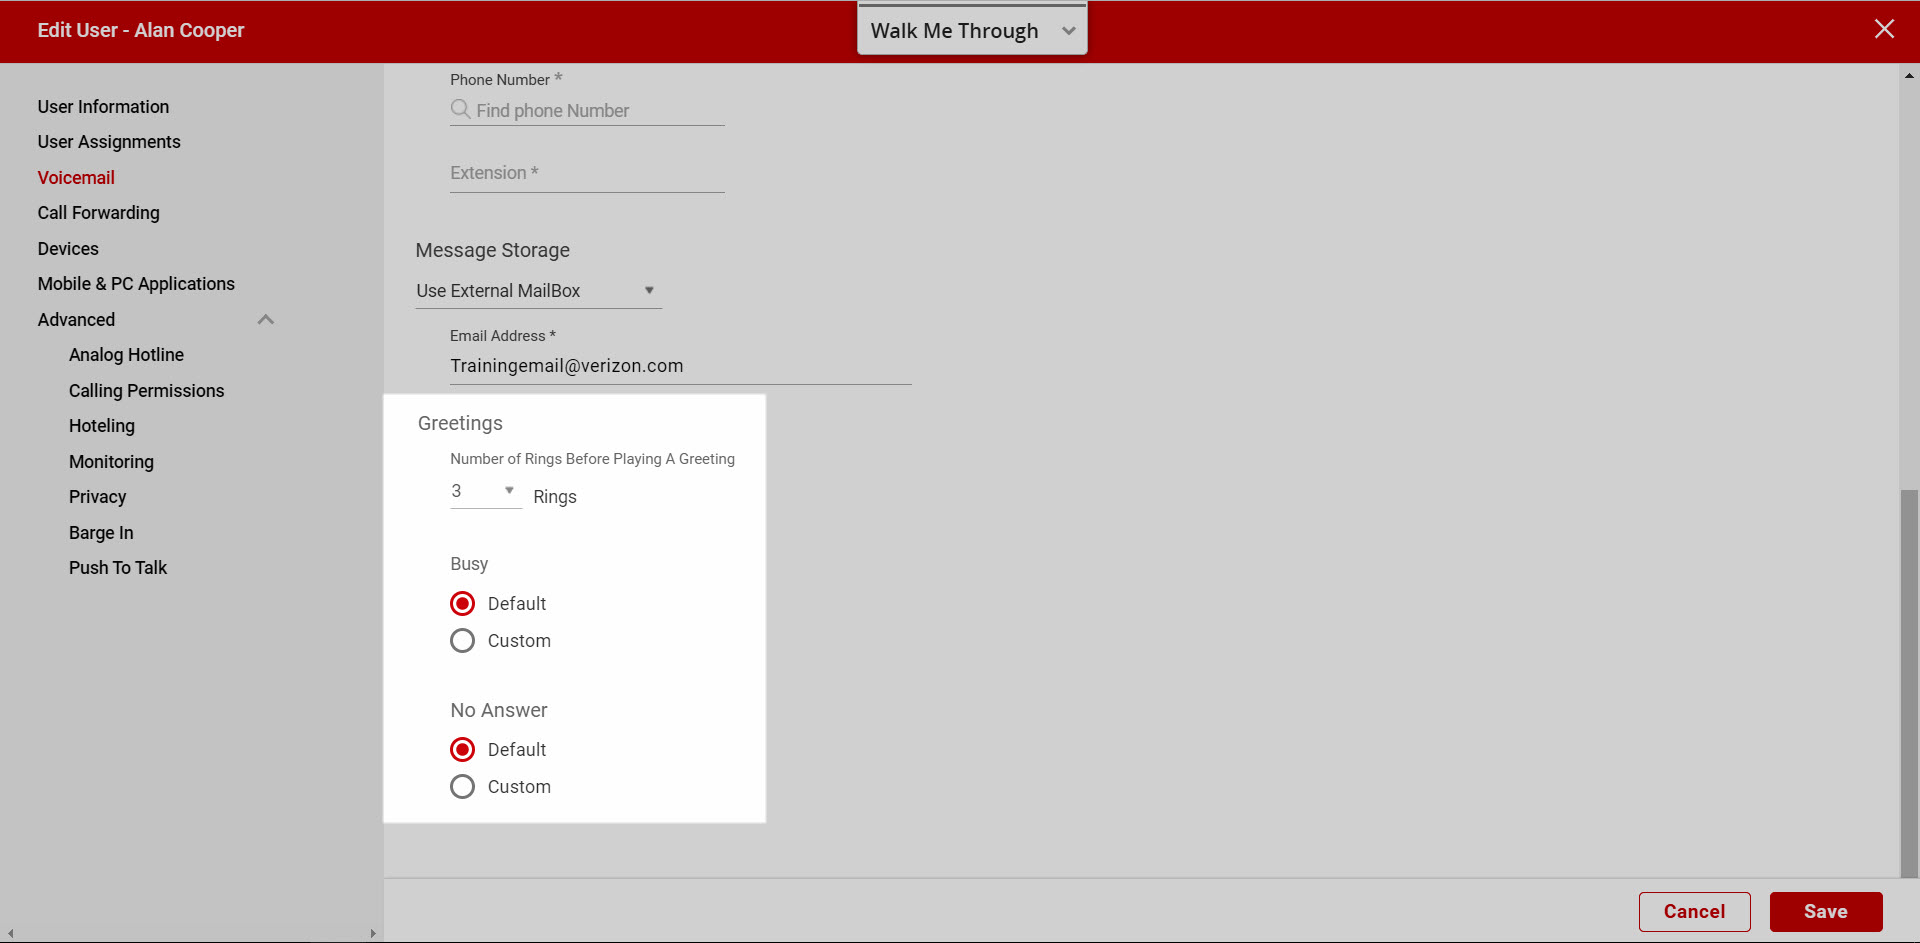
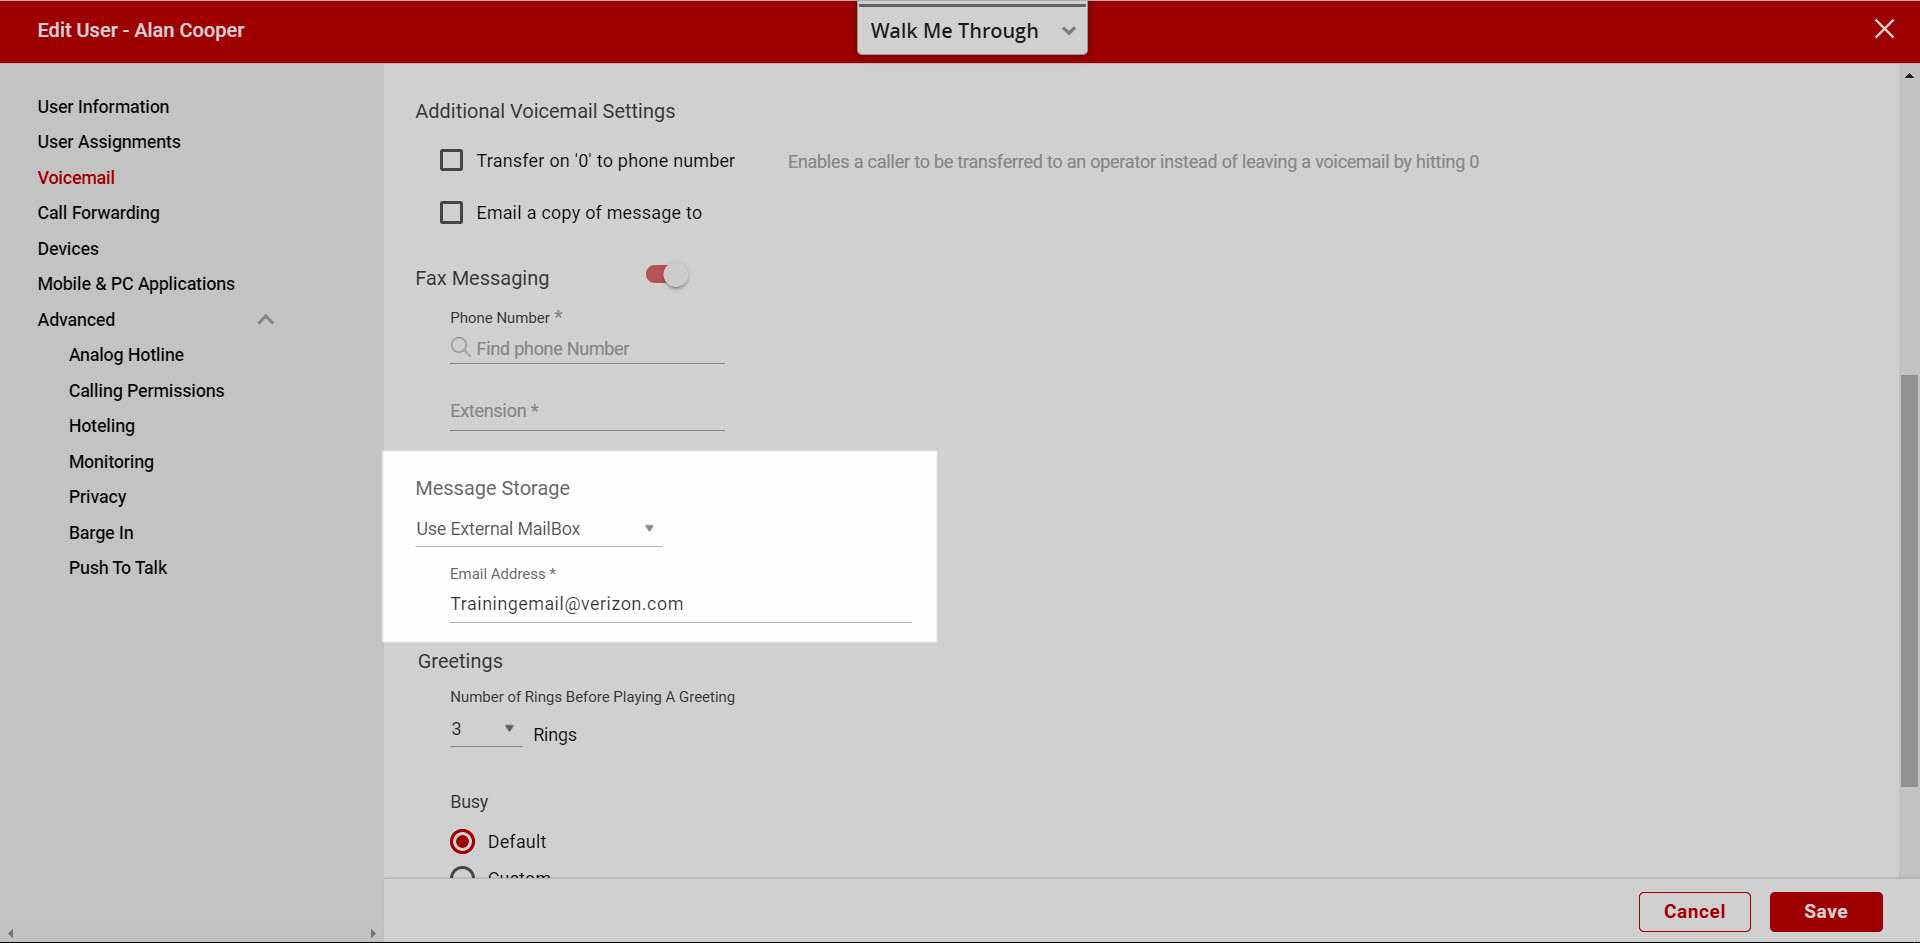
Message storage
- Select System Mailbox if you want messages accessed via phone or the end user portal.
- Check Use phone message indicator, if applicable.
- Select External Mailbox, if you want all messages sent as a file to the email you enter for the user (.wav for voicemail and .tiff for fax).
Greetings
There are two types of Voicemail greetings - Busy and No Answer.- The Busy Greeting will be played when the user is on his or her phone; voicemail is enabled and call waiting is disabled. Or, when Do Not Disturb is enabled.
- The No Answer Greeting will be played when the user does not answer his or her phone.
Greetings can also be recorded by dialing the Voice Portal (pressing the Message button on your VoIP phone) and entering the Voice Portal password.
- Select the Number of rings before playing a greeting before a voicemail greeting is played.
- Select the type of message the caller hears when the line is busy.
- Select Default – To play the default system greeting.
- Select Custom – To upload your own custom personalized greeting.
- Click the Upload button and browse for the file on your computer. All voicemail greetings must be formatted as CCITT U-Law, 8.000 kHz, 8-bit Mono attributes as a .wav file.
- Click Open.
- Select Save to save your changes.